First, search for and open EC2.
First, search for and open EC2.
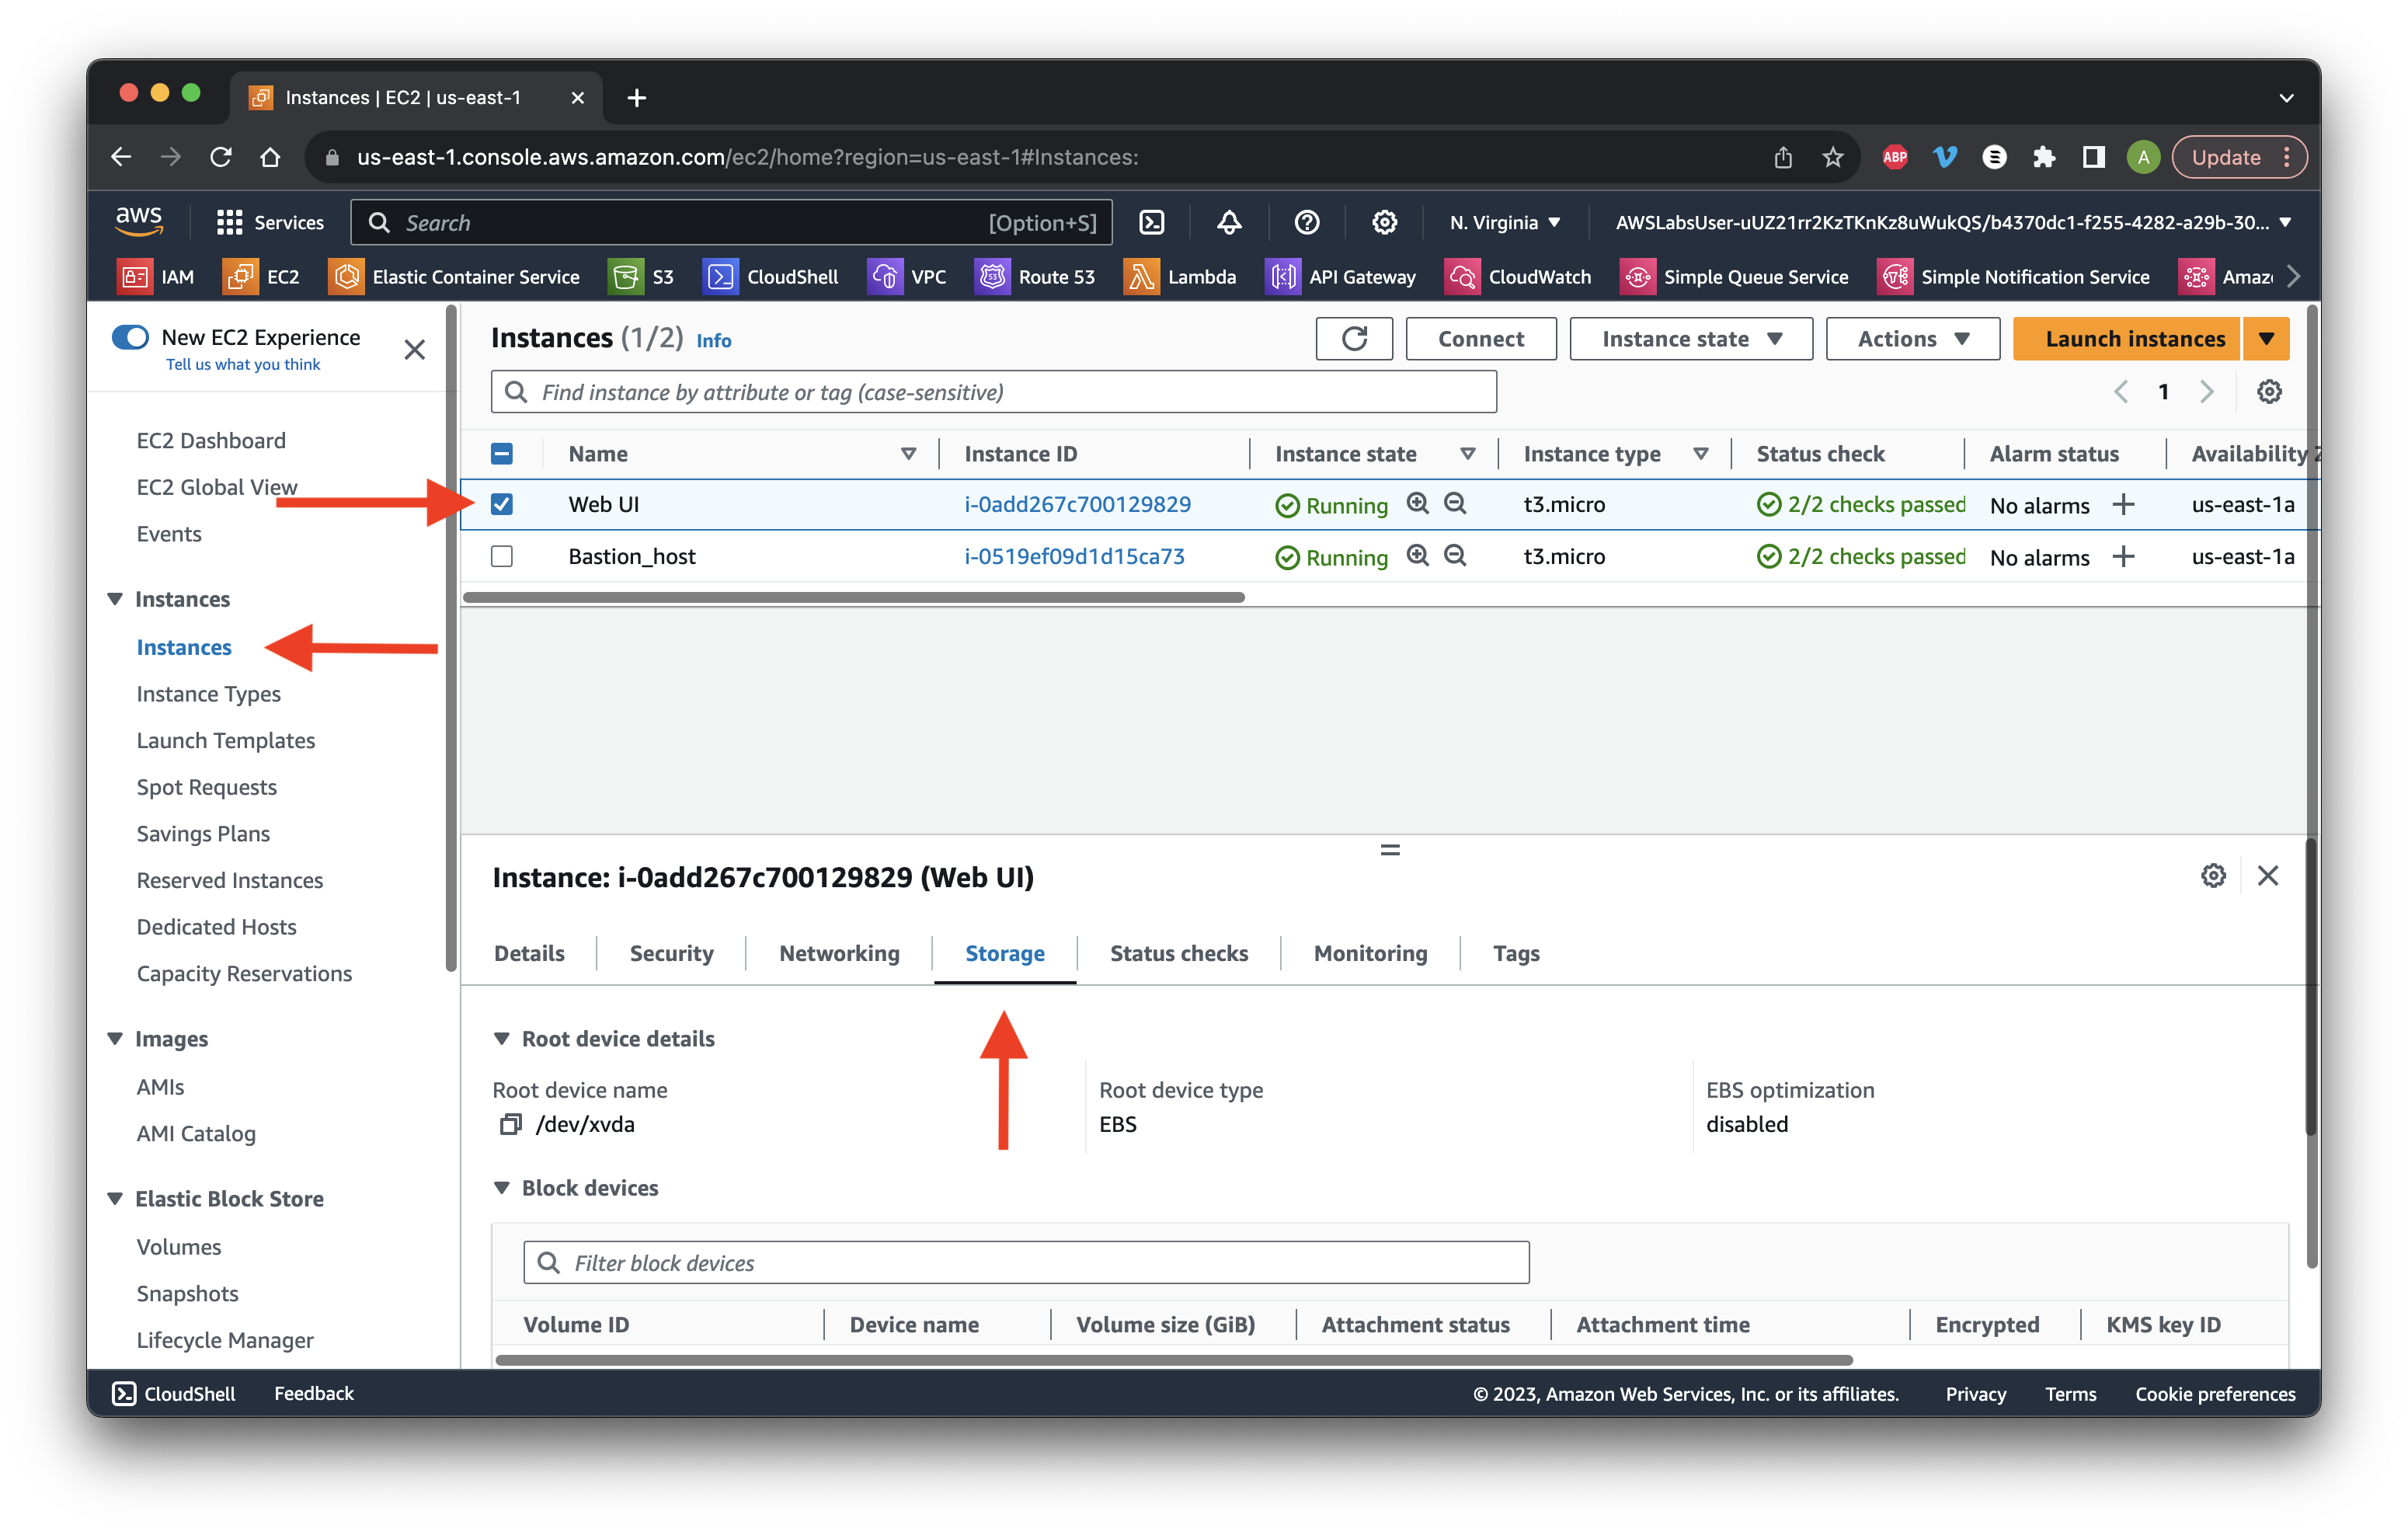
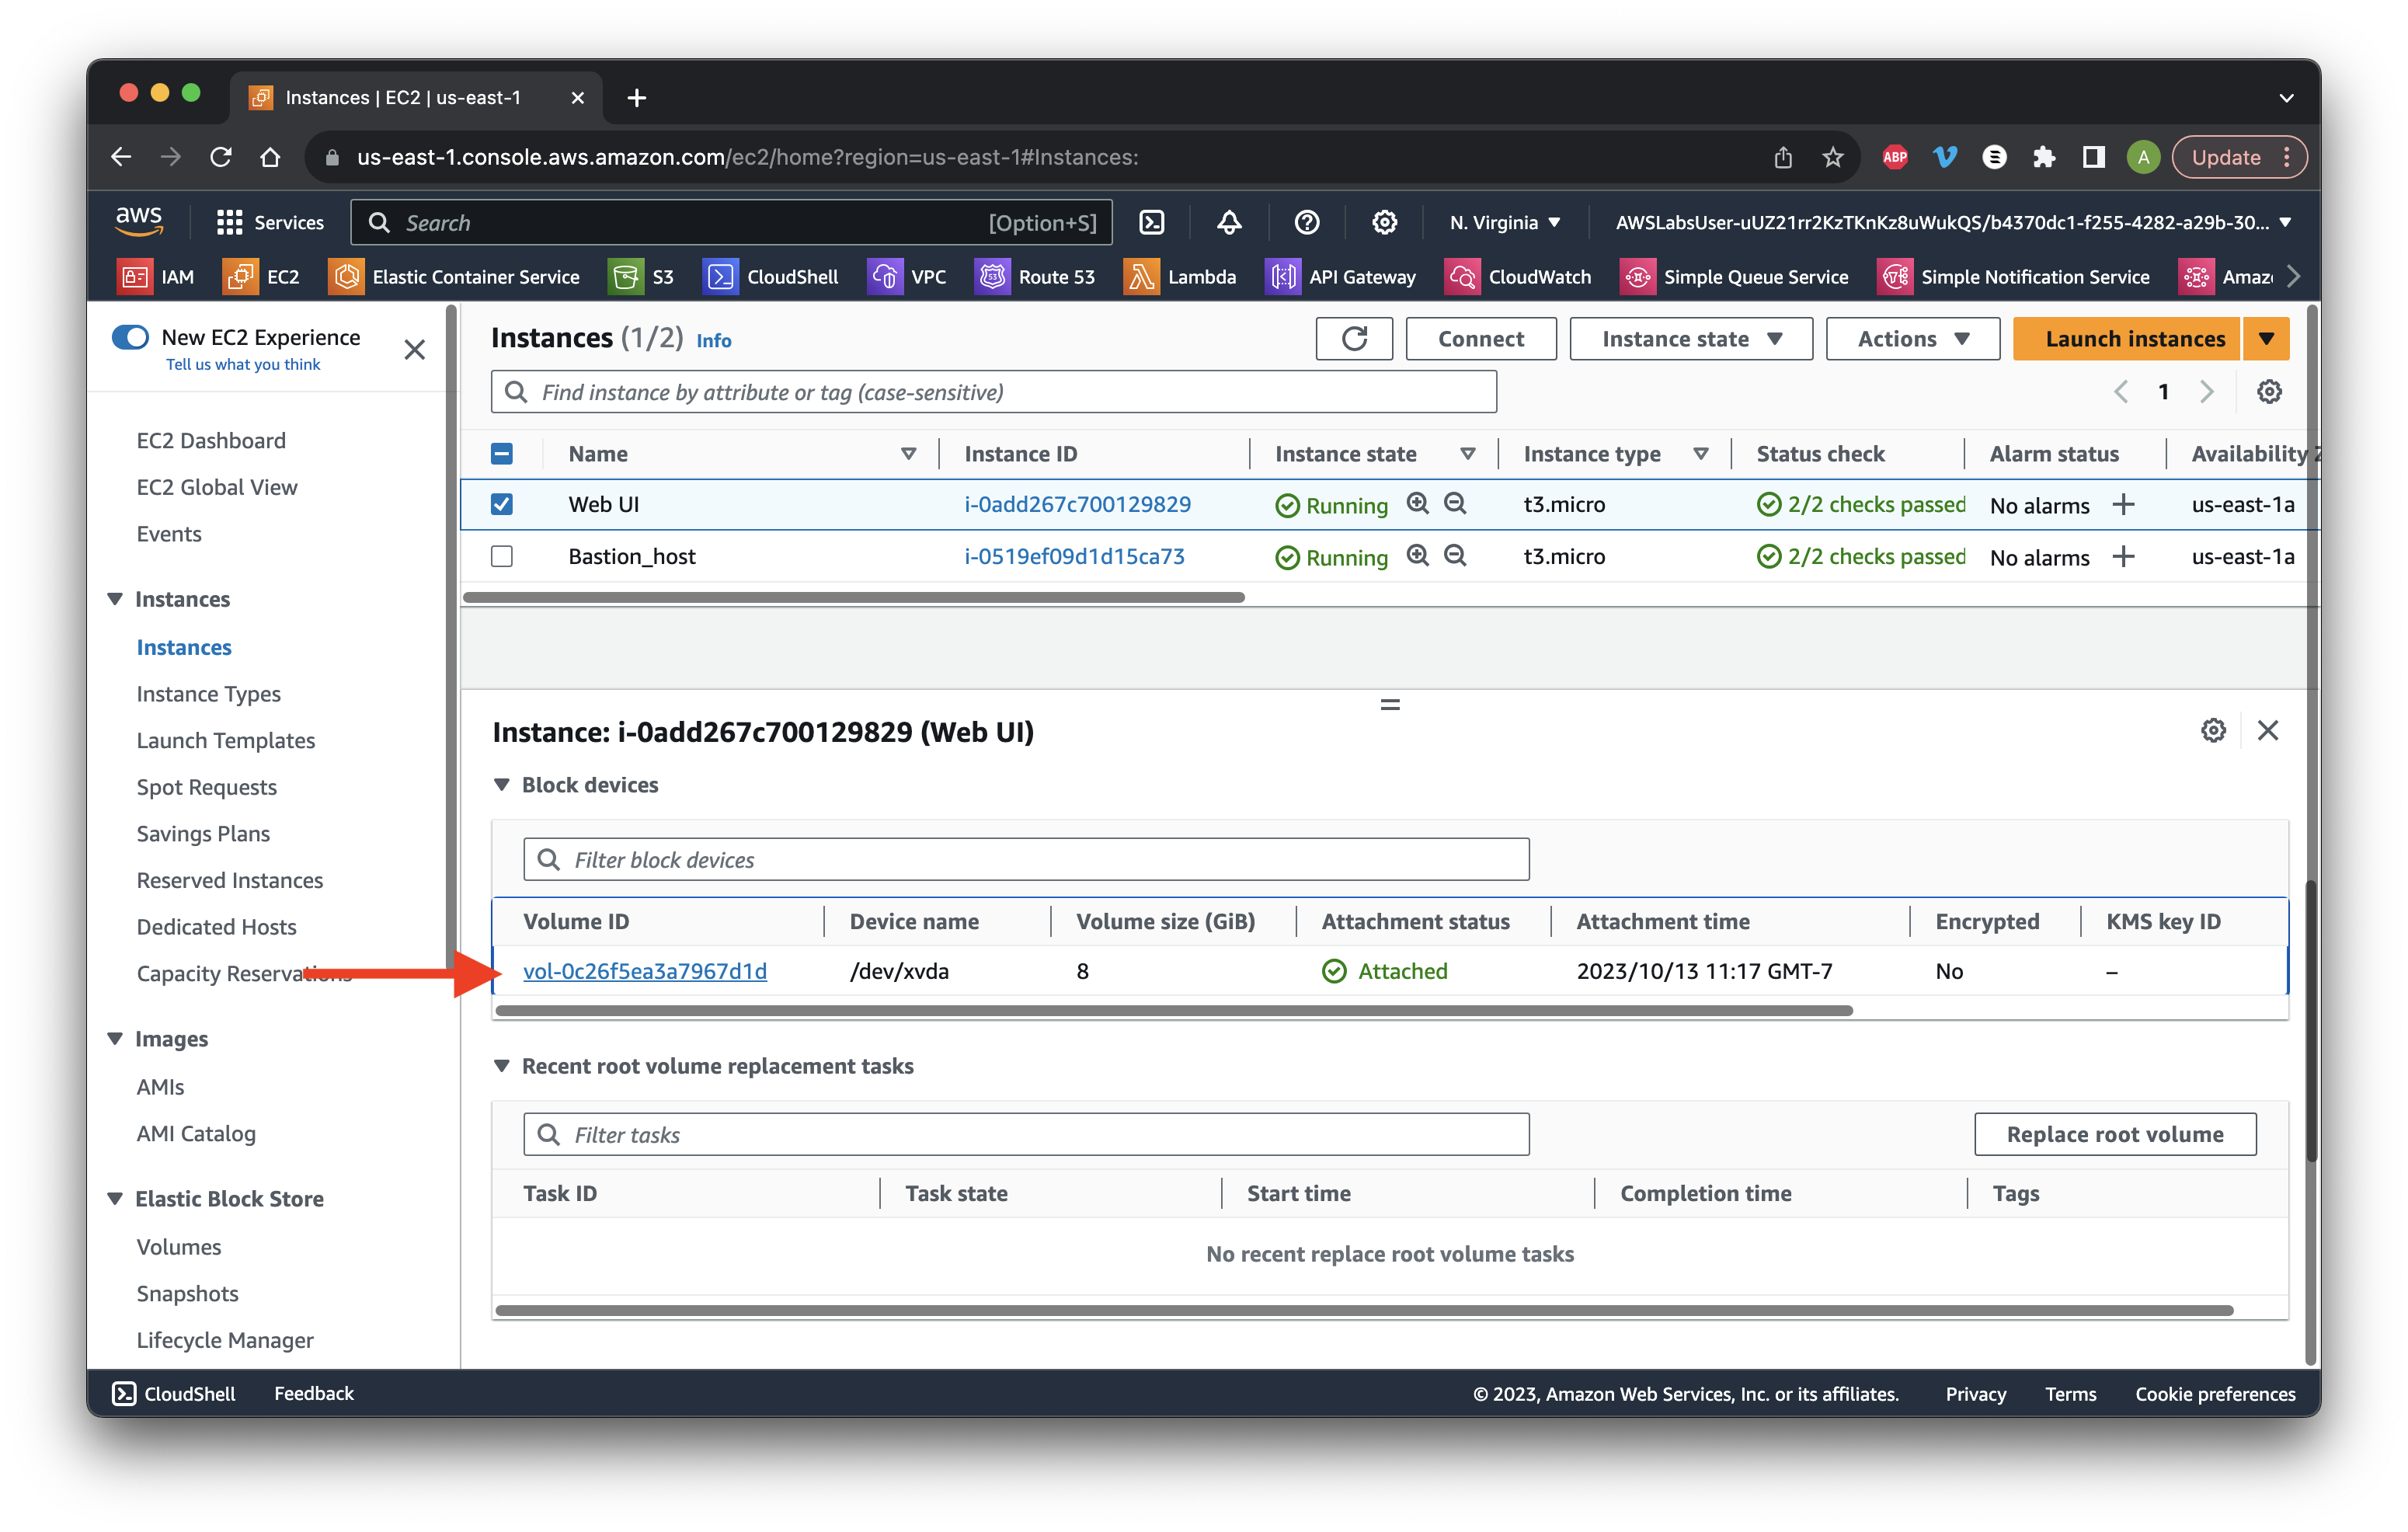
Select Instances then the Web UI check box and head to the Storage tab. Scroll down.
Copy the Volume ID for later use. Click the Volume ID.
Click the check box then go to the Tags tab and click Manage tags.
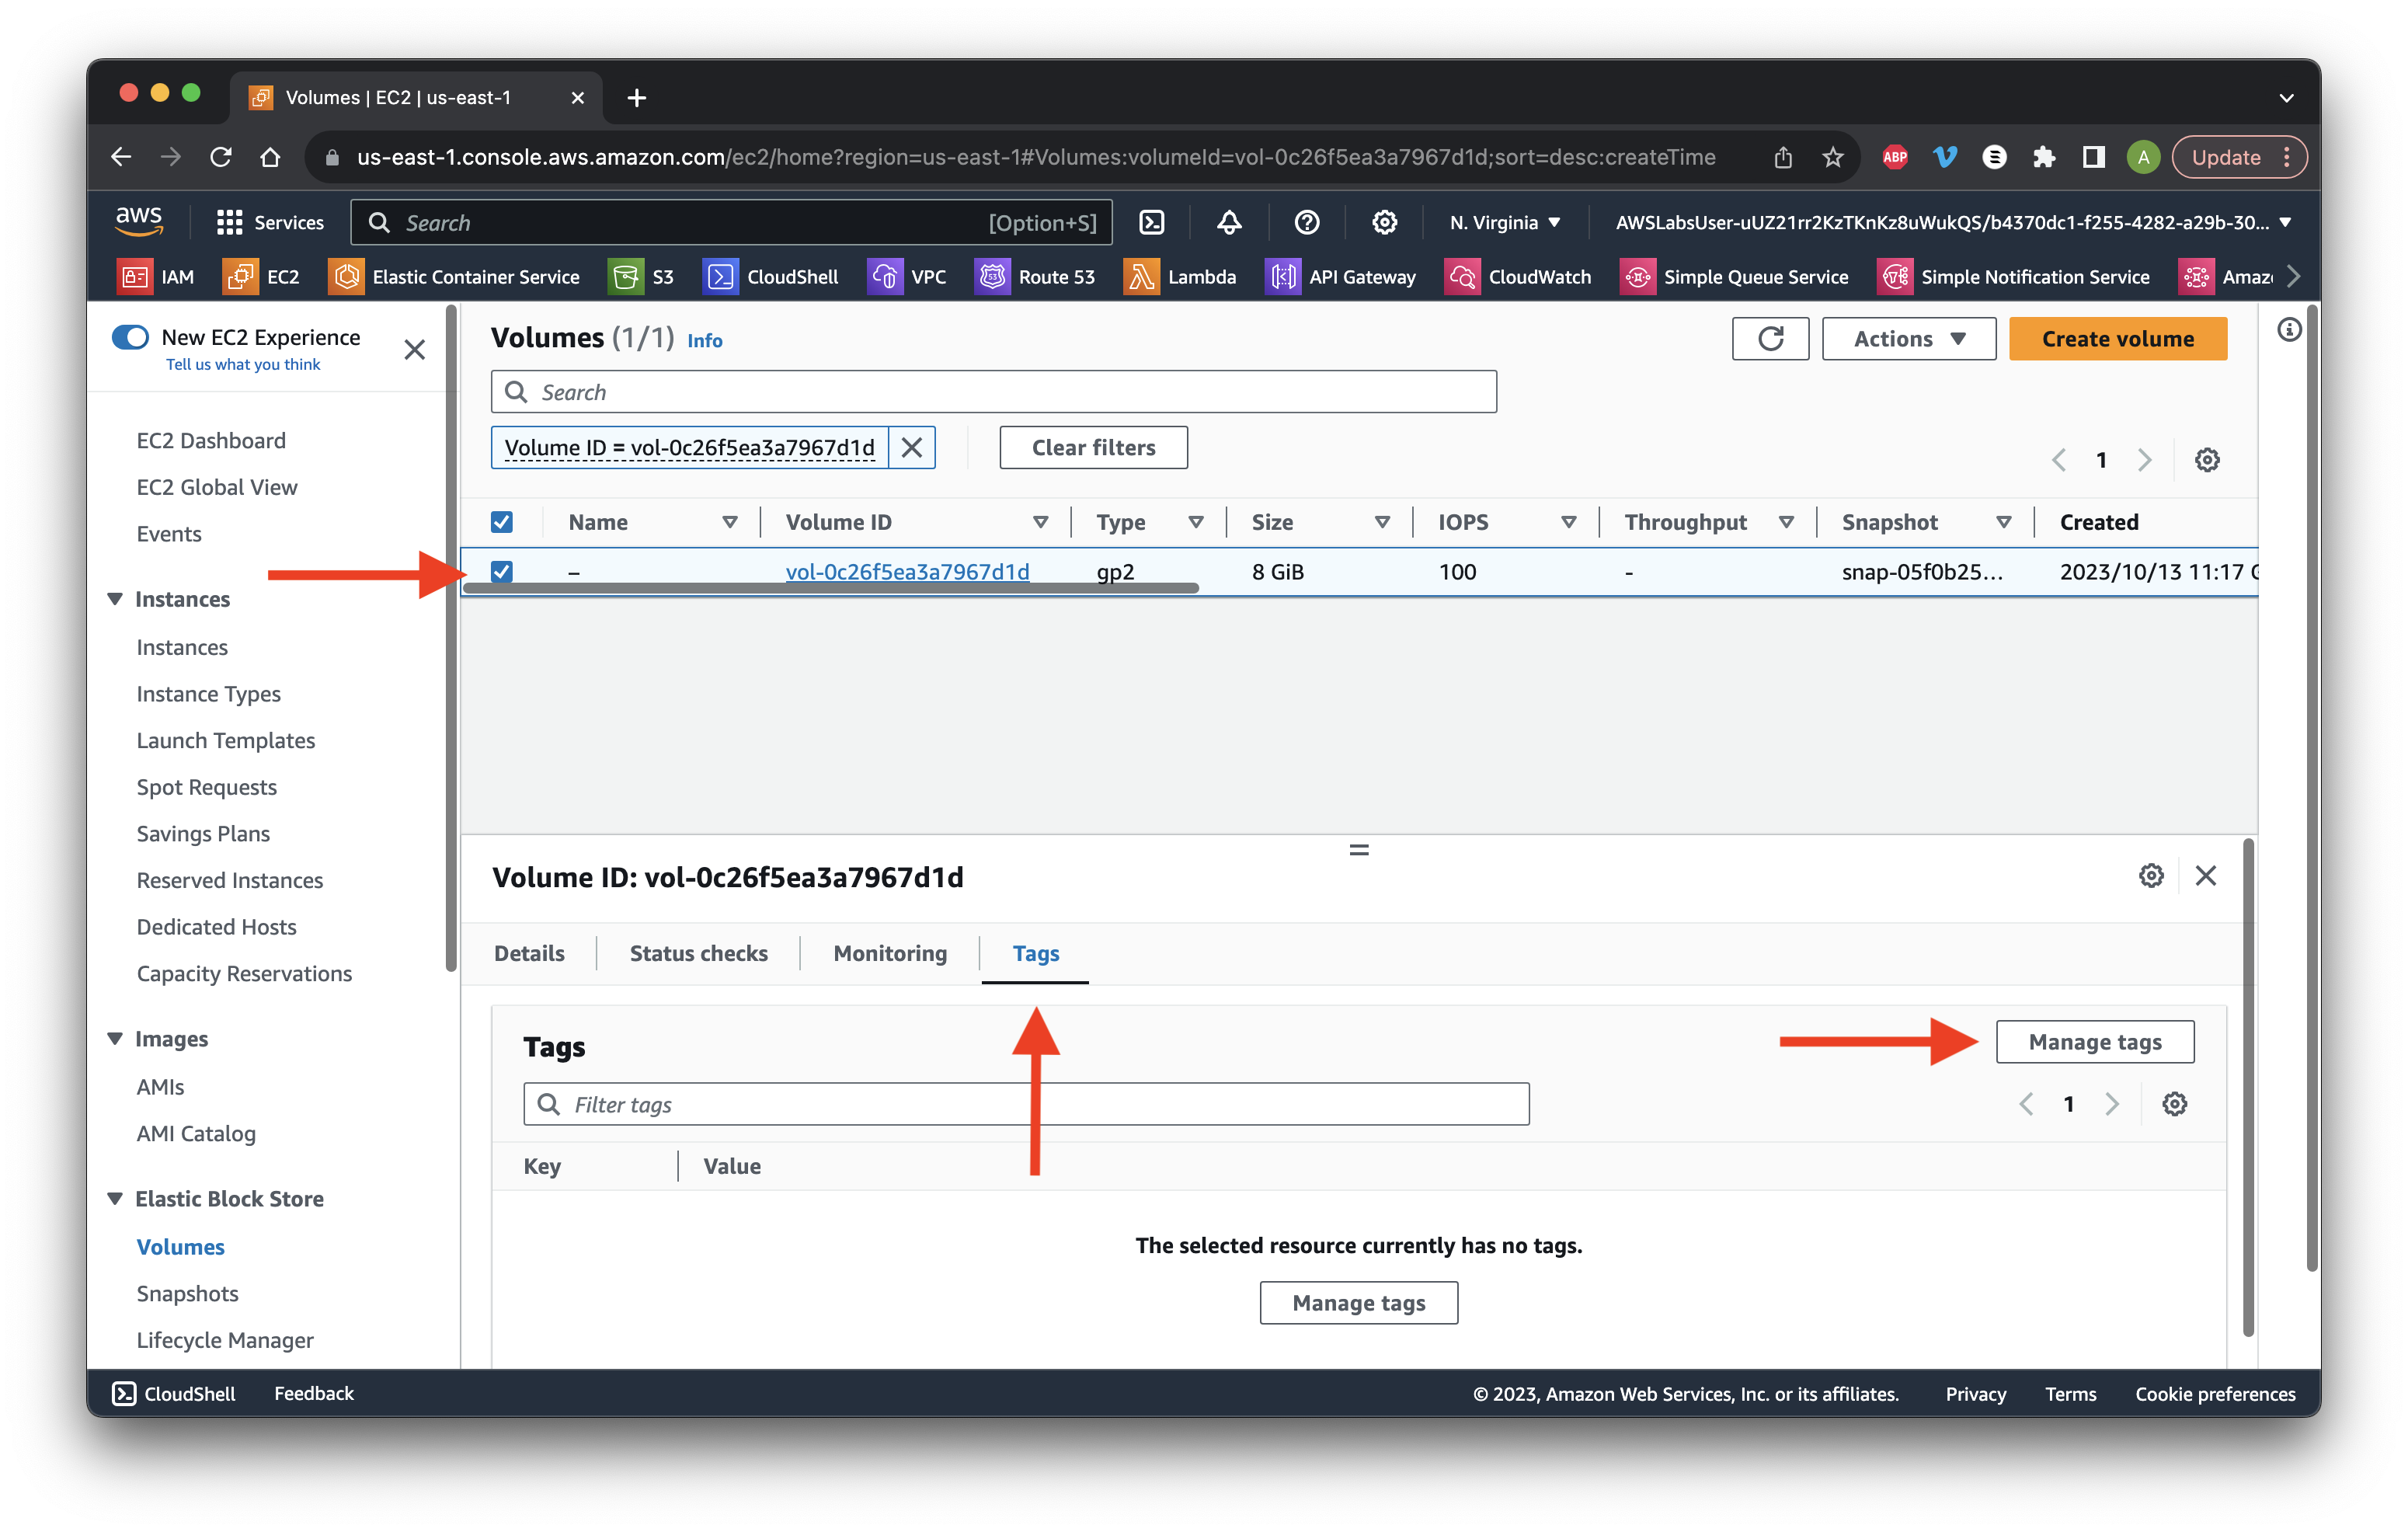
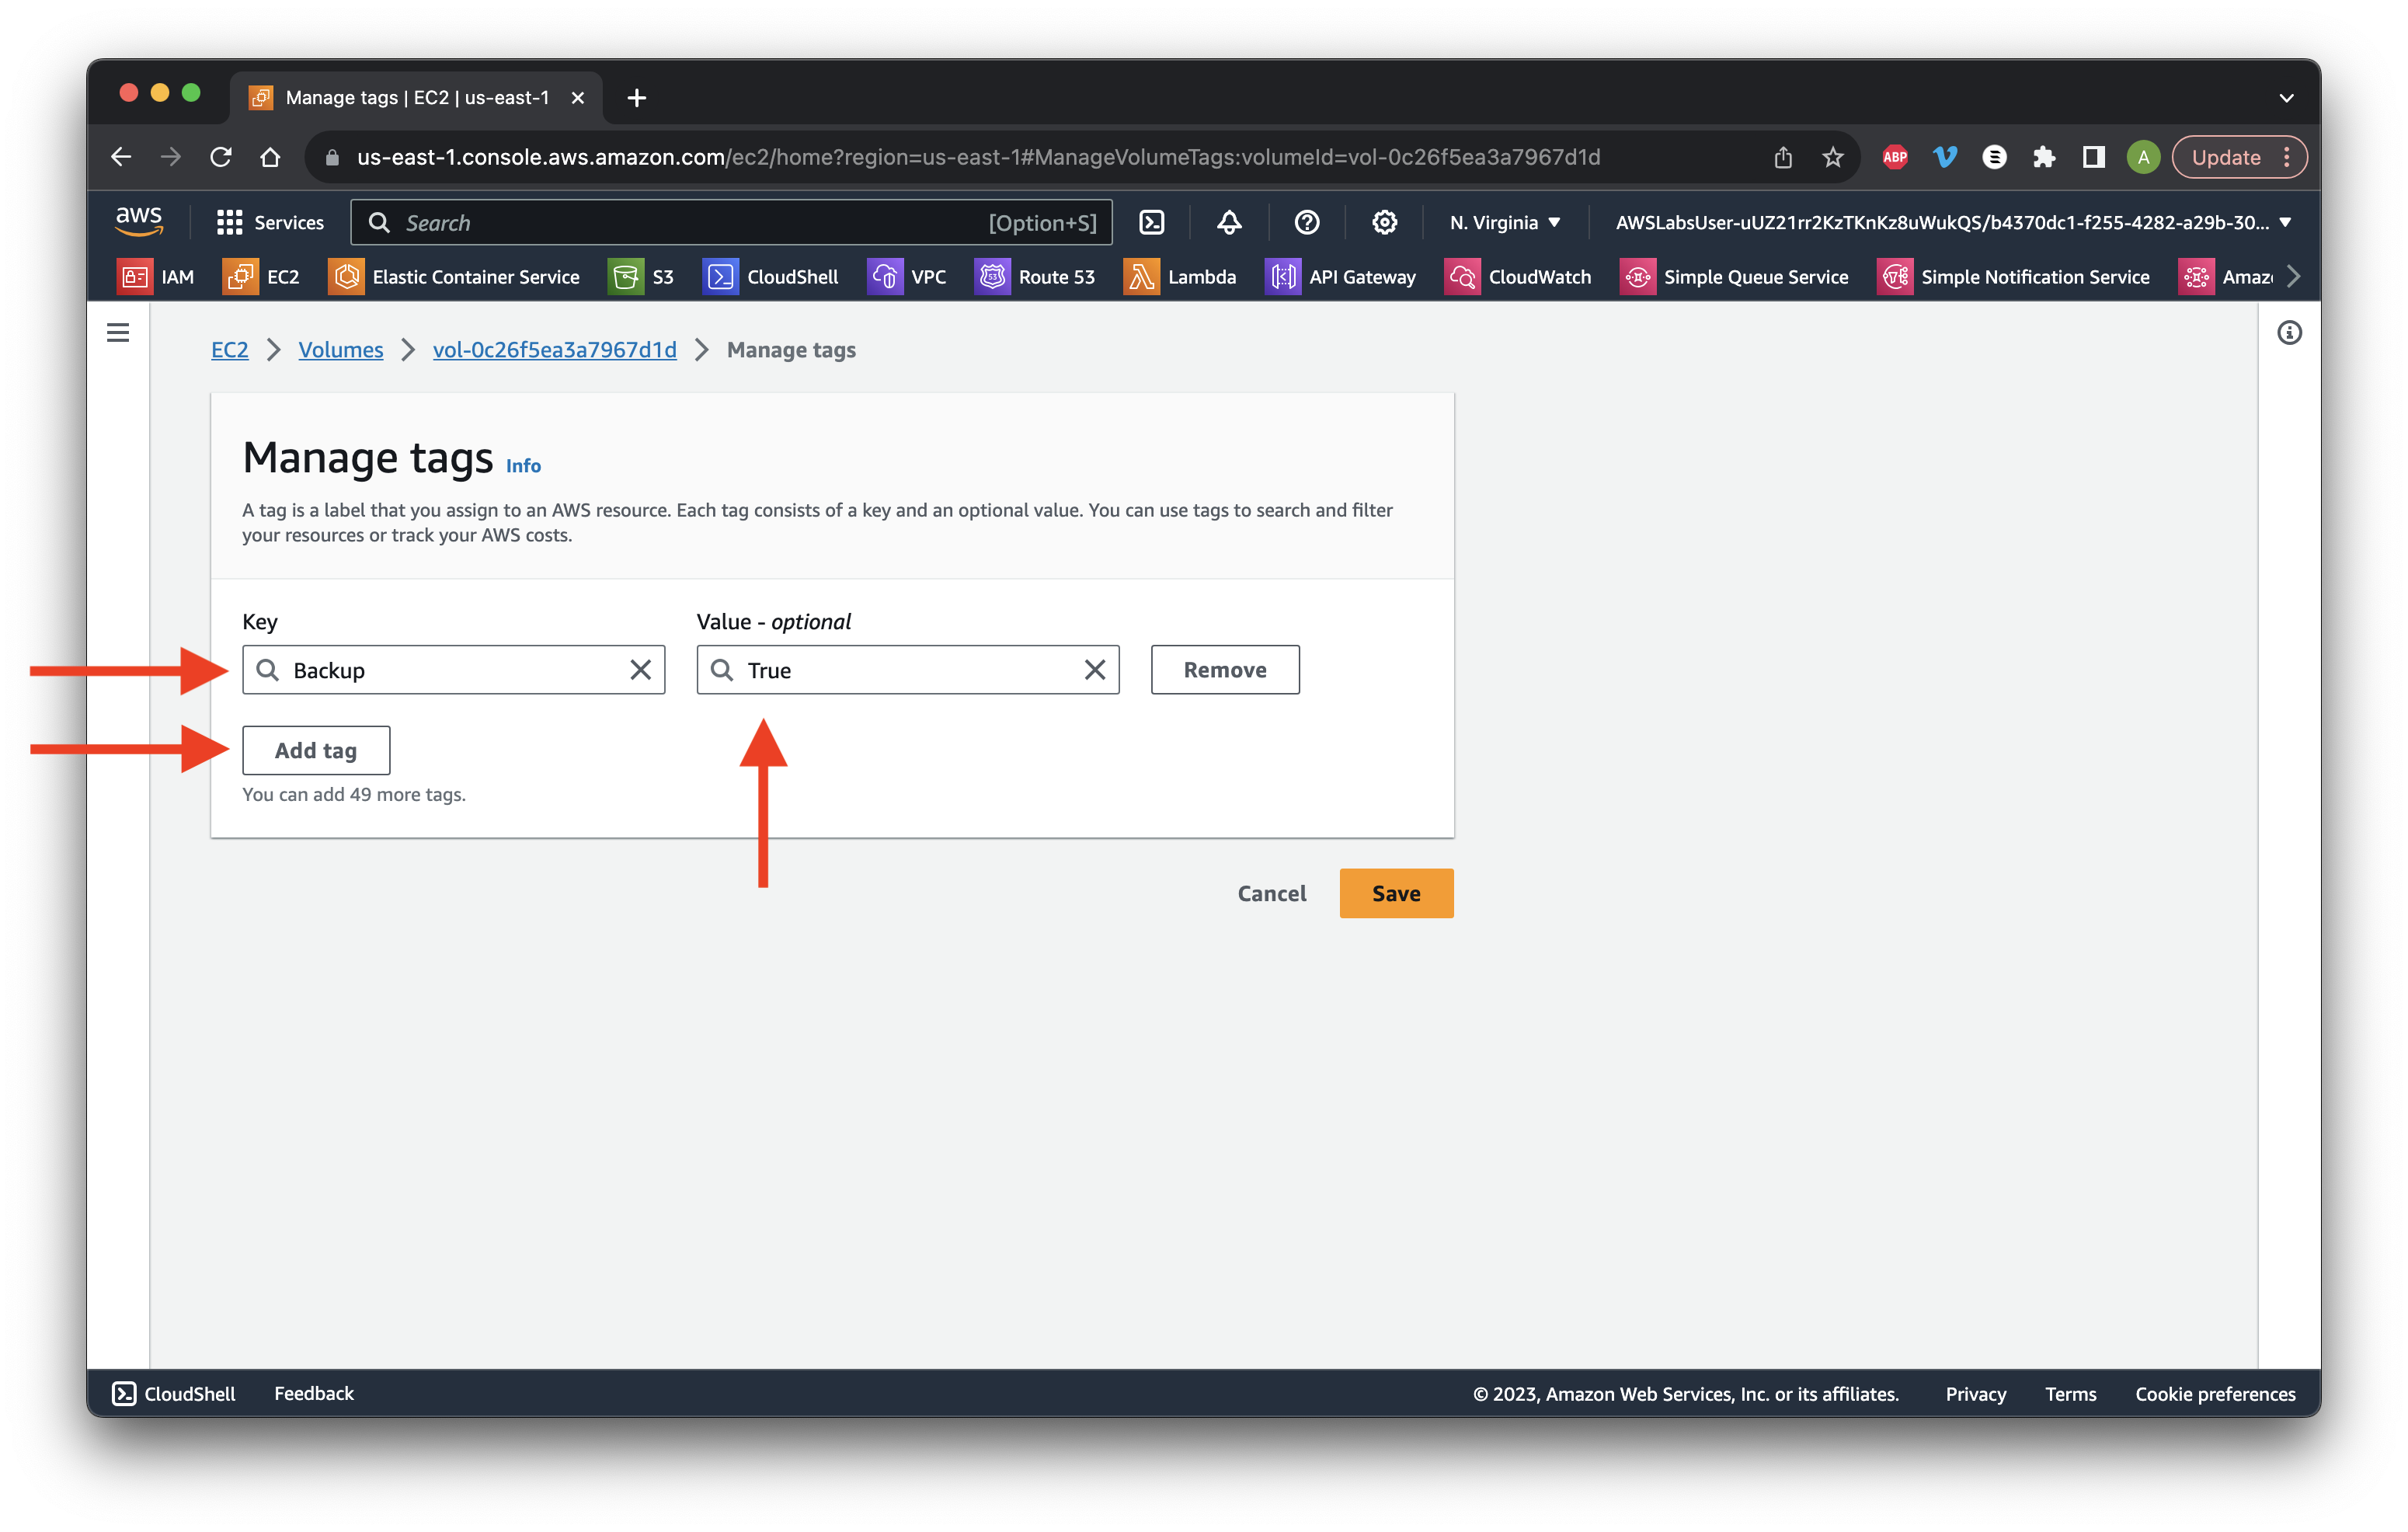
Click Add tag then enter the key-value pair of Backup and True. Click Save.
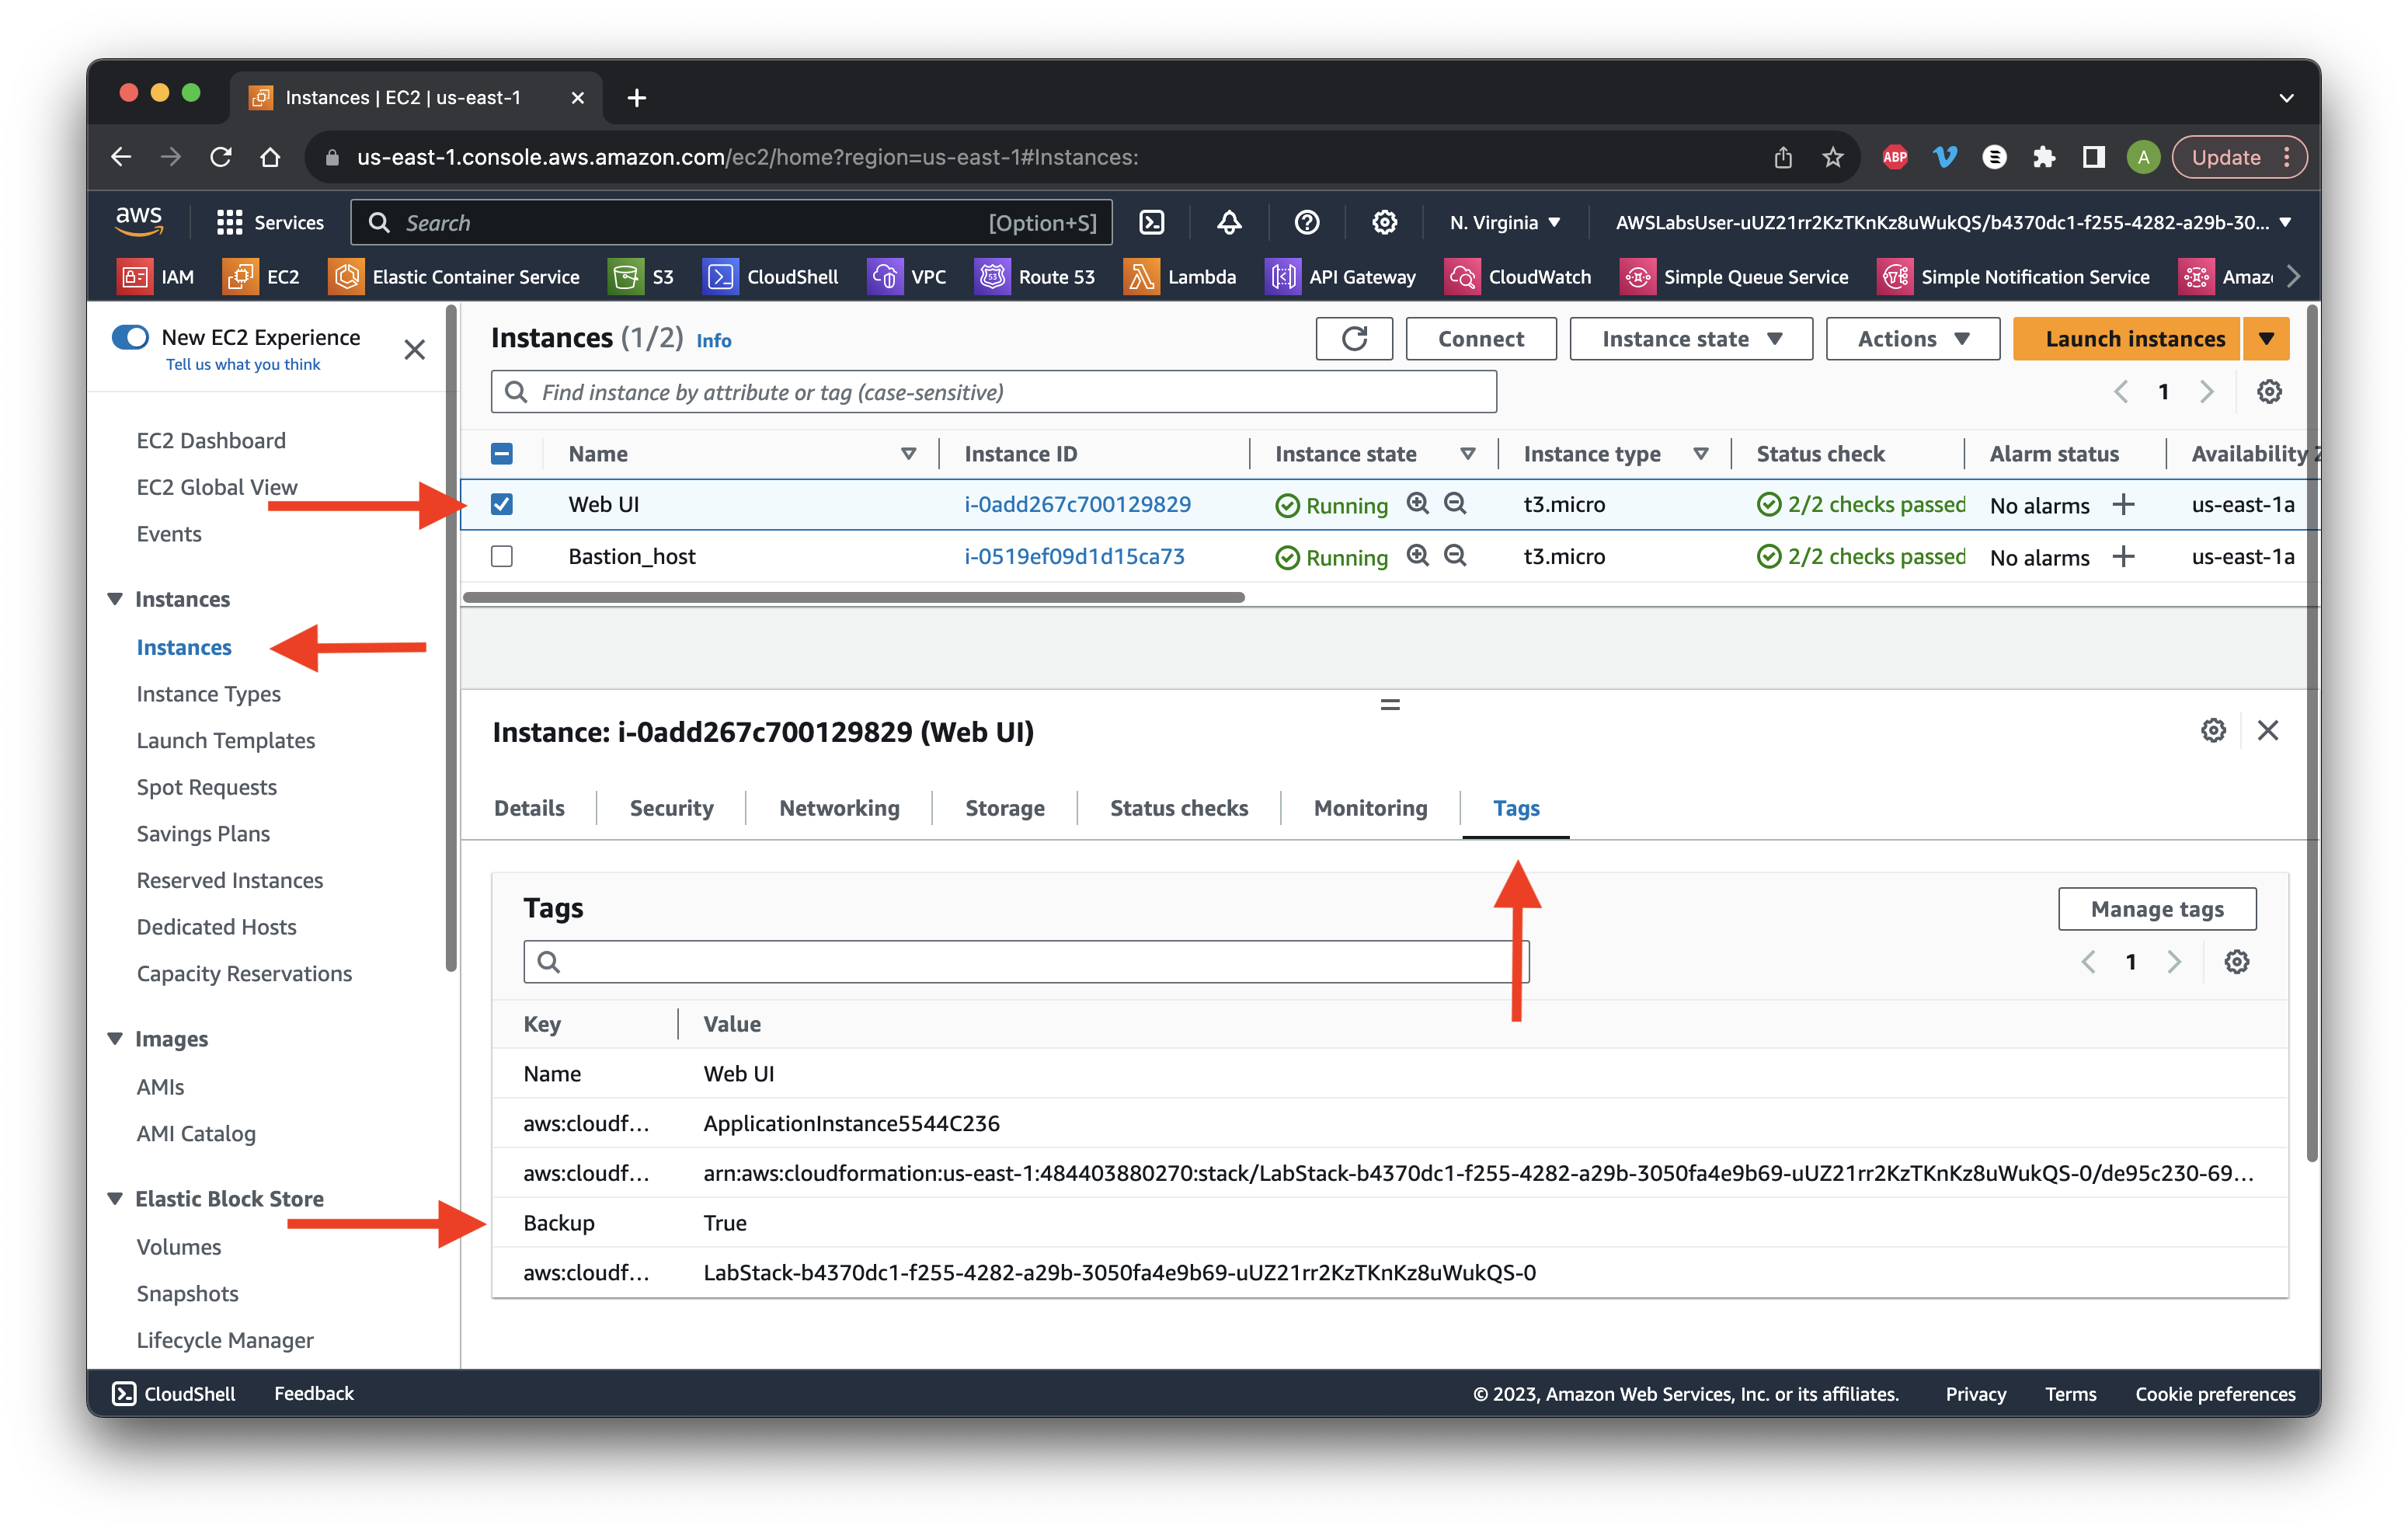
Return to the Instances and select the Web UI check box. Go to the Tags tab. Review the Backup tag and repeat with the Bastion_host instance.
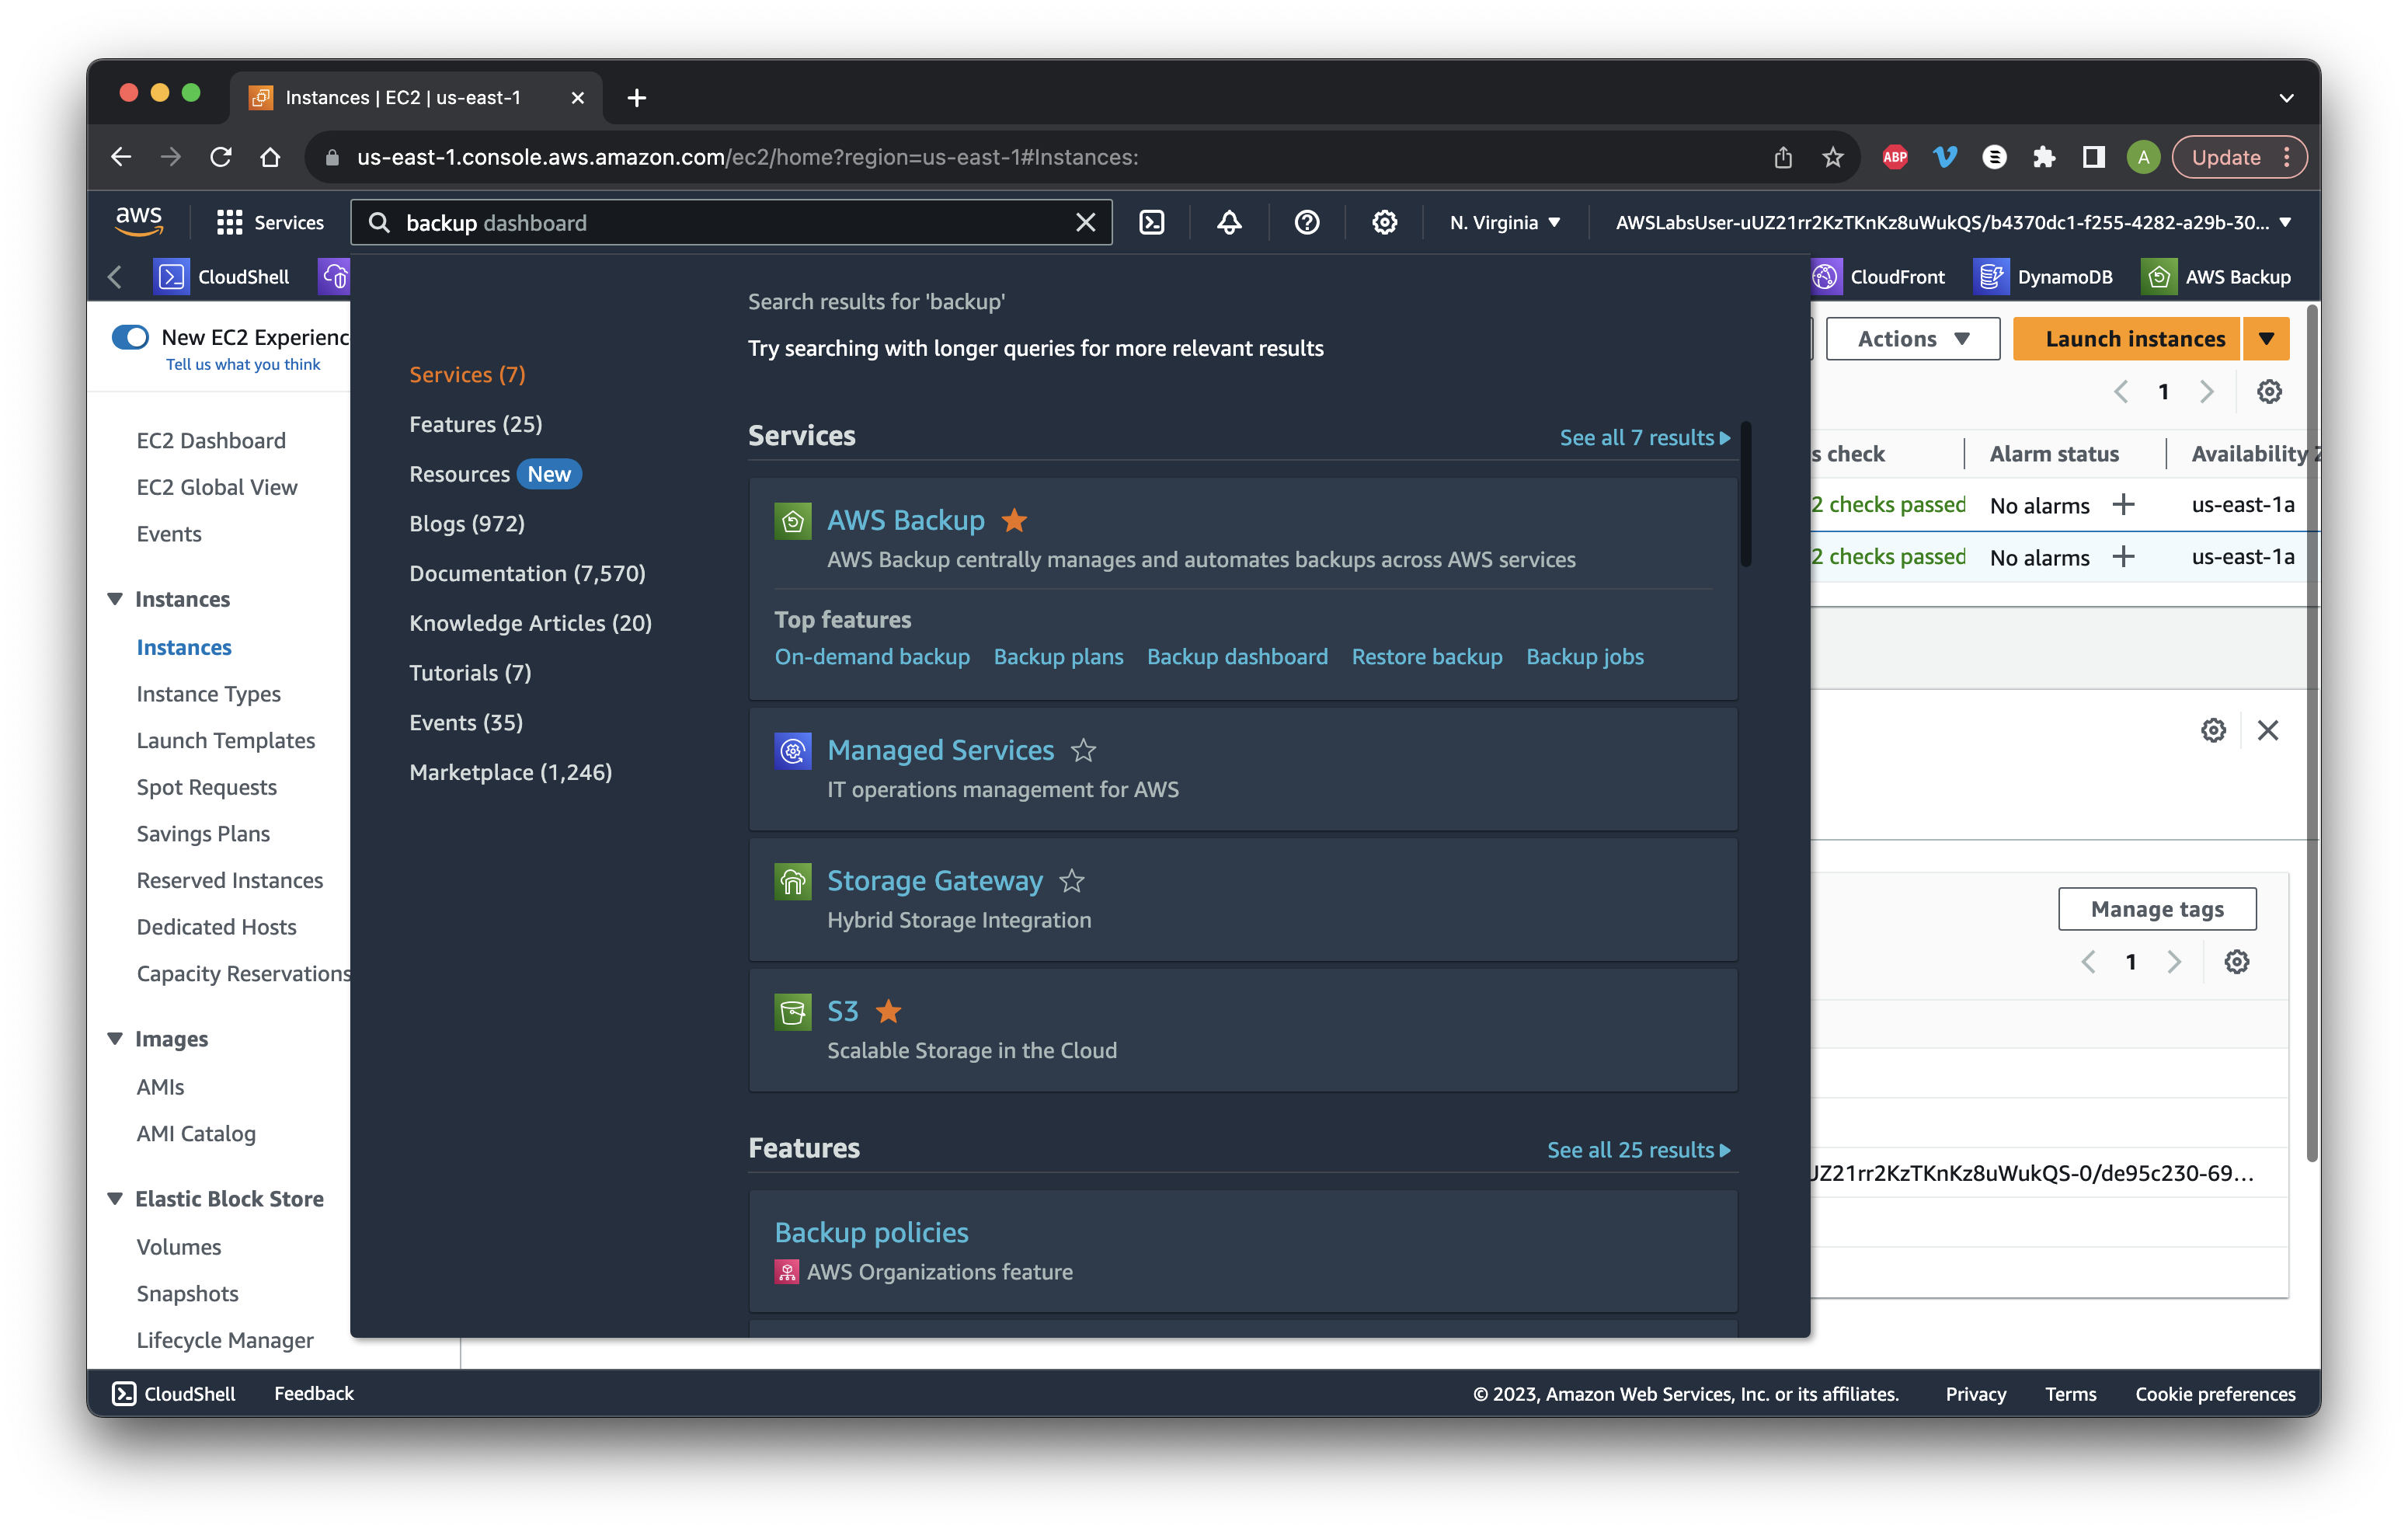
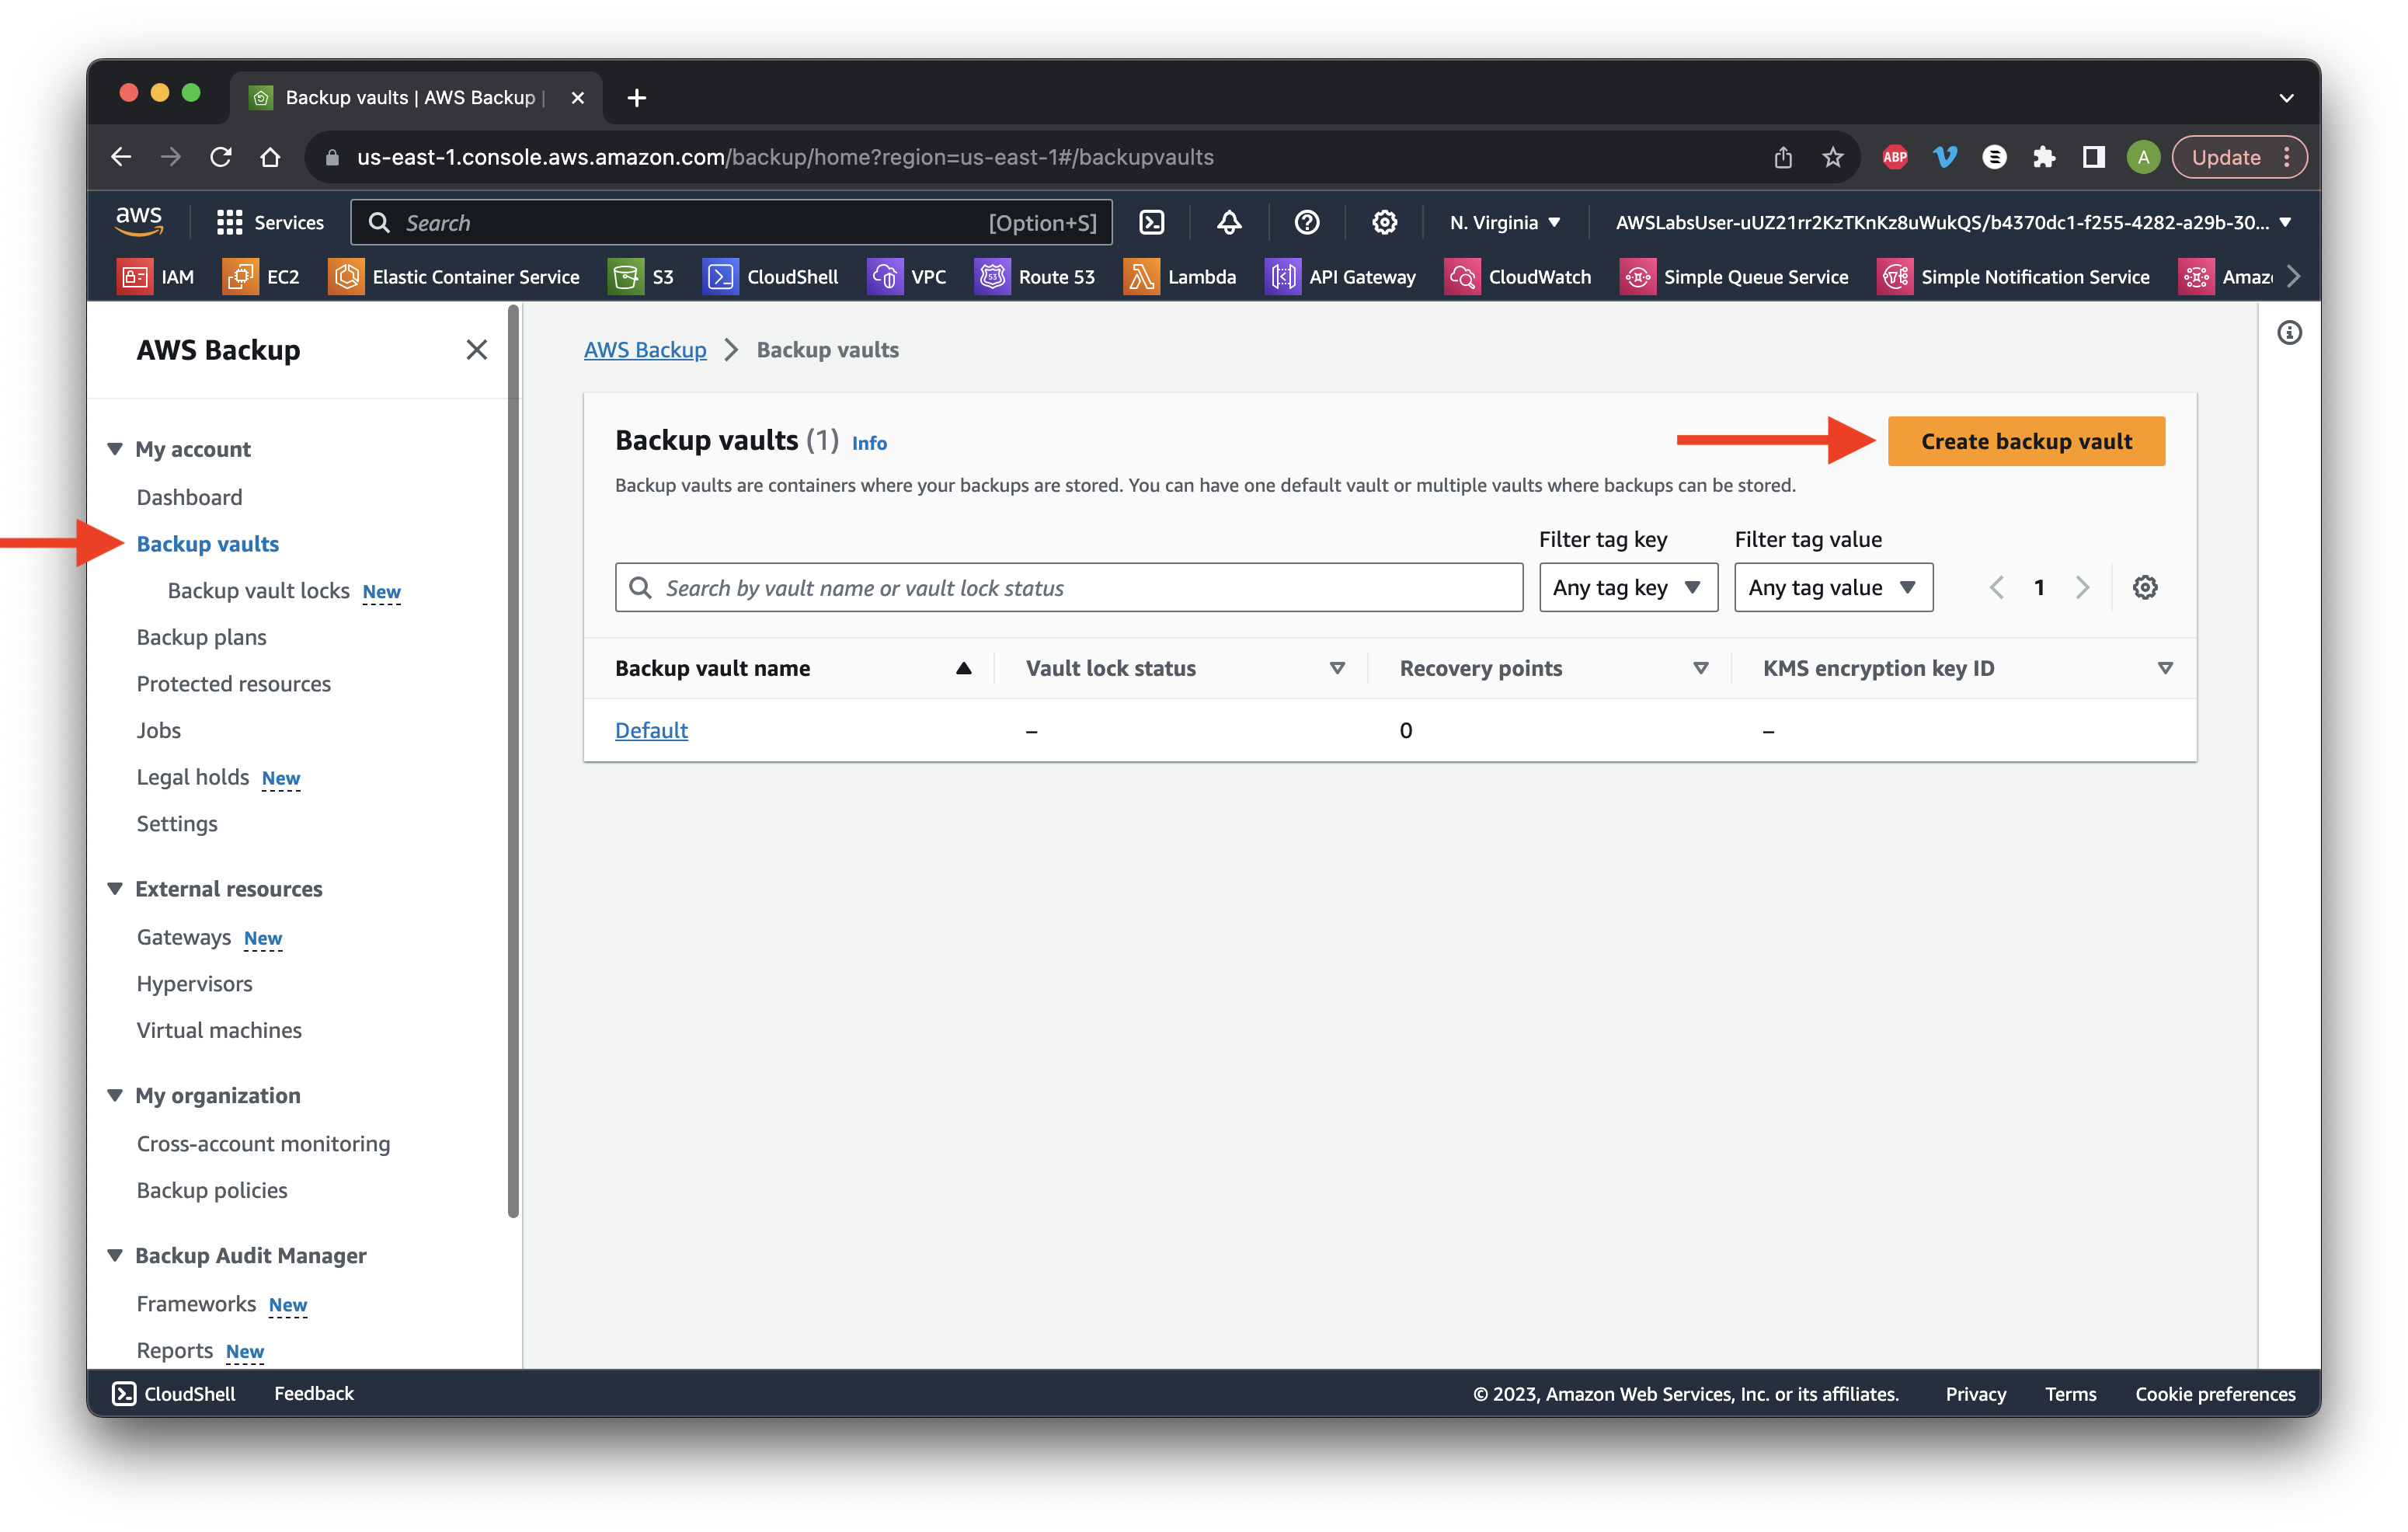
Search for and open AWS Backup.
Select Backup vaults then click Create Backup vault.
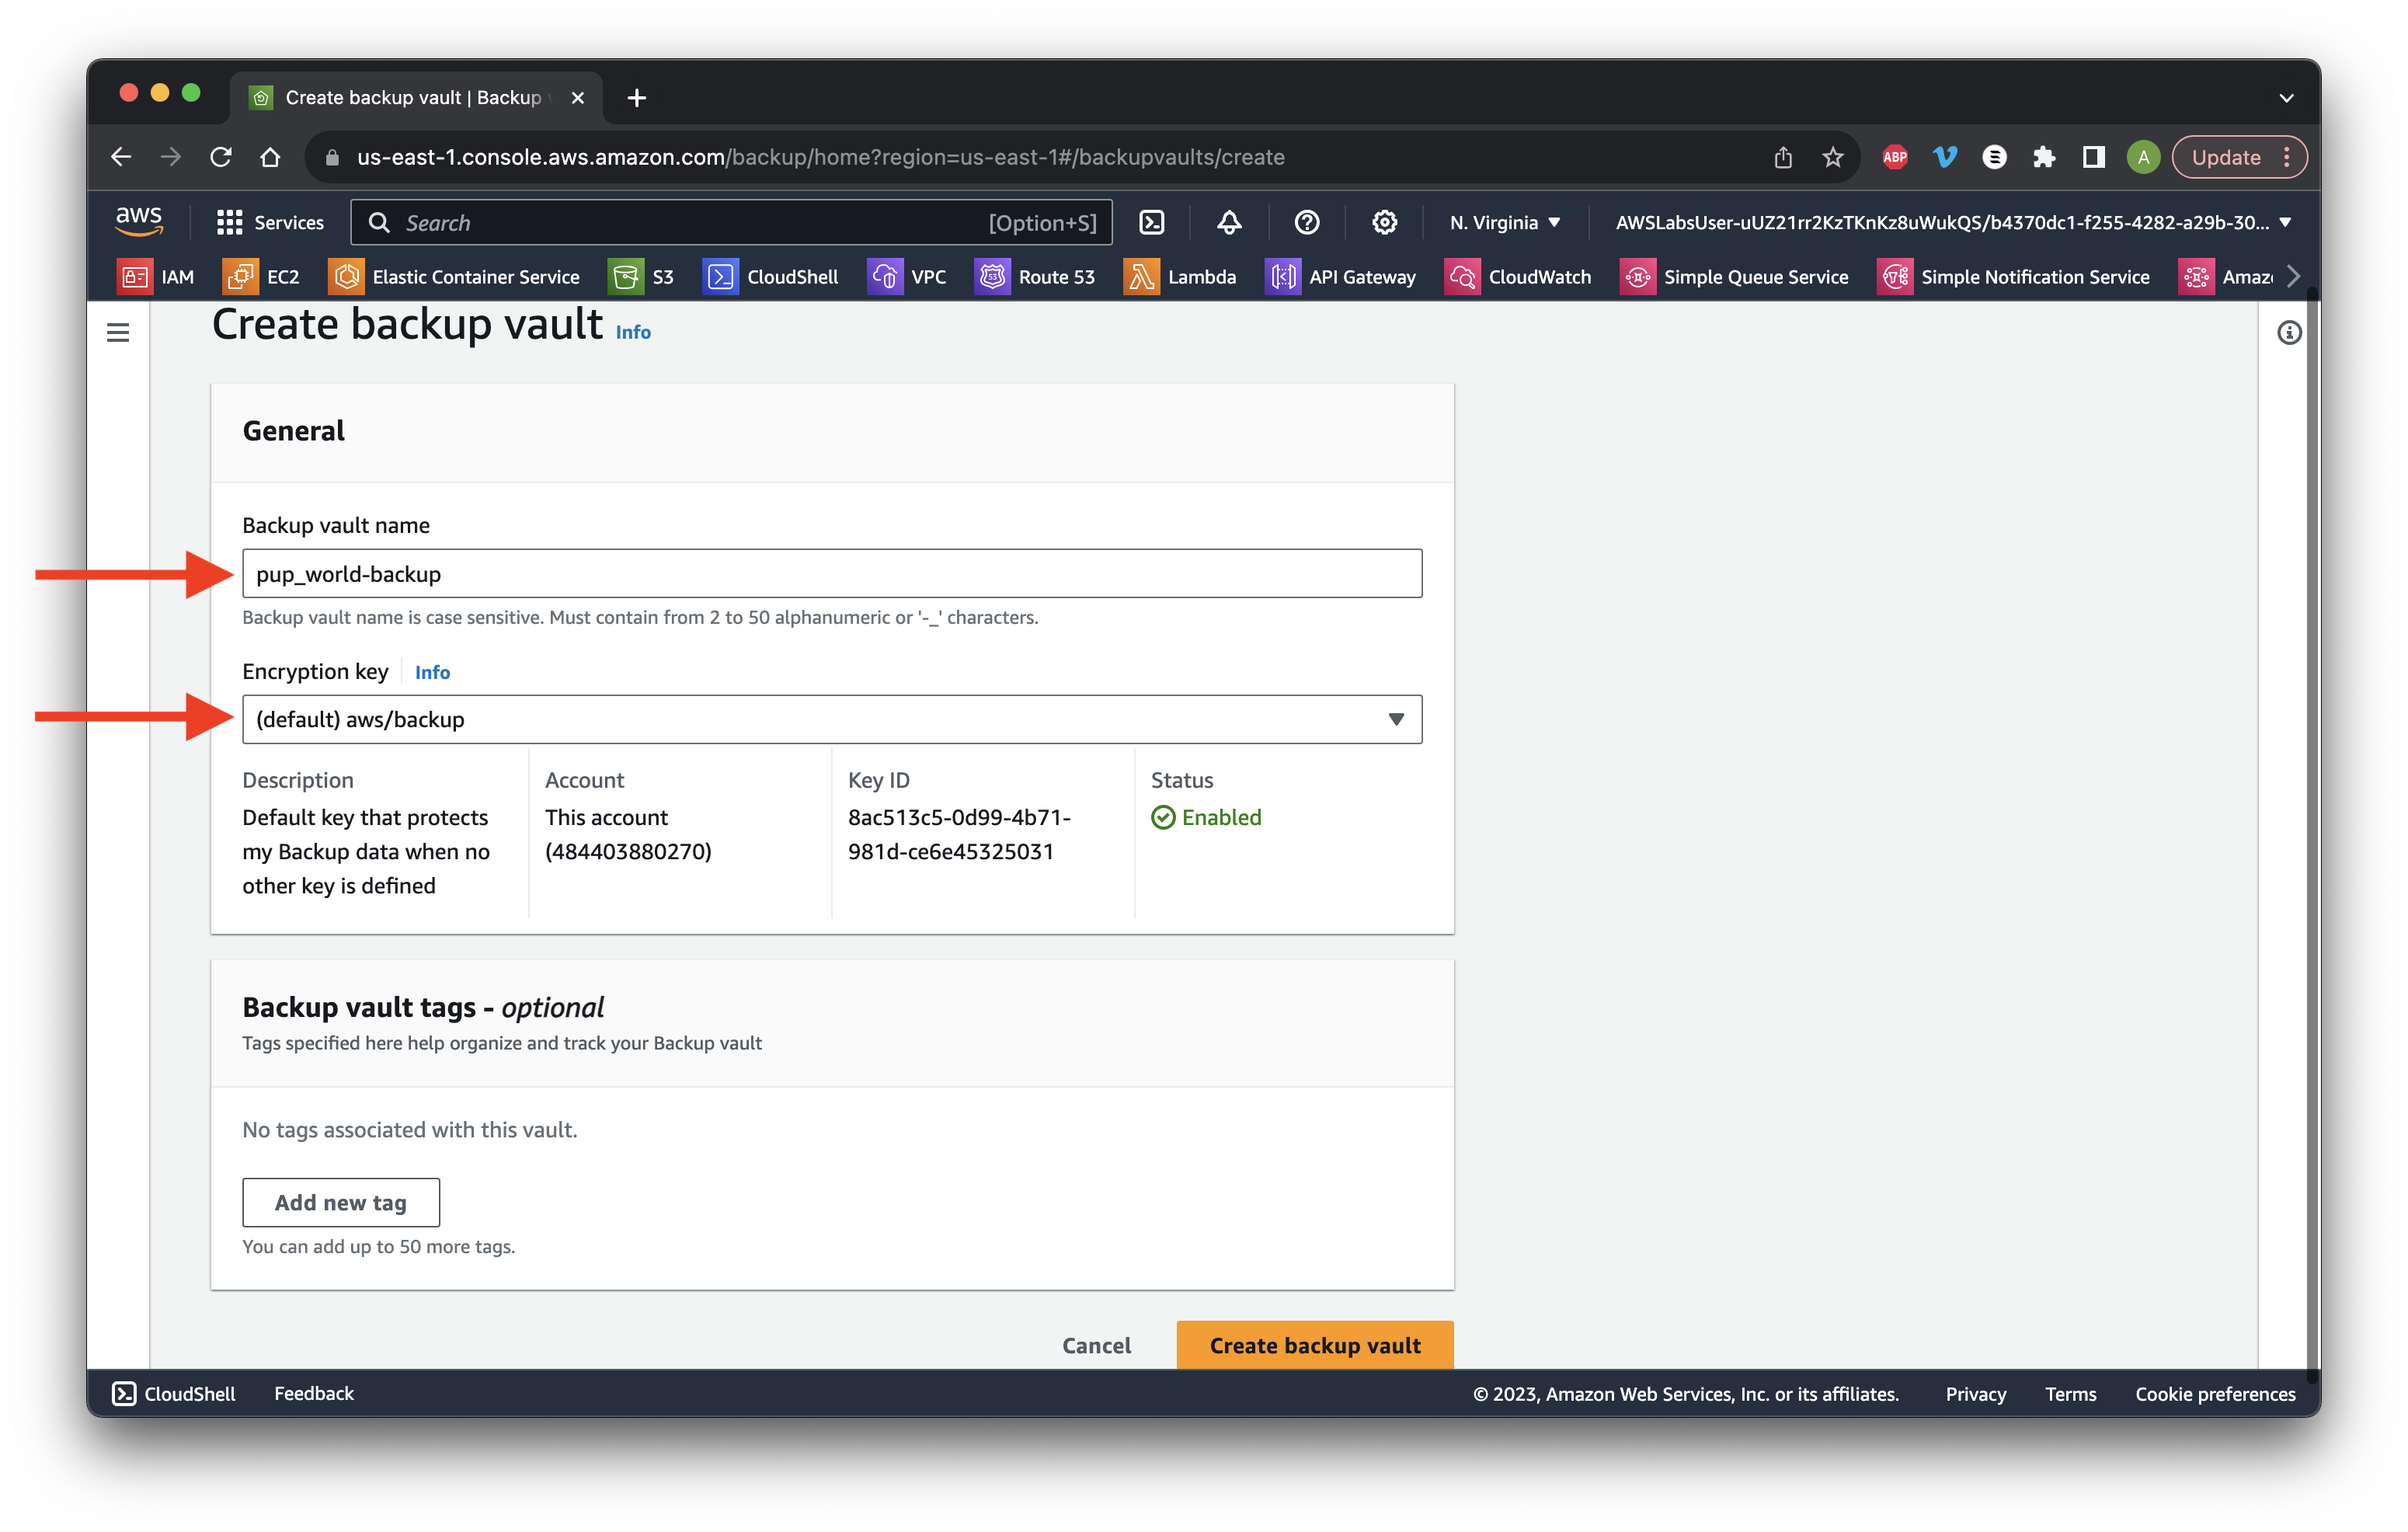
For the name, type pup_world-backup and select the default Encryption key. Click Create backup vault.
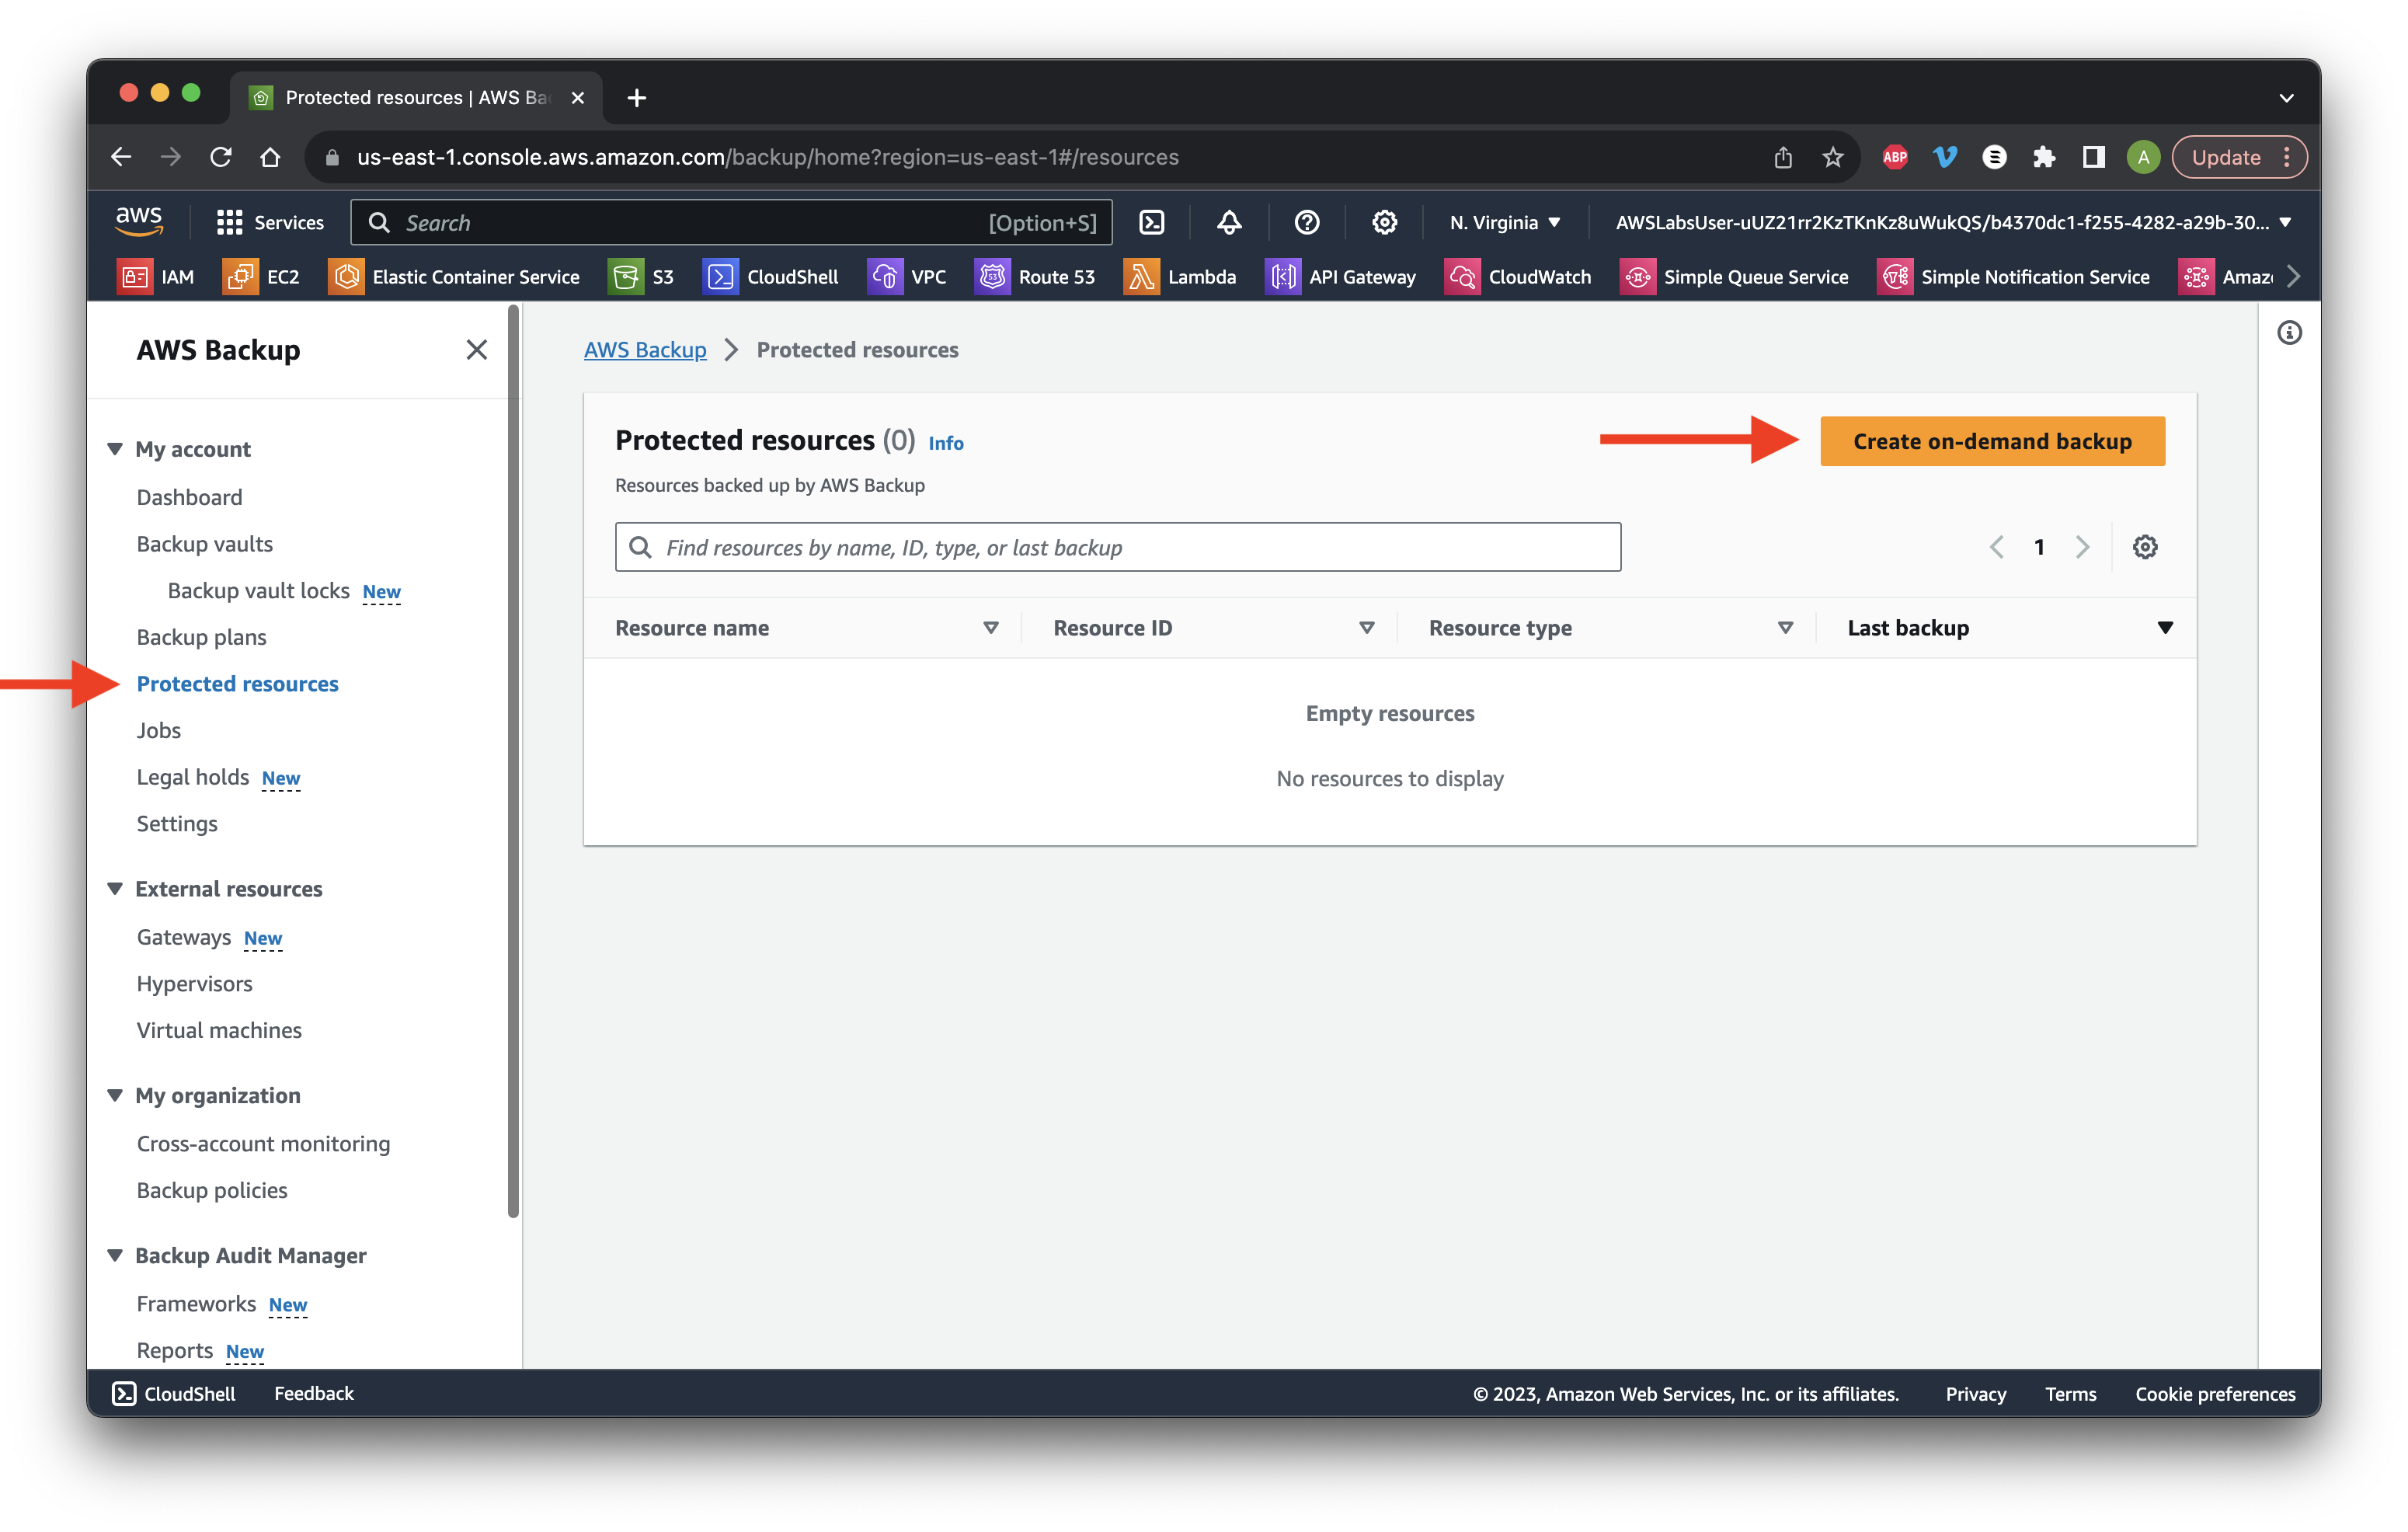
Go to Protected resources and click Create on-demand backup.
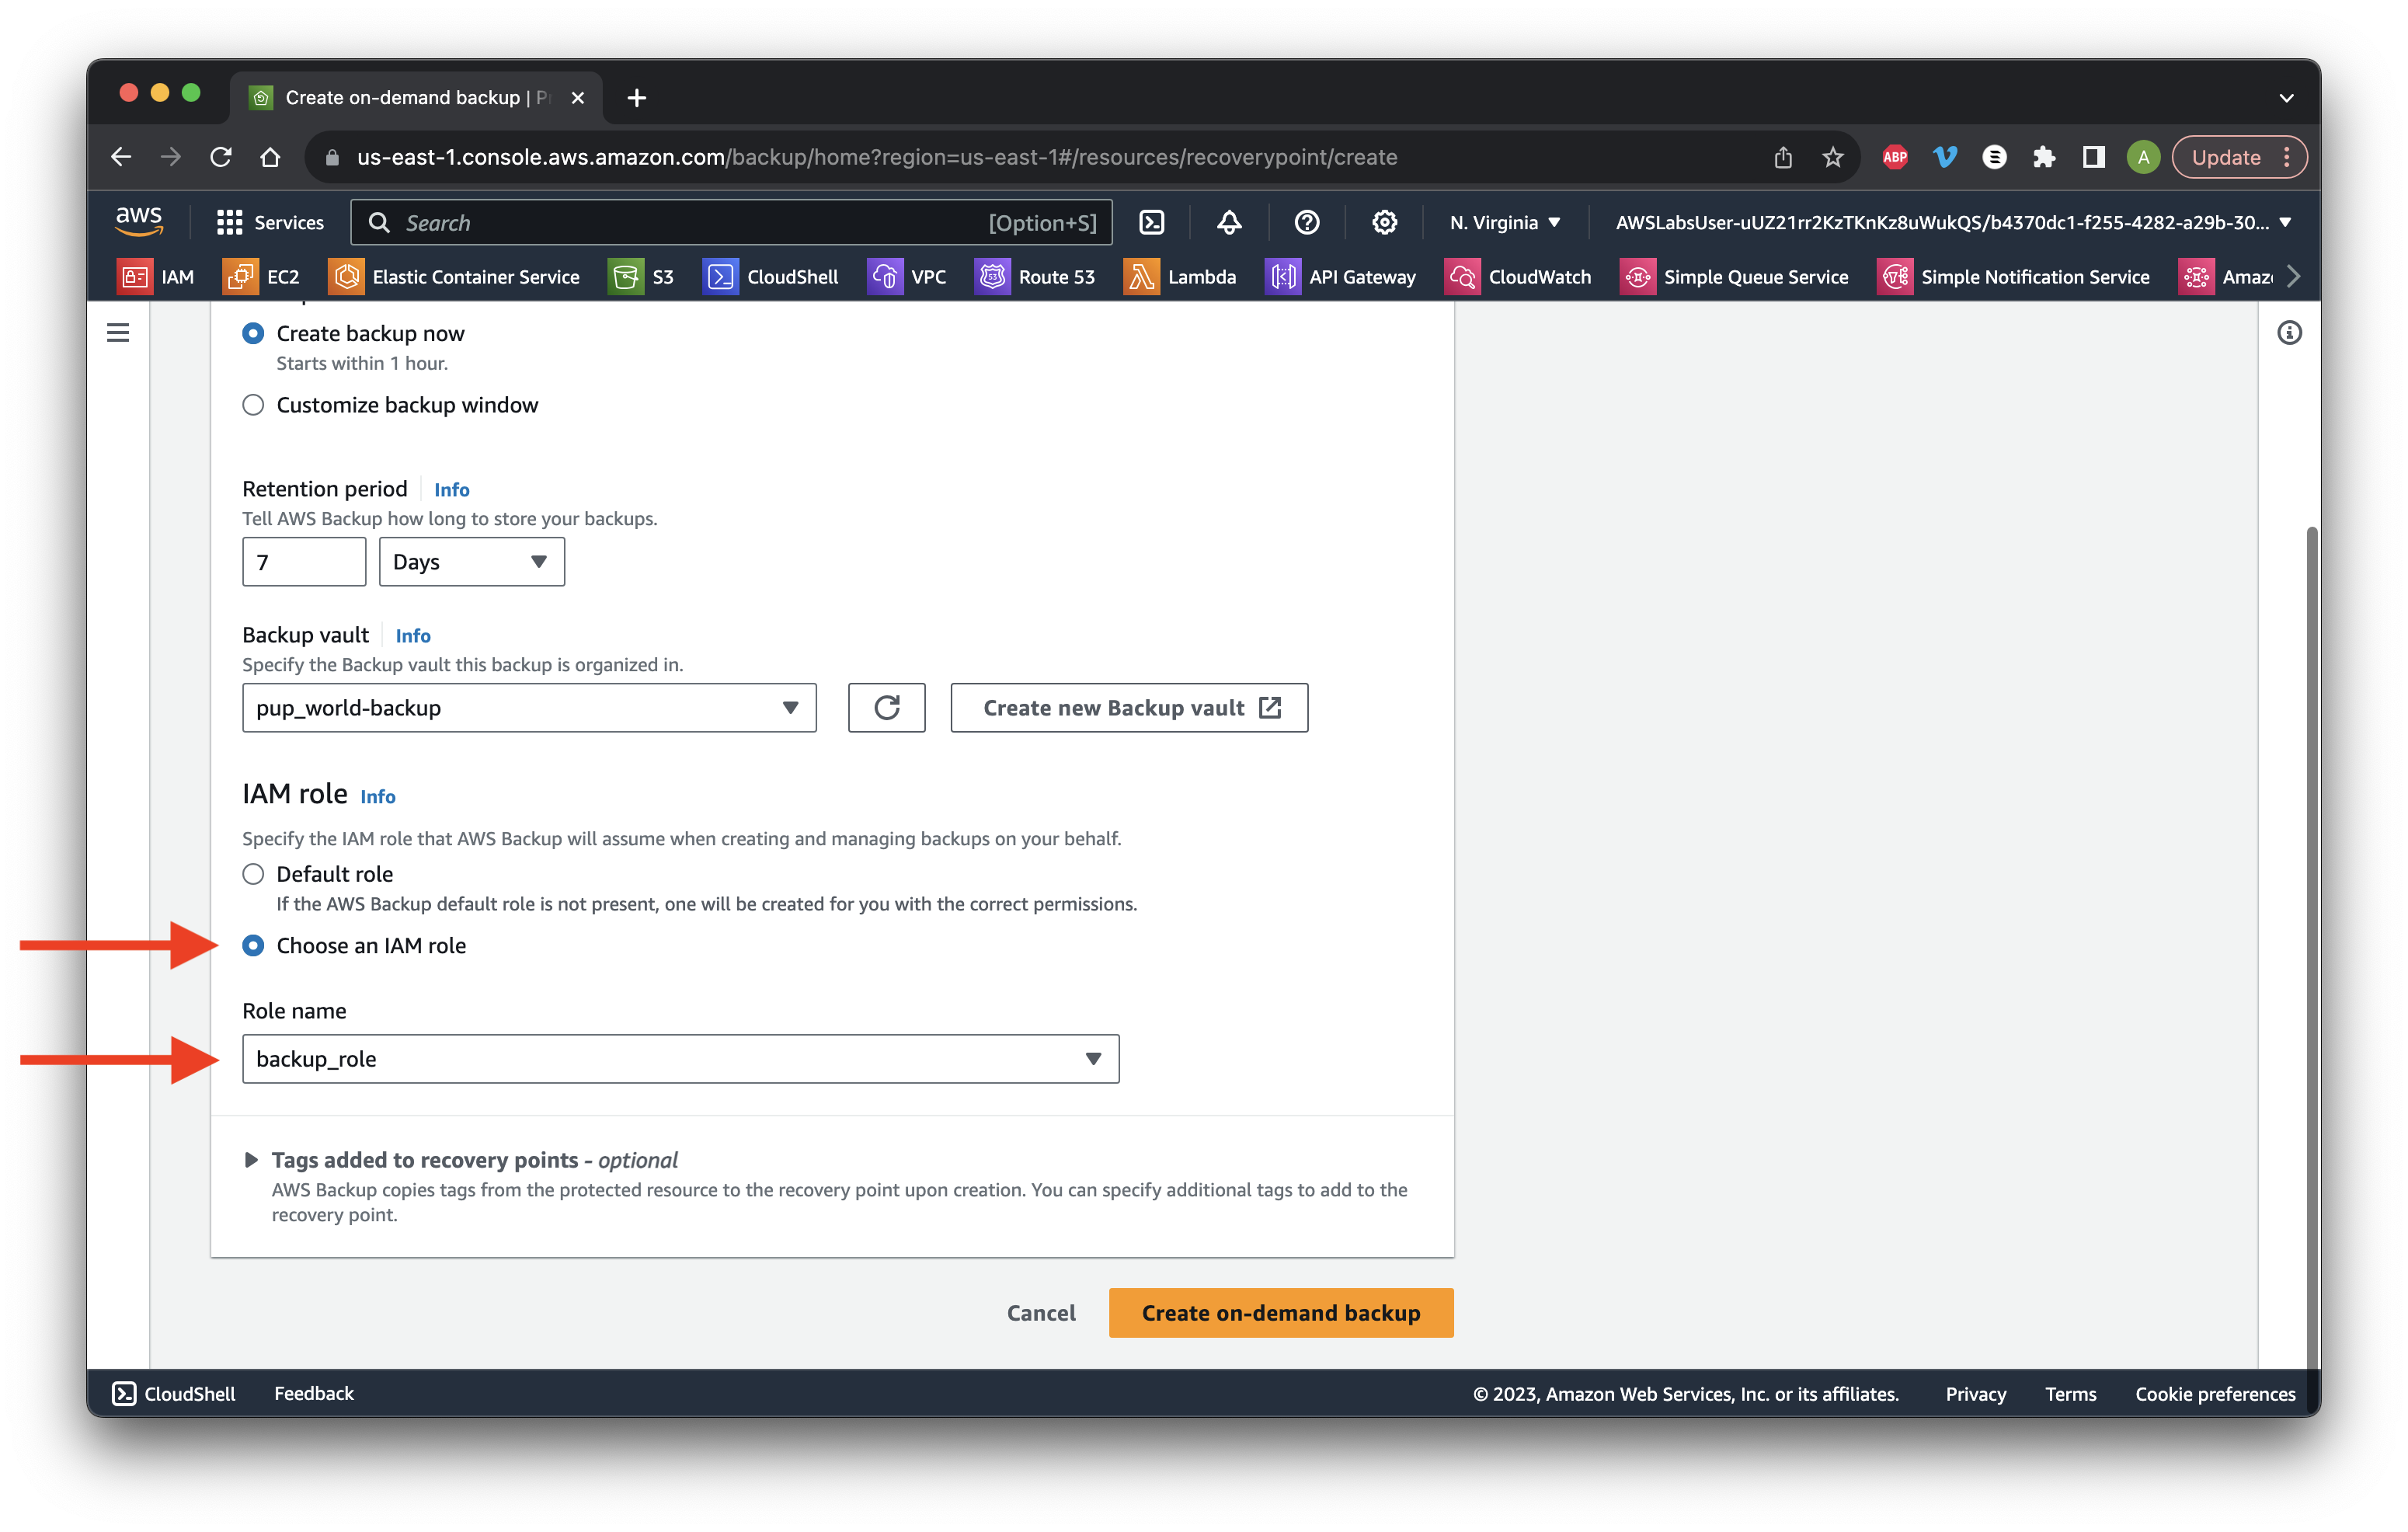
For type choose EBS and select the Volume ID for Web UI. Input 7 Days for the Retention period and select the Backup vault we created earlier.
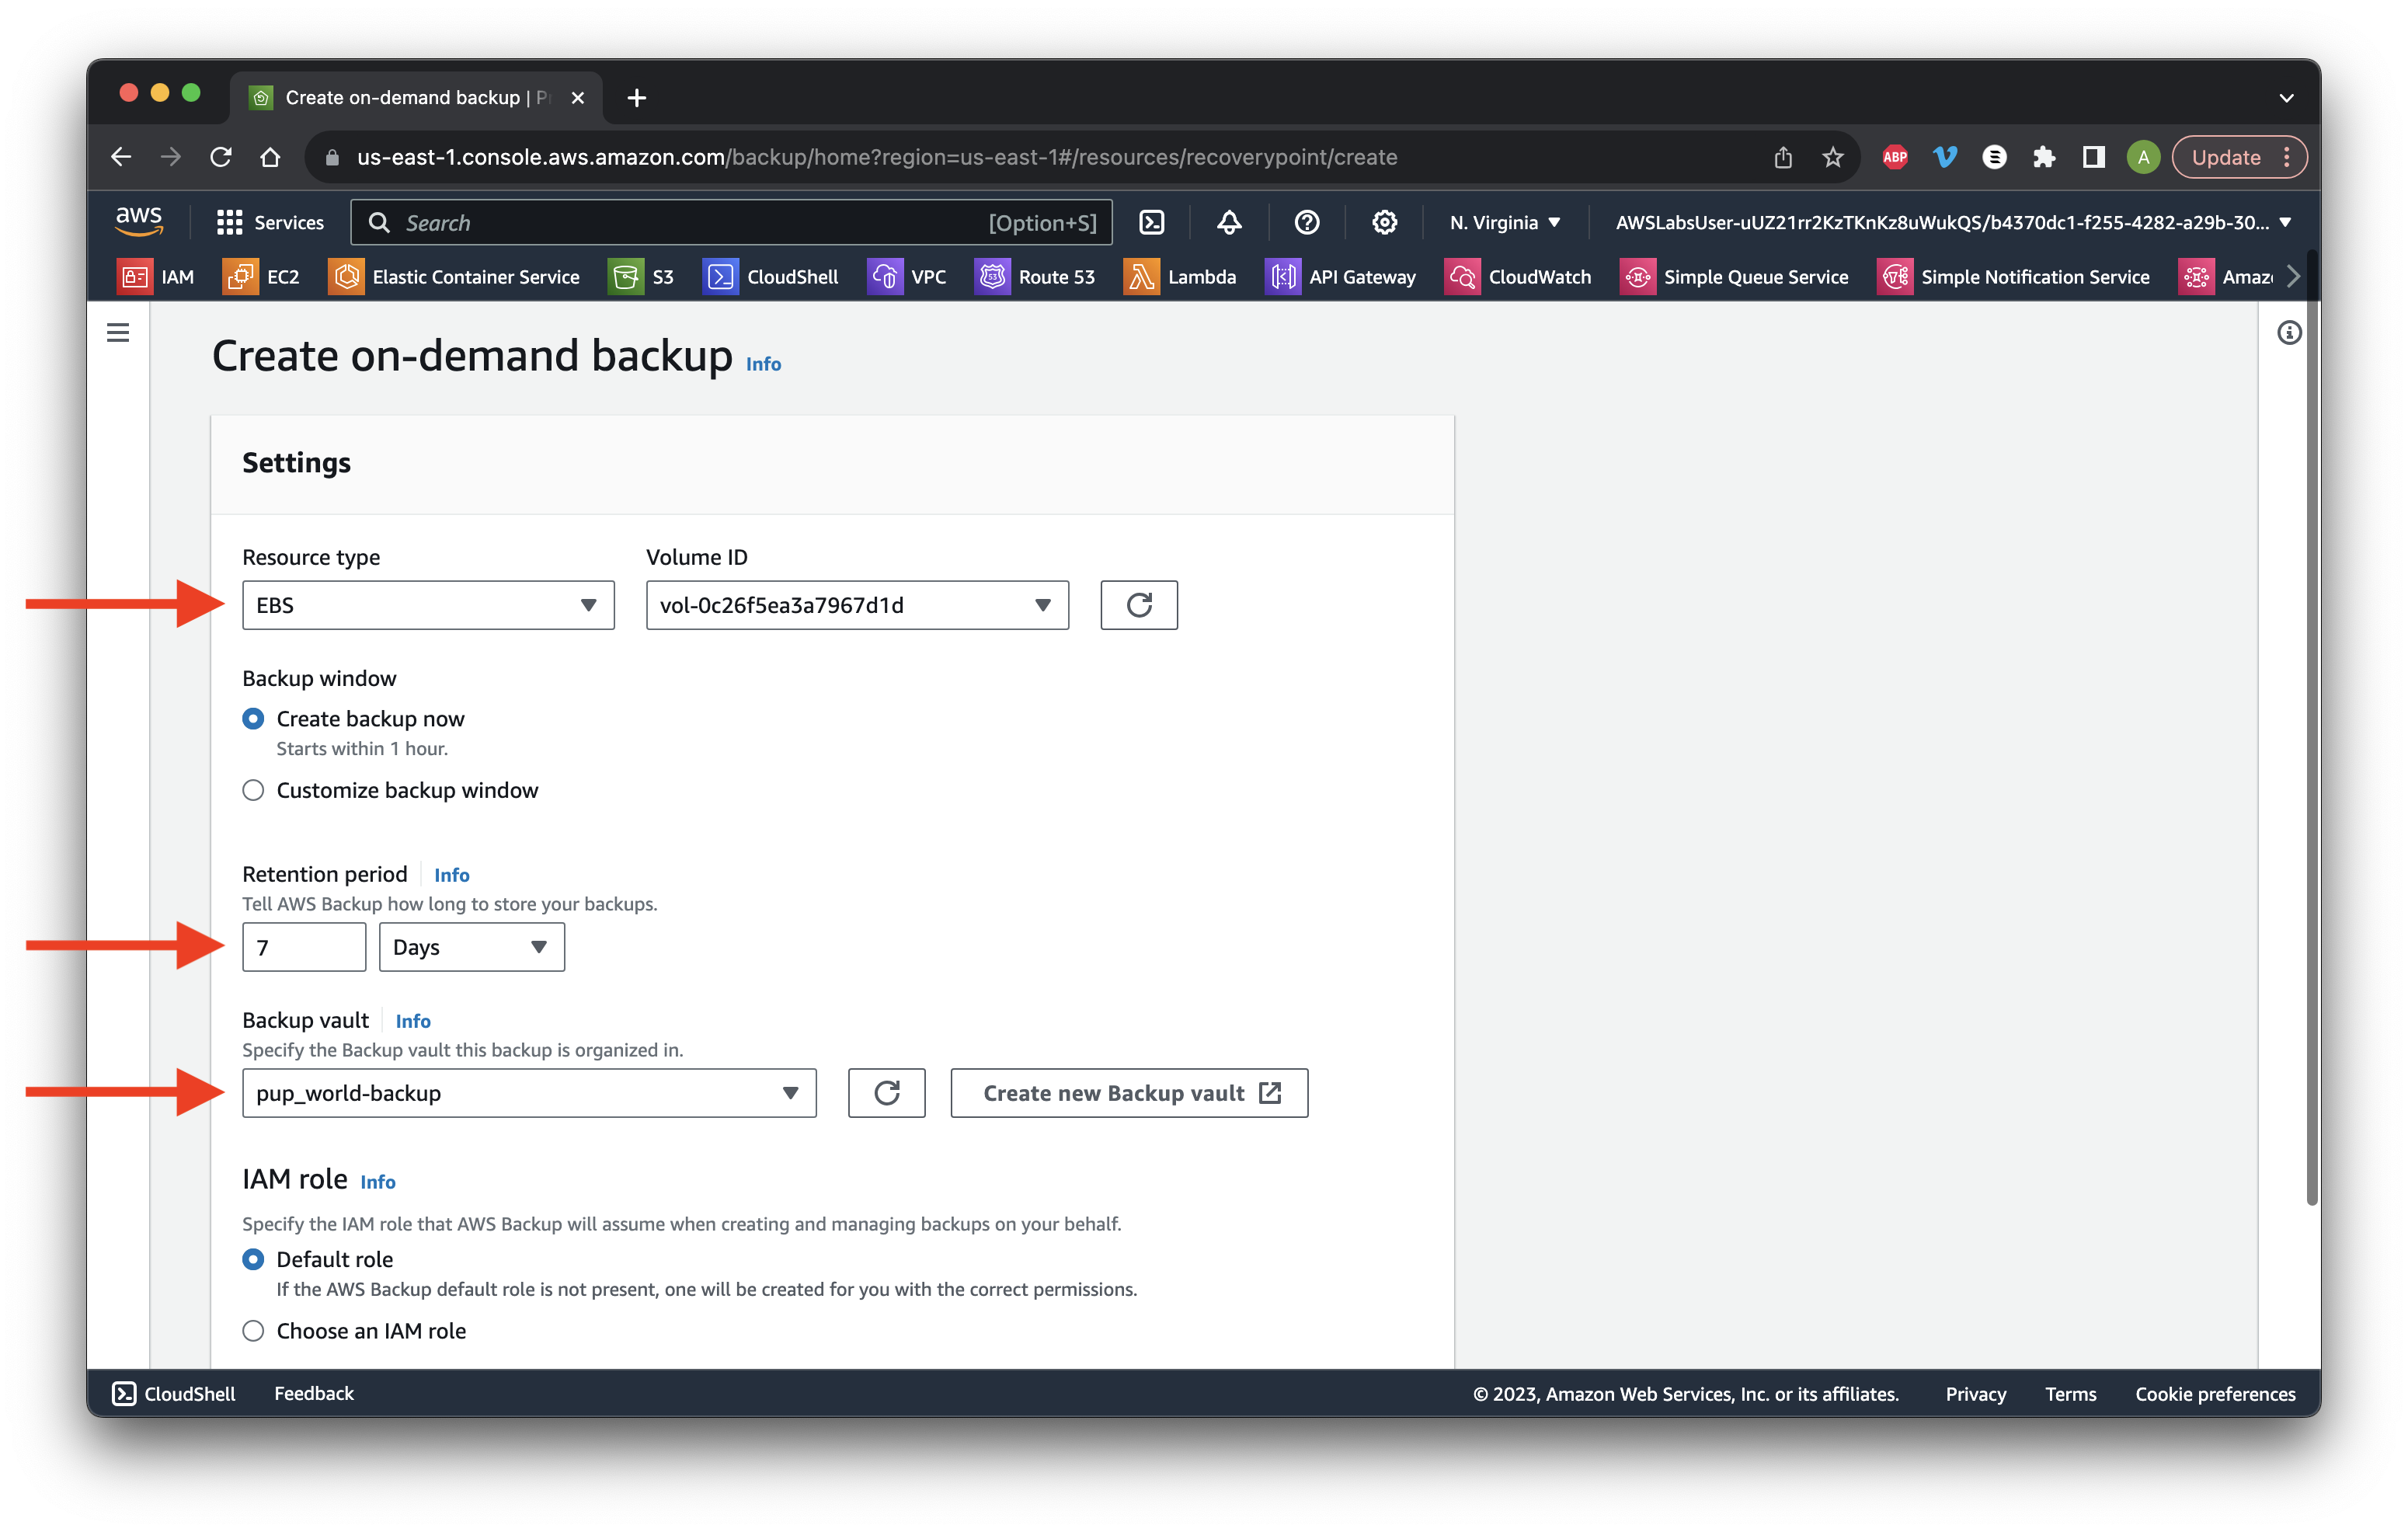
Scroll down and select Choose an IAM role. Choose backup_role from the dropdown list. Click Create on-demand backup.
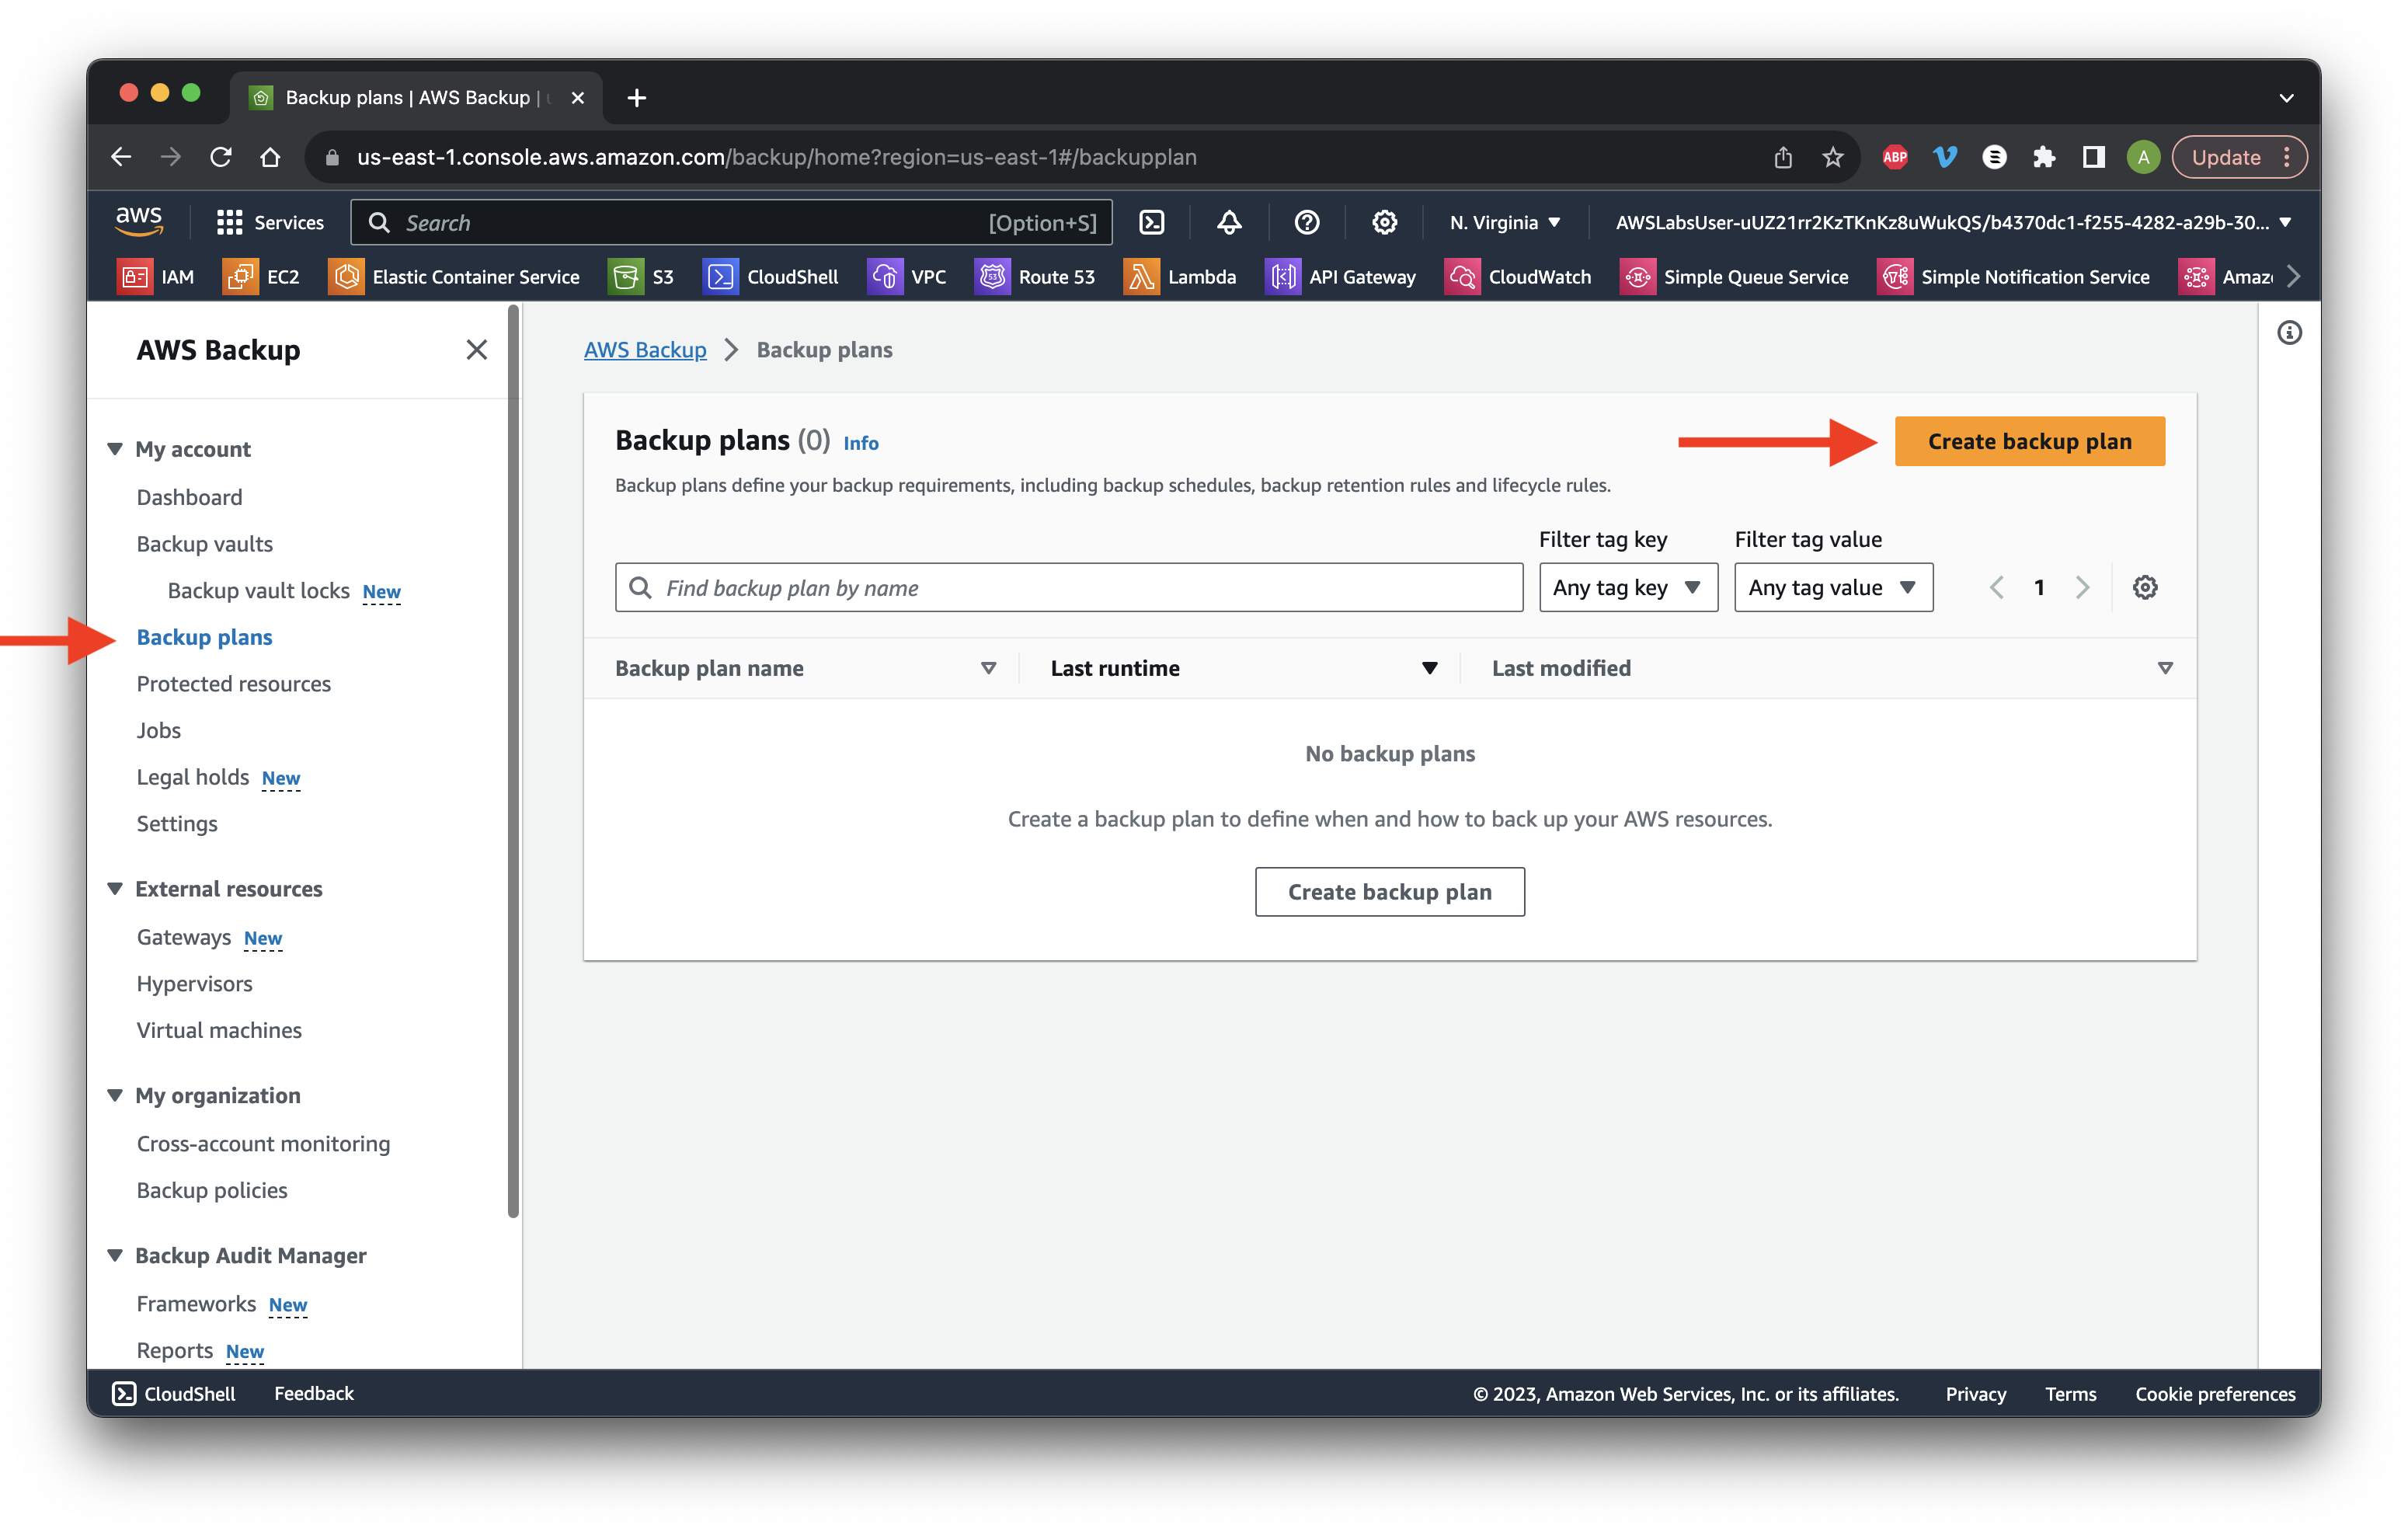
Next go to Backup plans and click Create Backup plan.
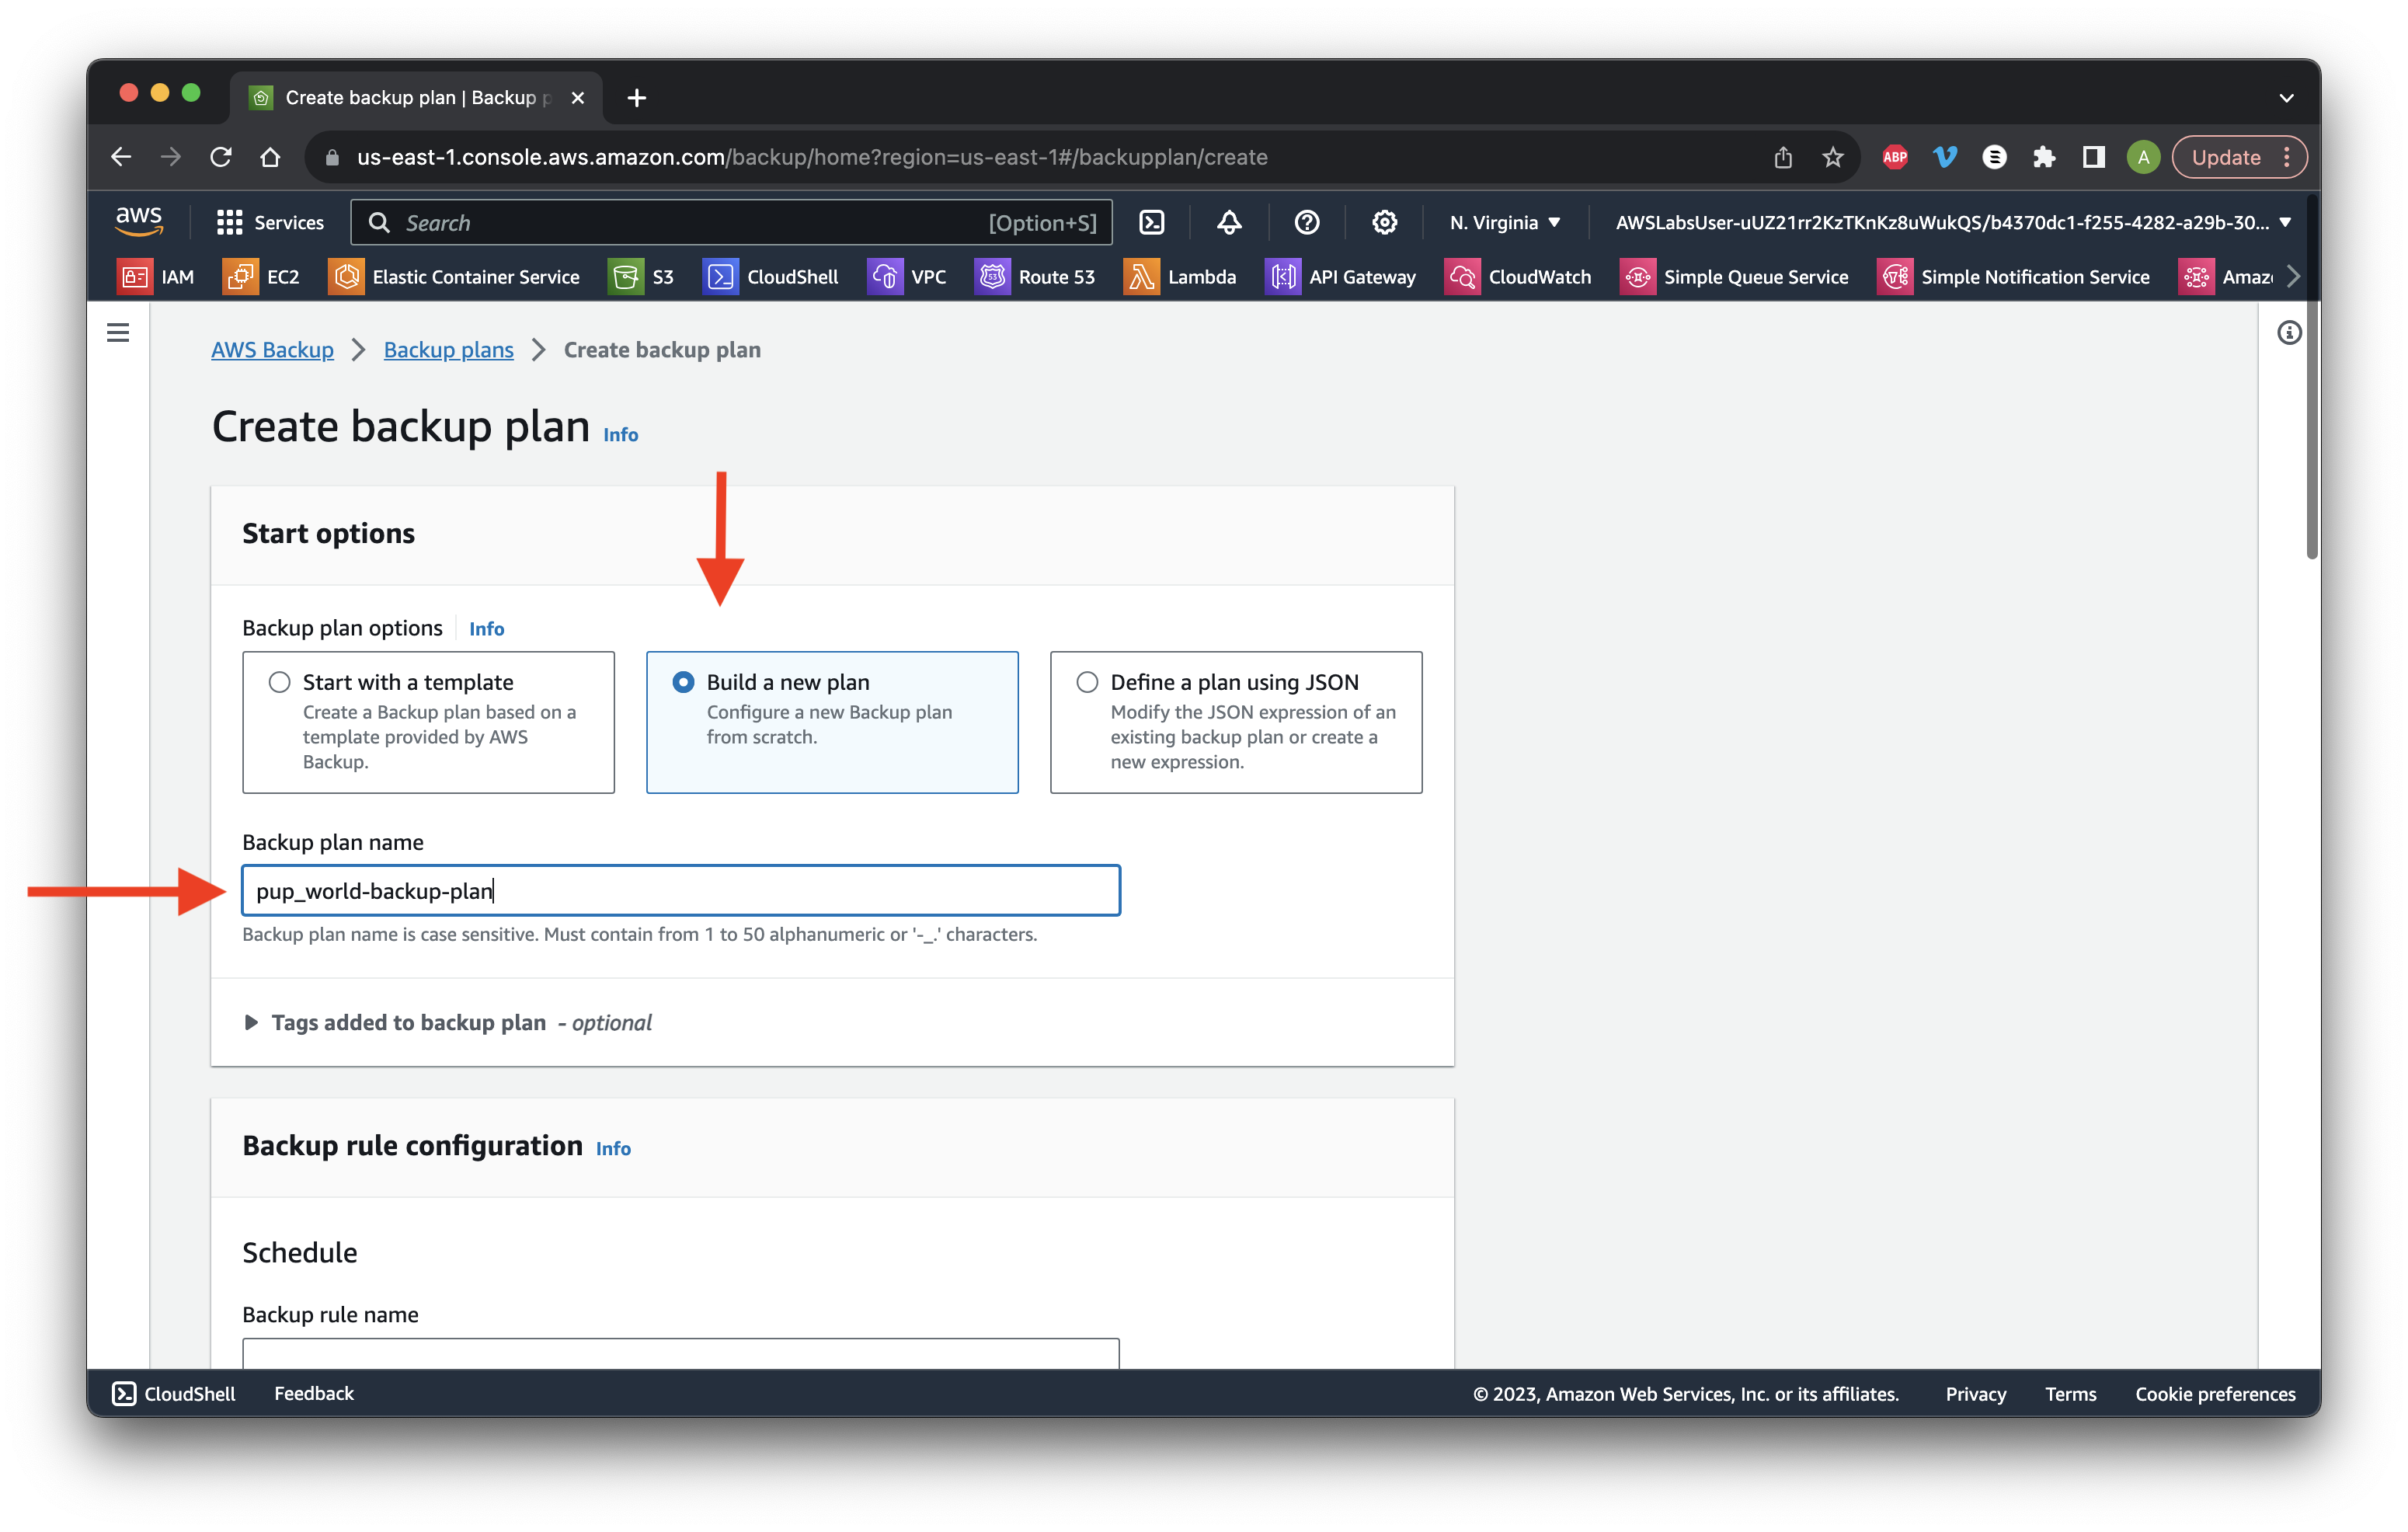
Build a new plan with the name pup_world-backup-plan and scroll down.
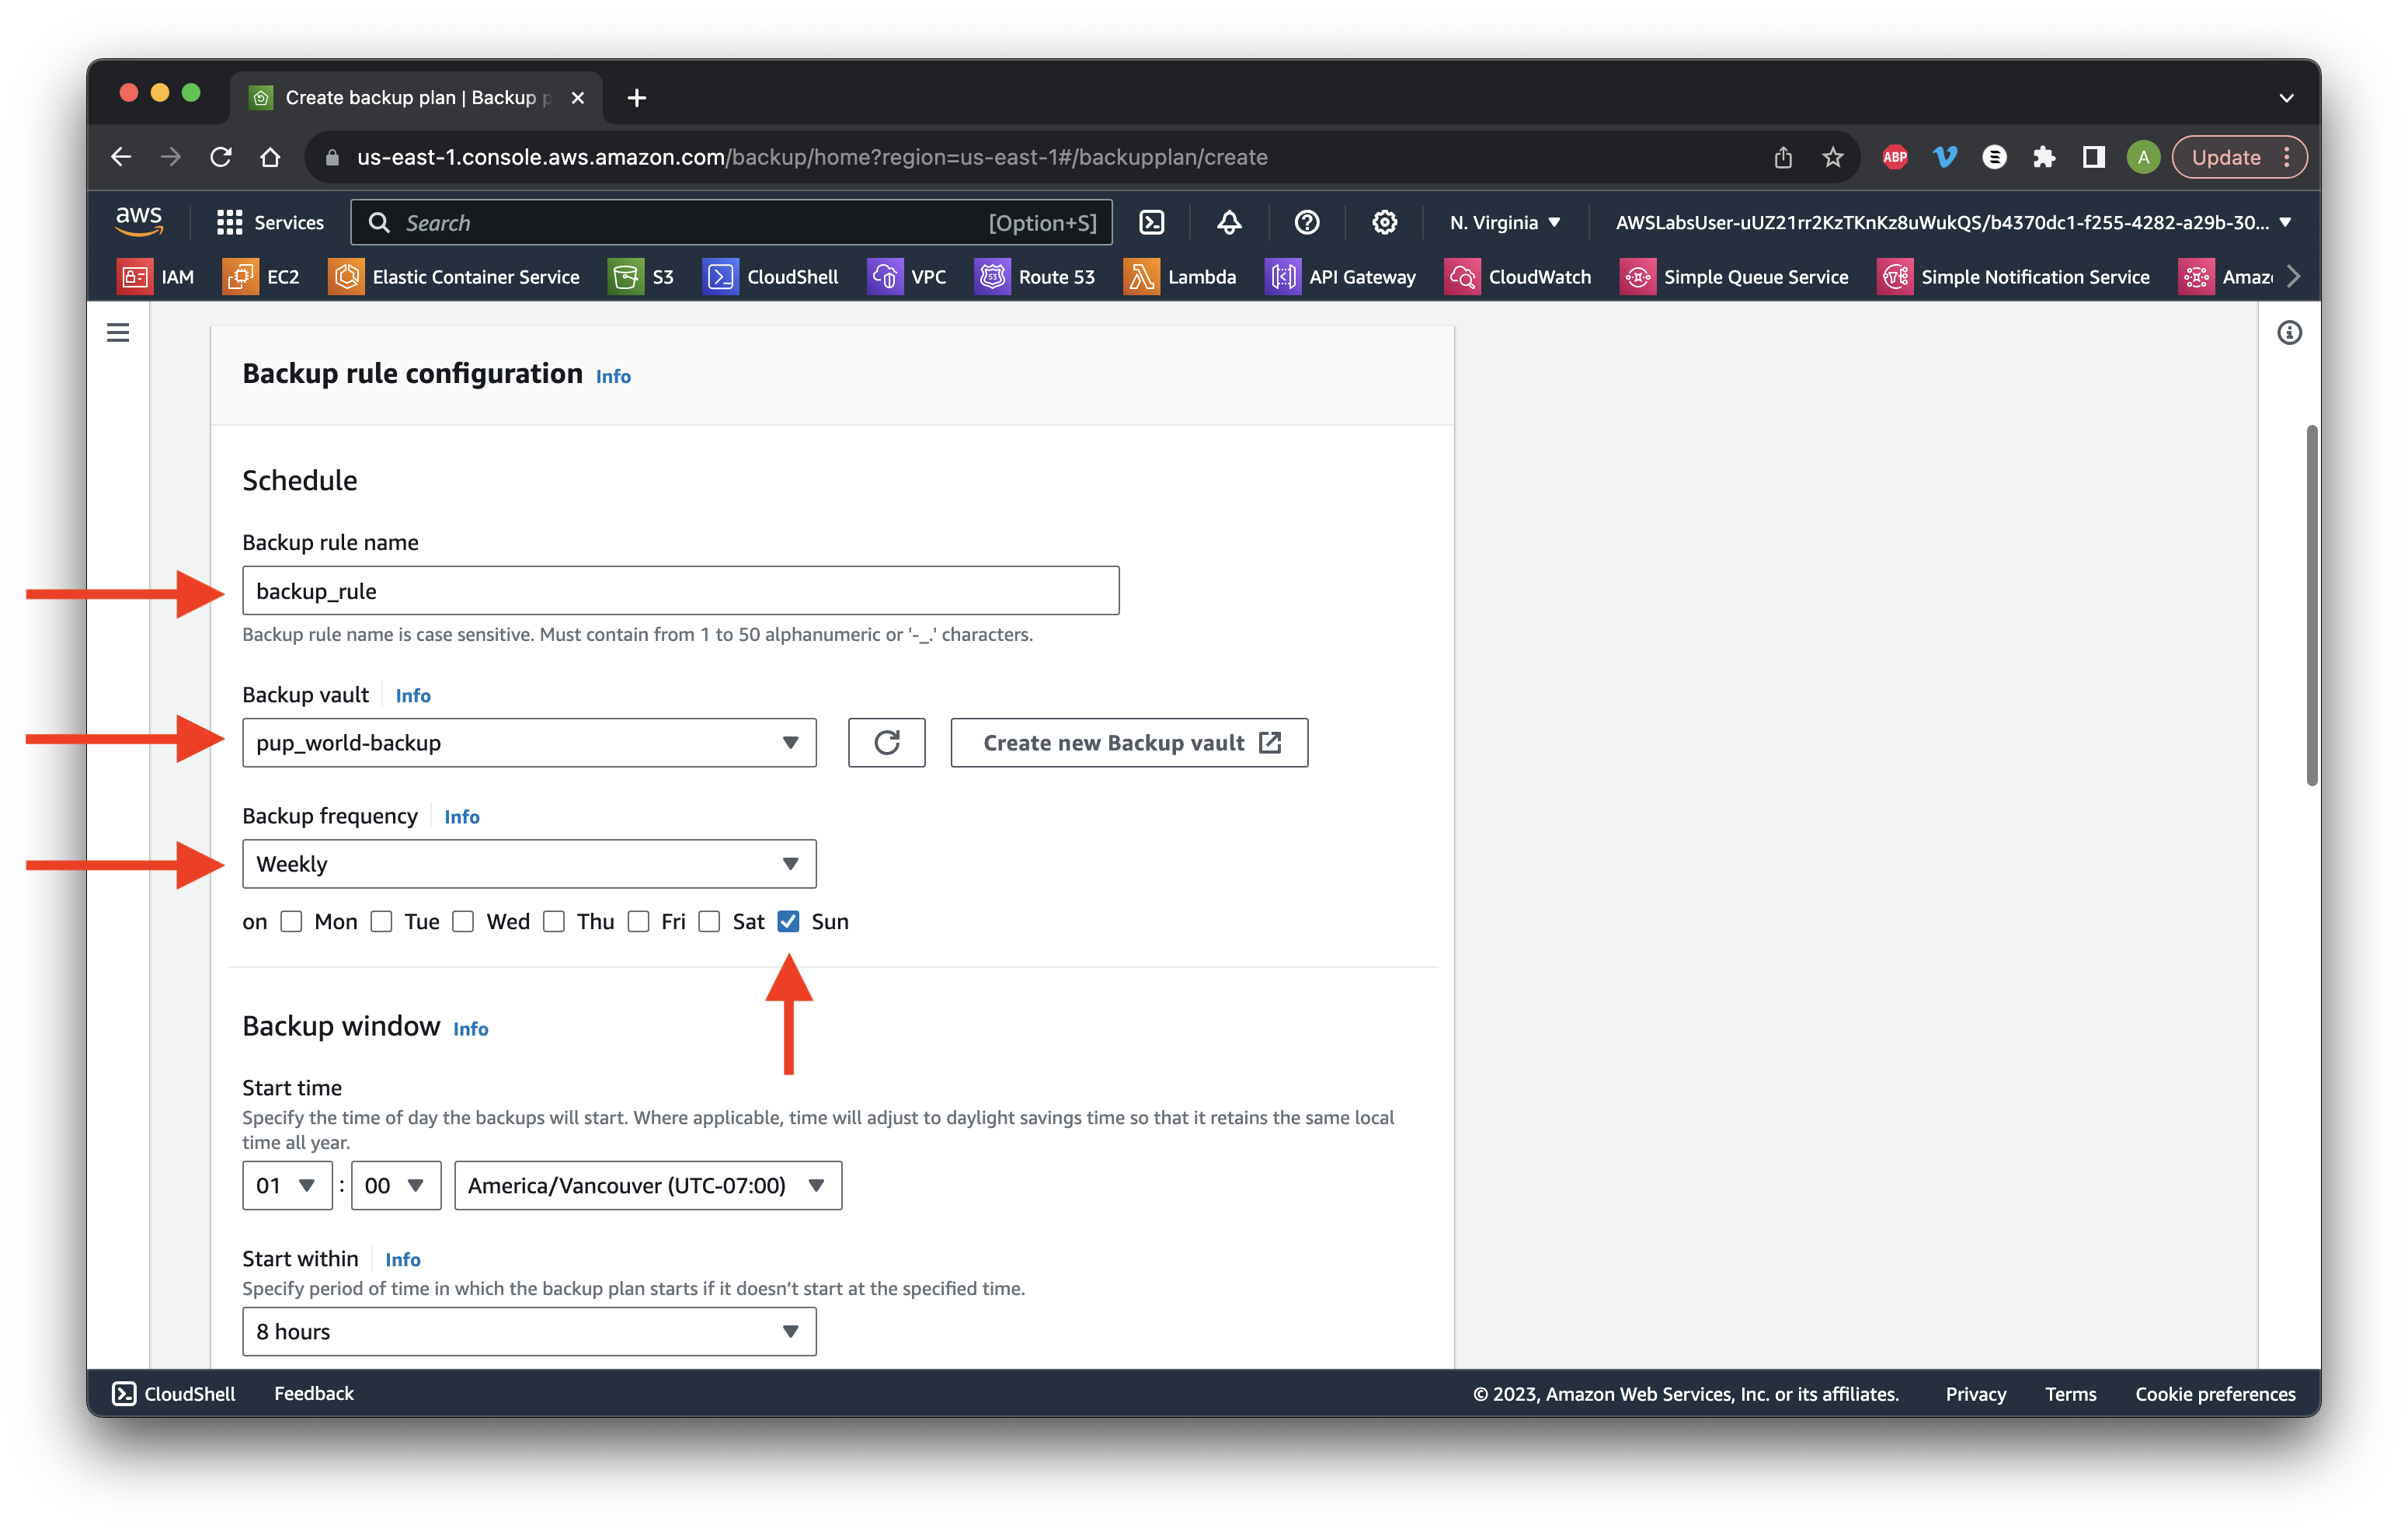
Give it the name backup_rule and select our Backup vault. Change frequency to weekly set on Sundays. Scroll down and click Create plan.
Type tagged_resources for the Resource name and Choose the IAM role backup_role. Scroll down.
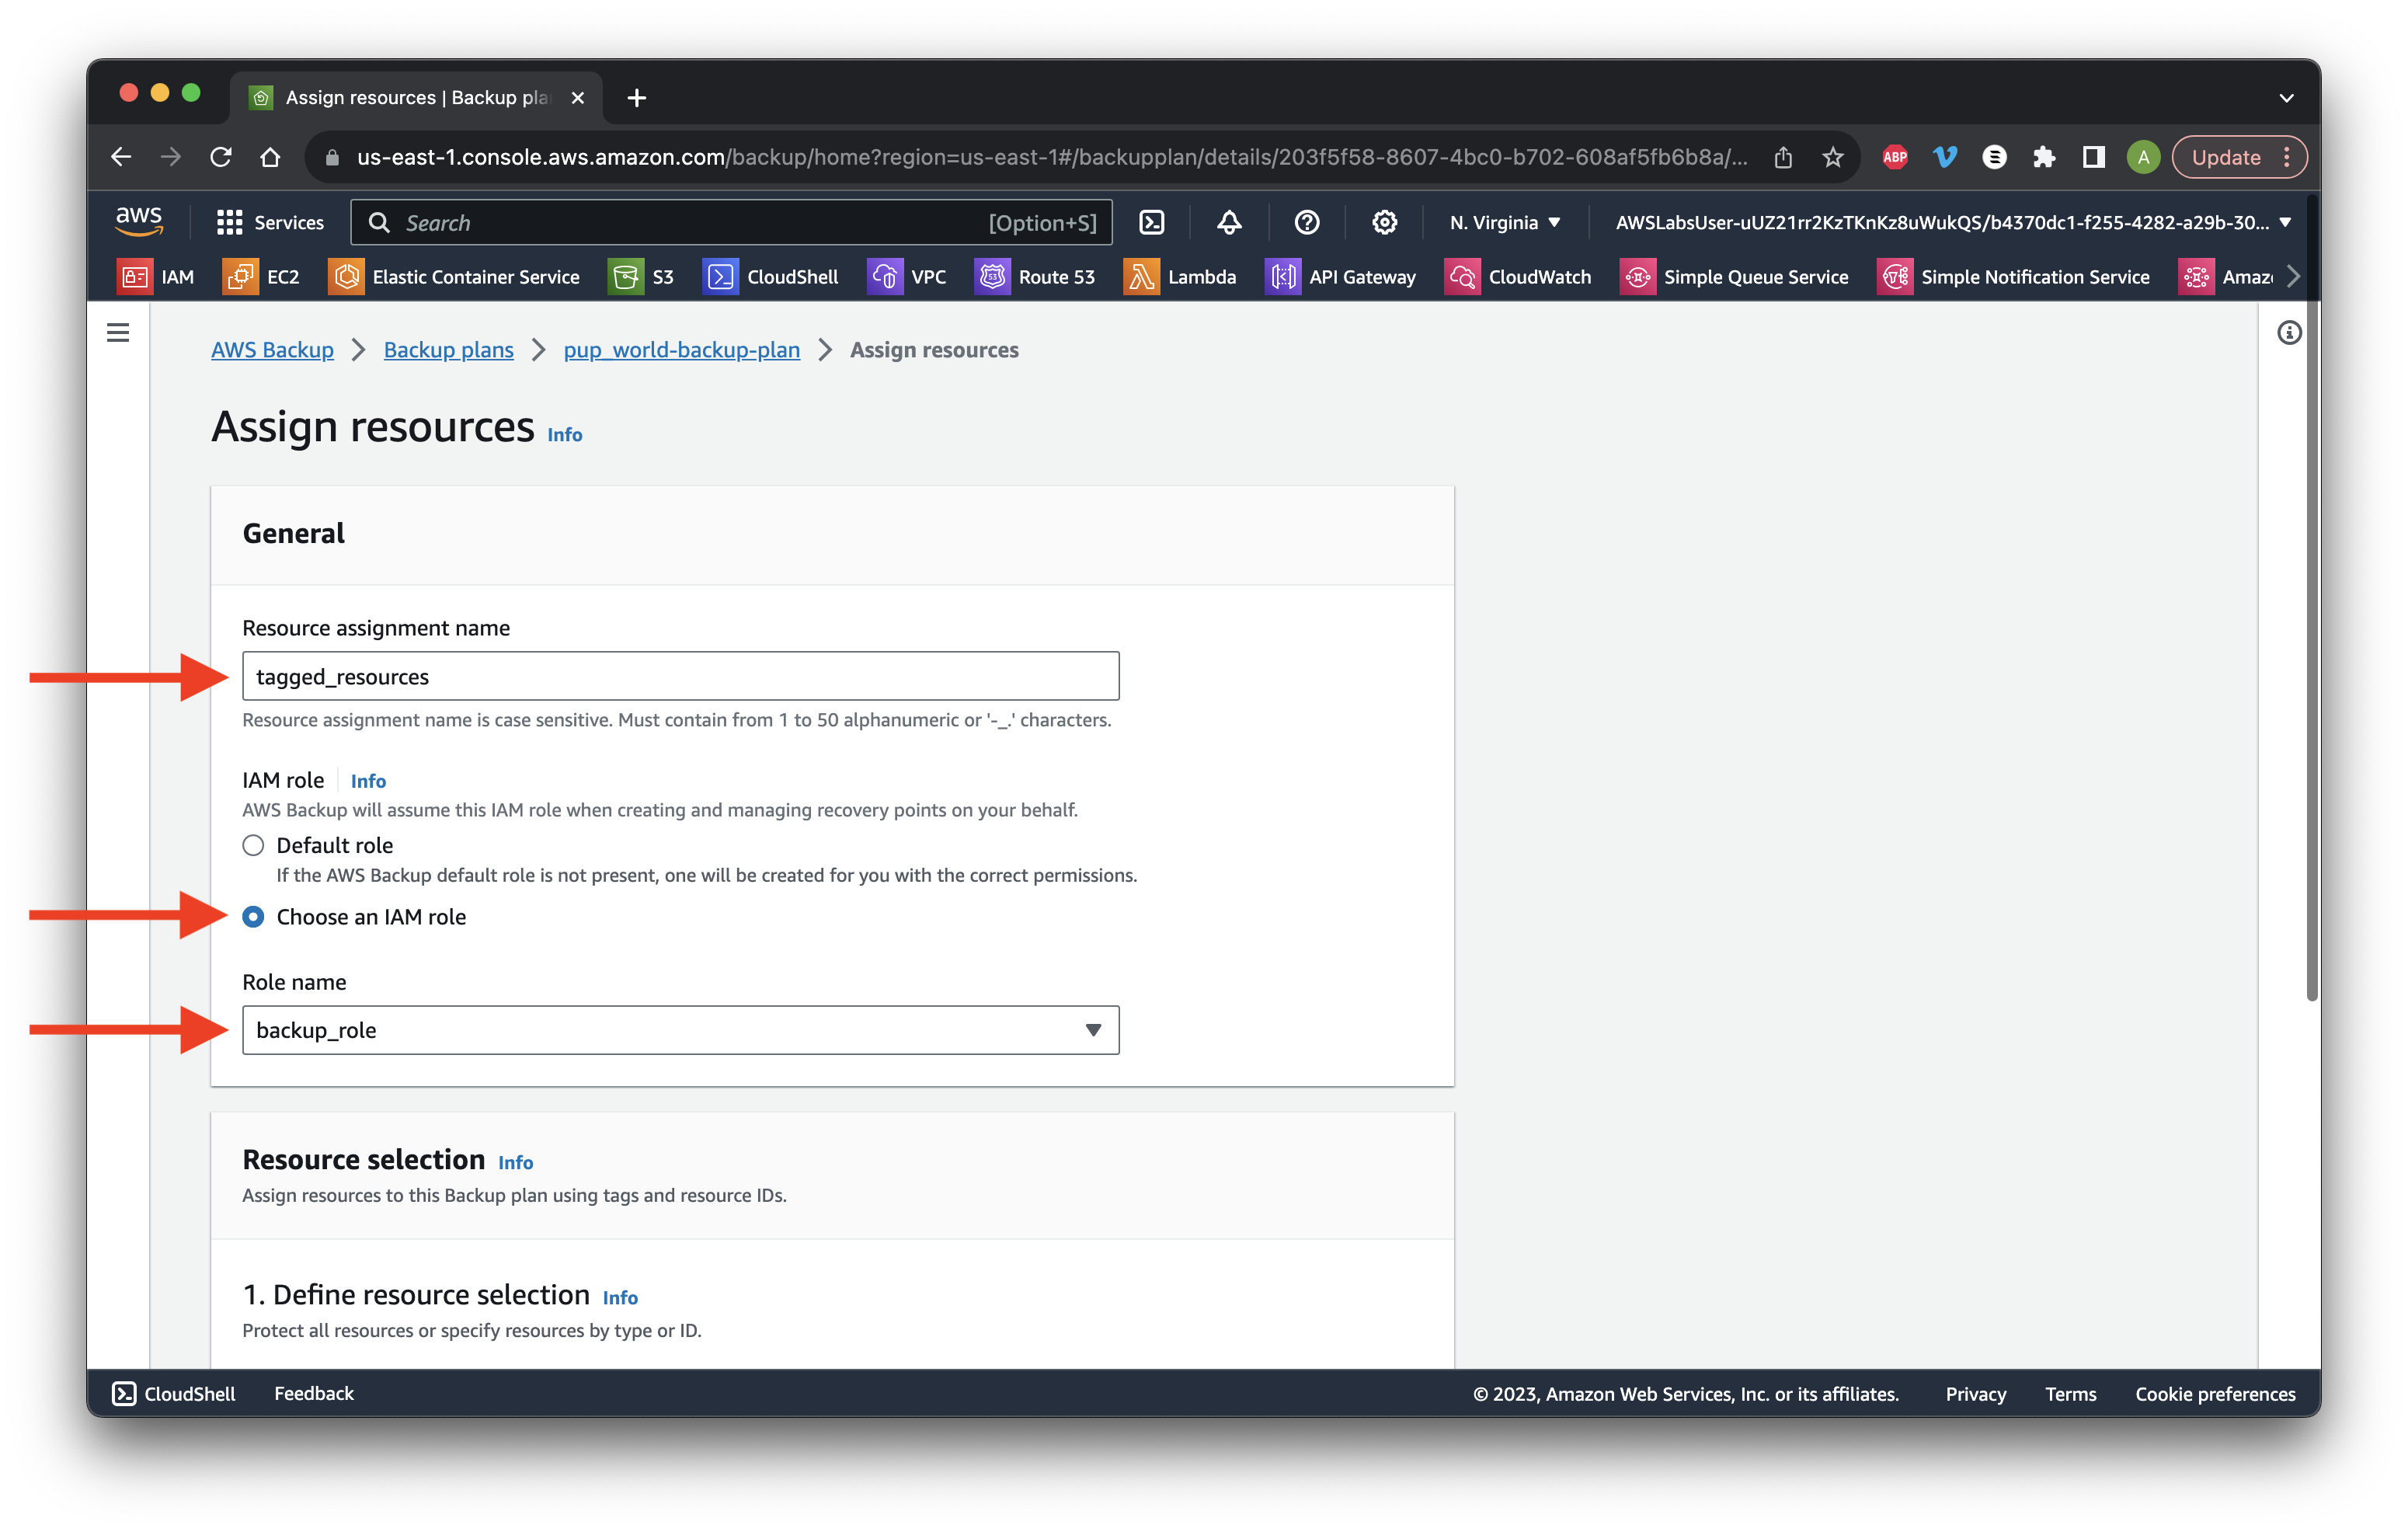
Click Add tags and type the same key-value pair from earlier but choose Equals for the Condition. Click Assign resources then Continue.

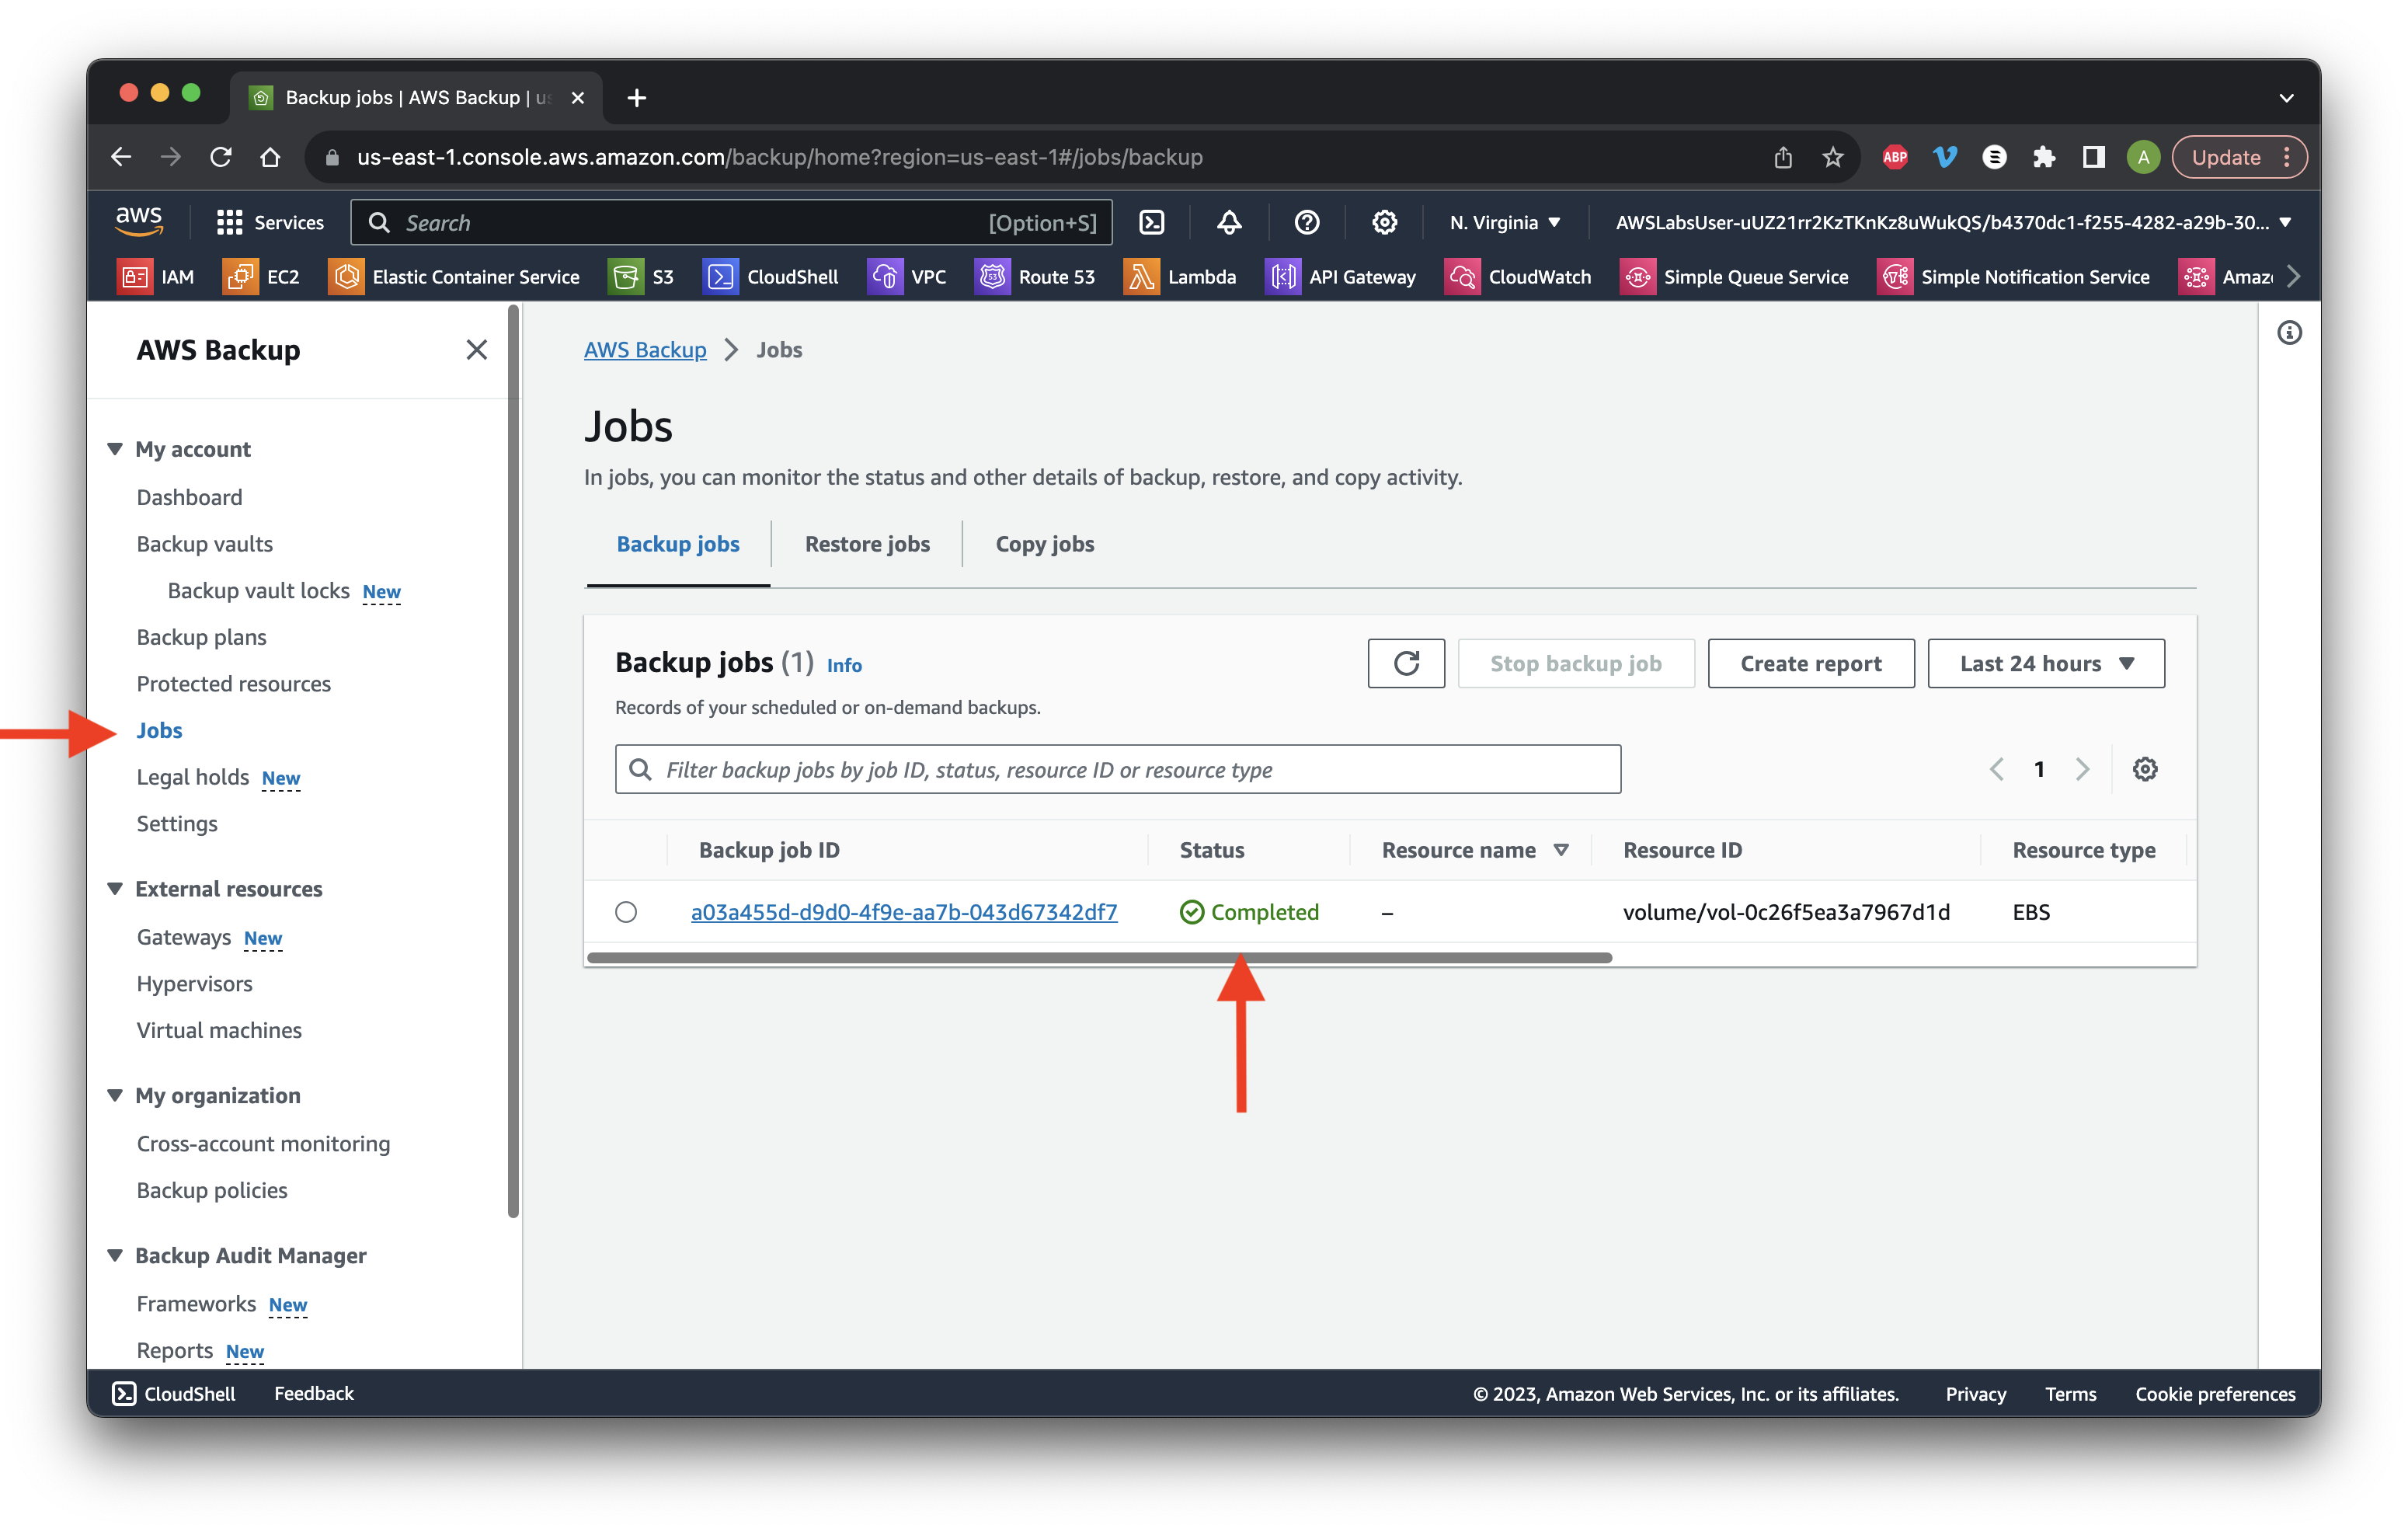
Return to Jobs and ensure that Backup job status is now Completed.
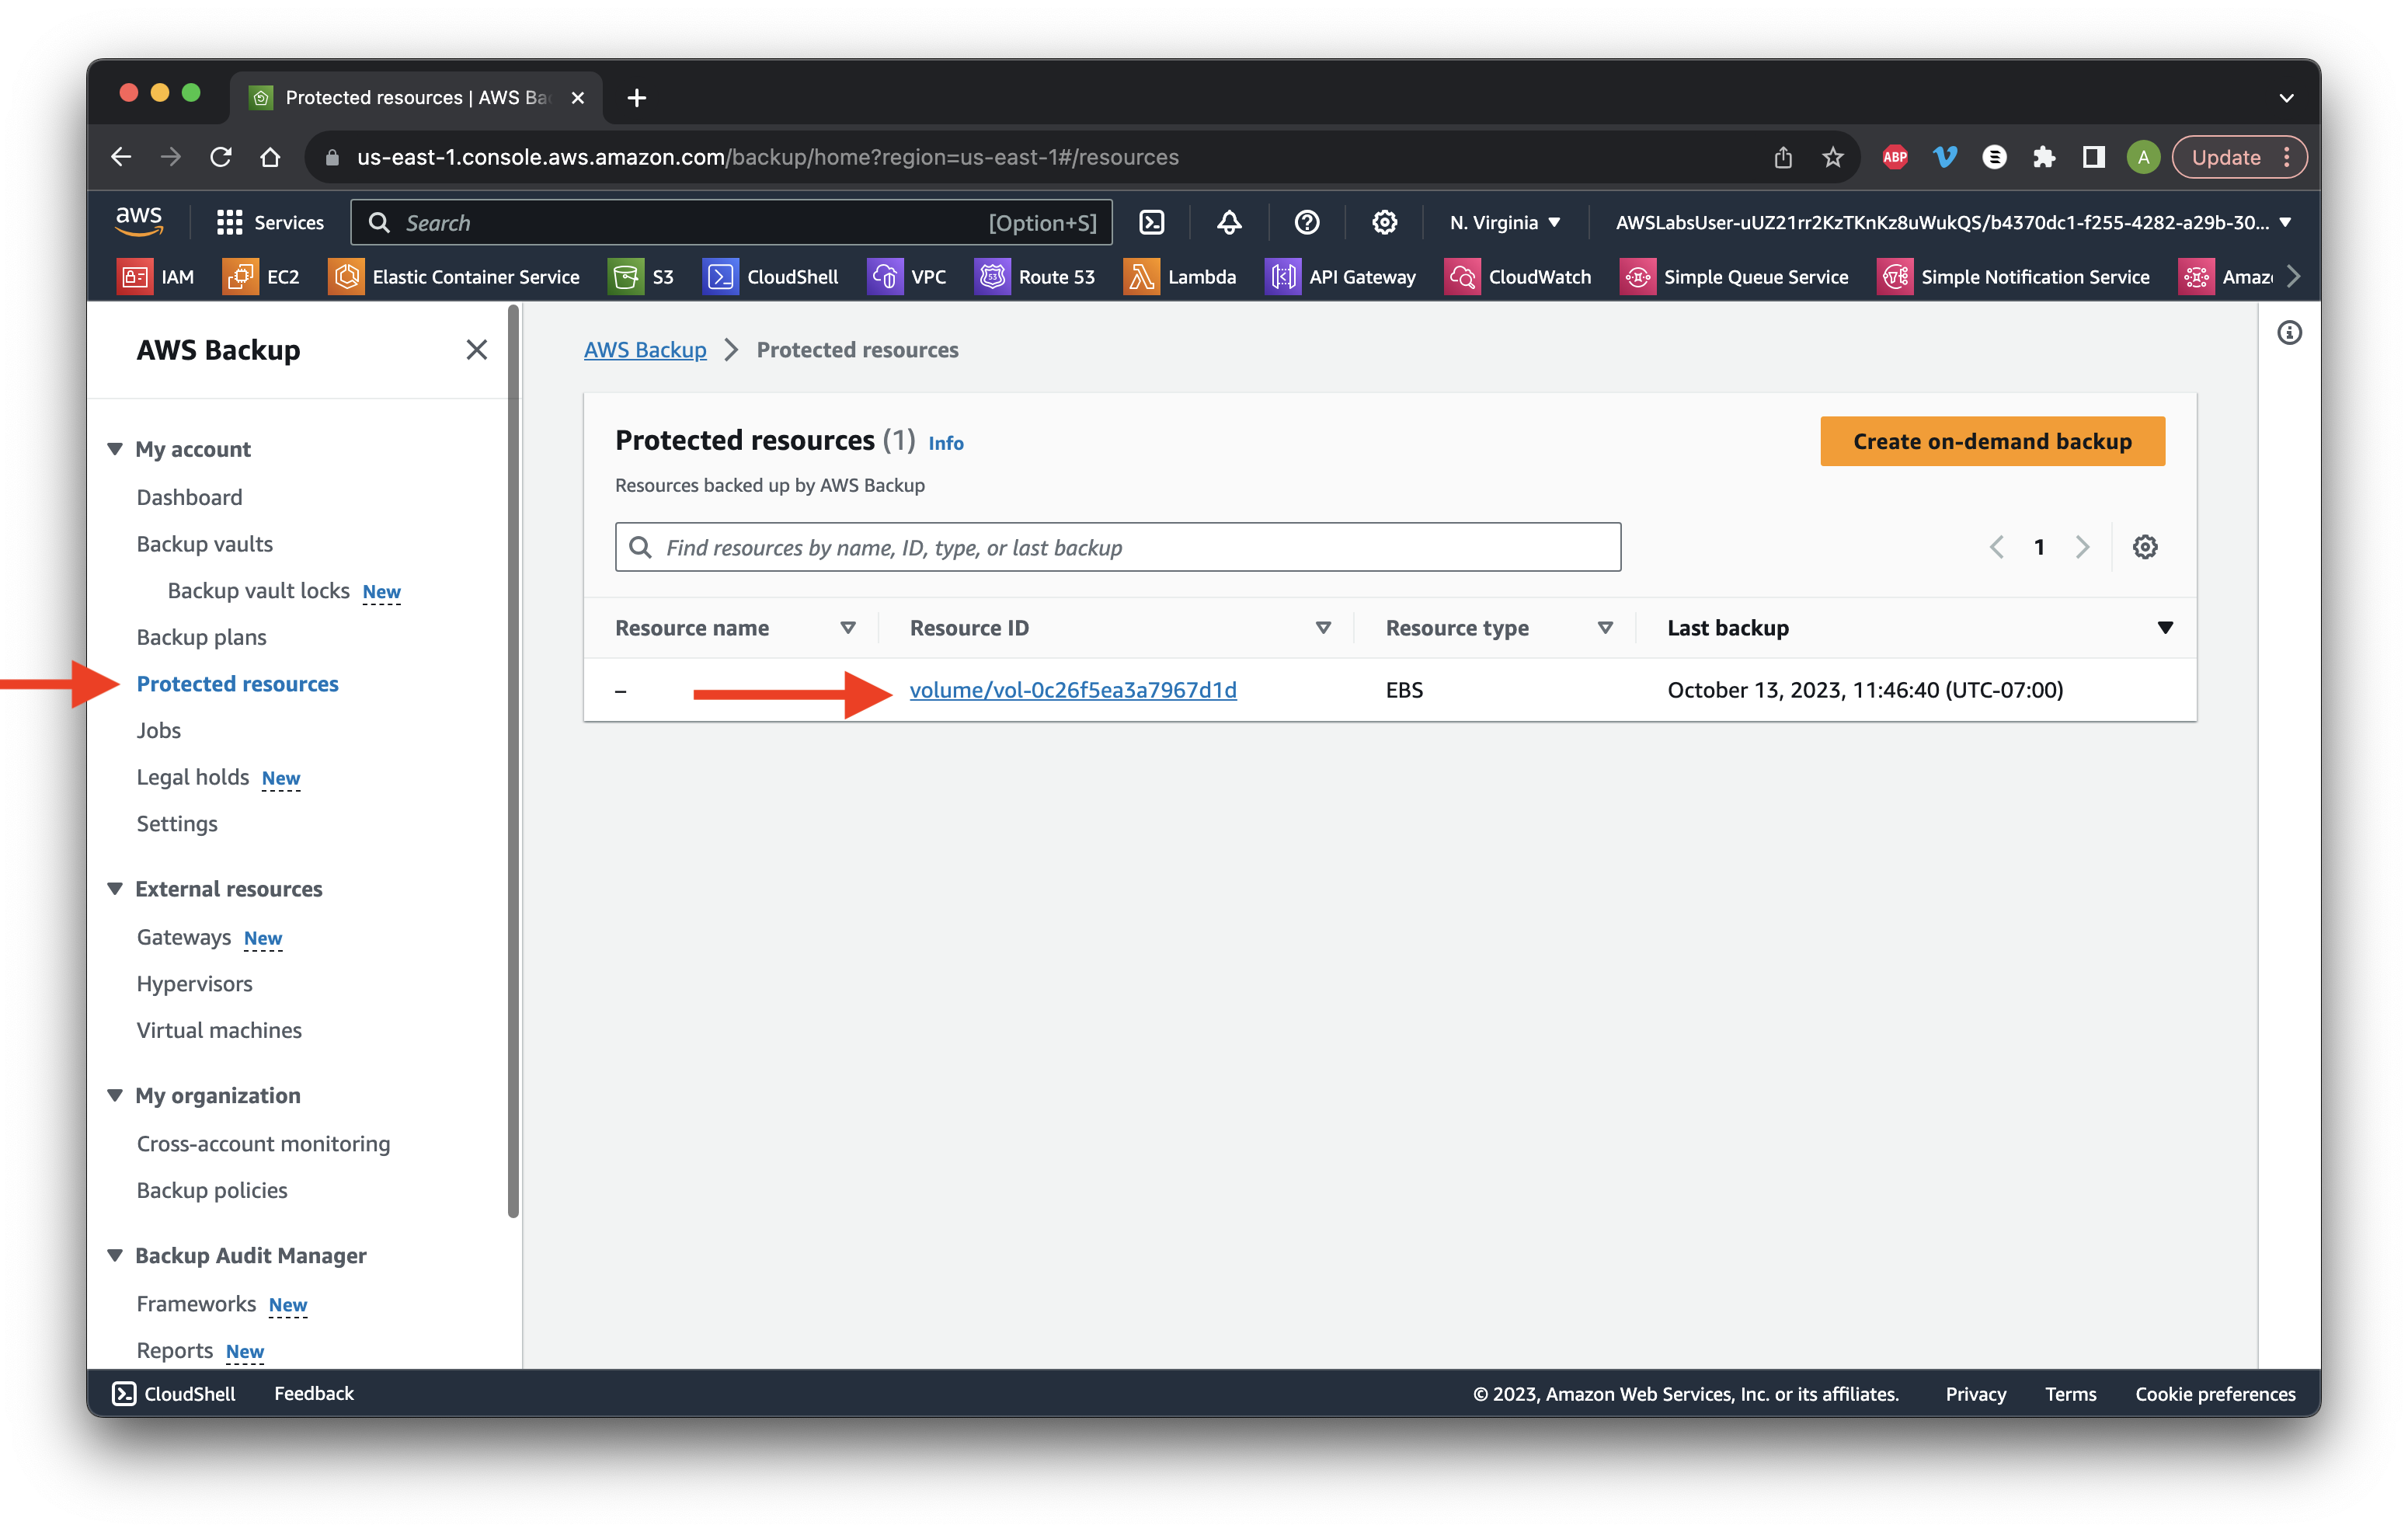
Return to Protected resources and click the Resource ID.
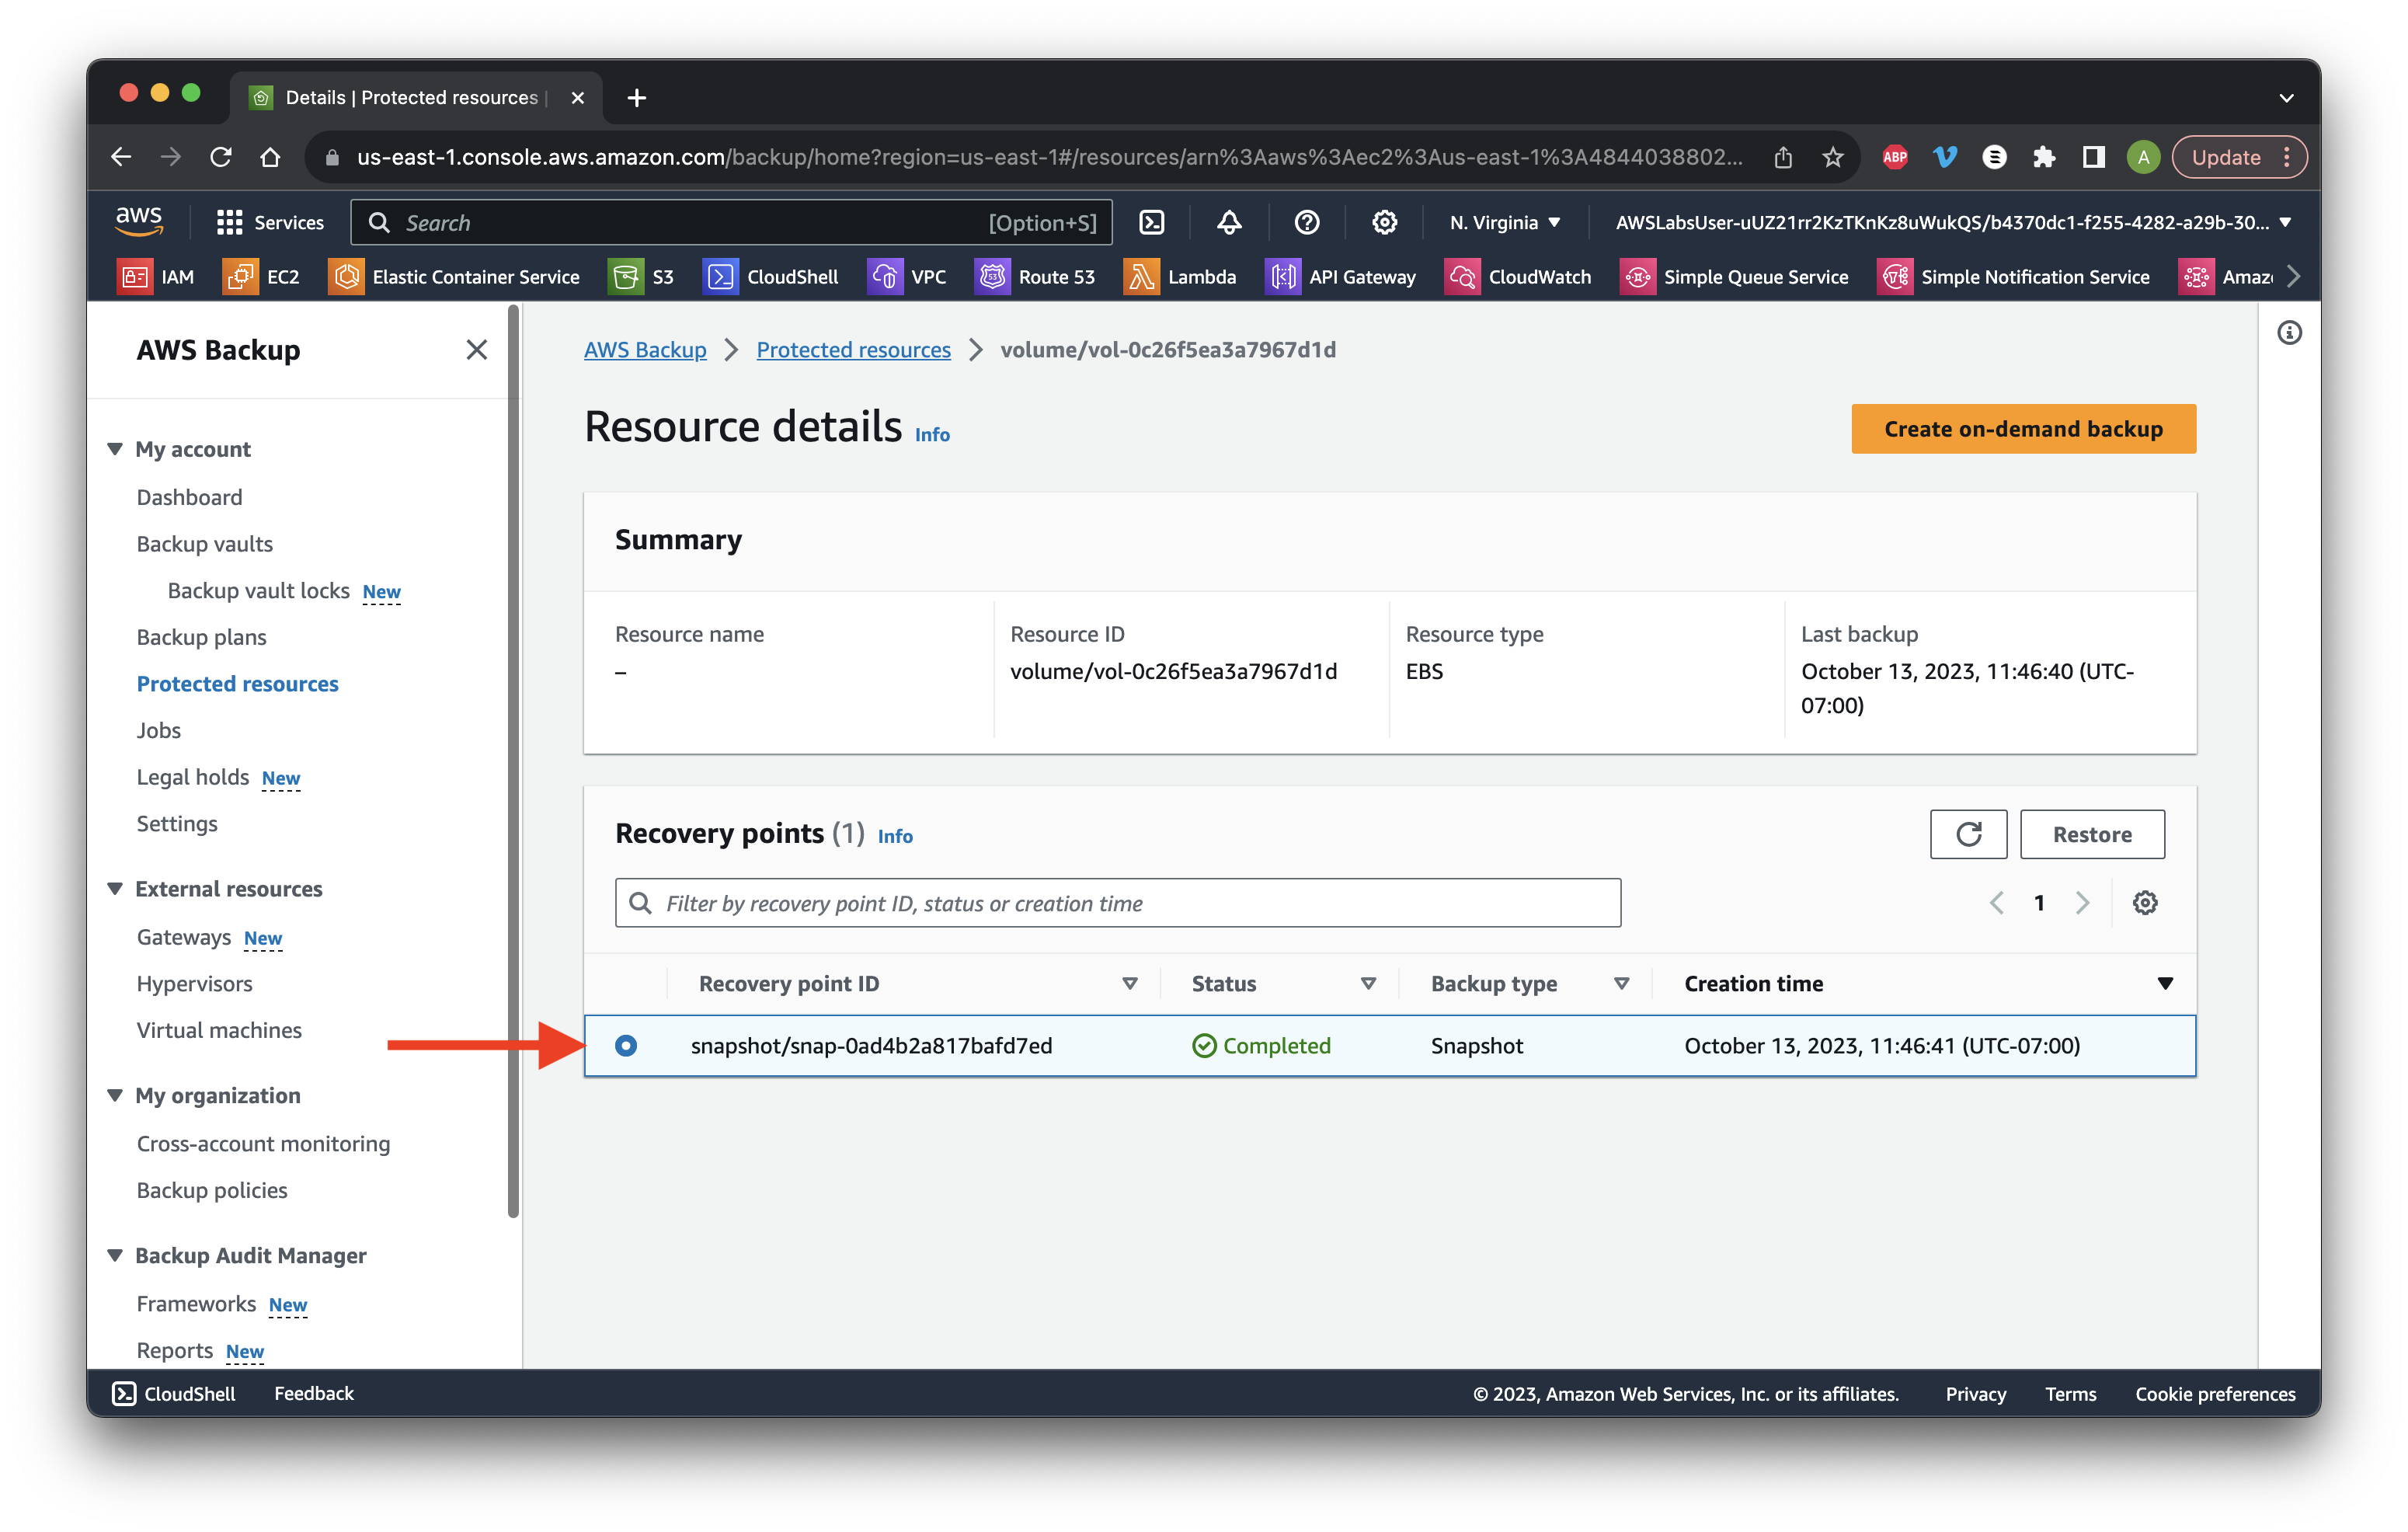
Review the volume snapshot that has been created.
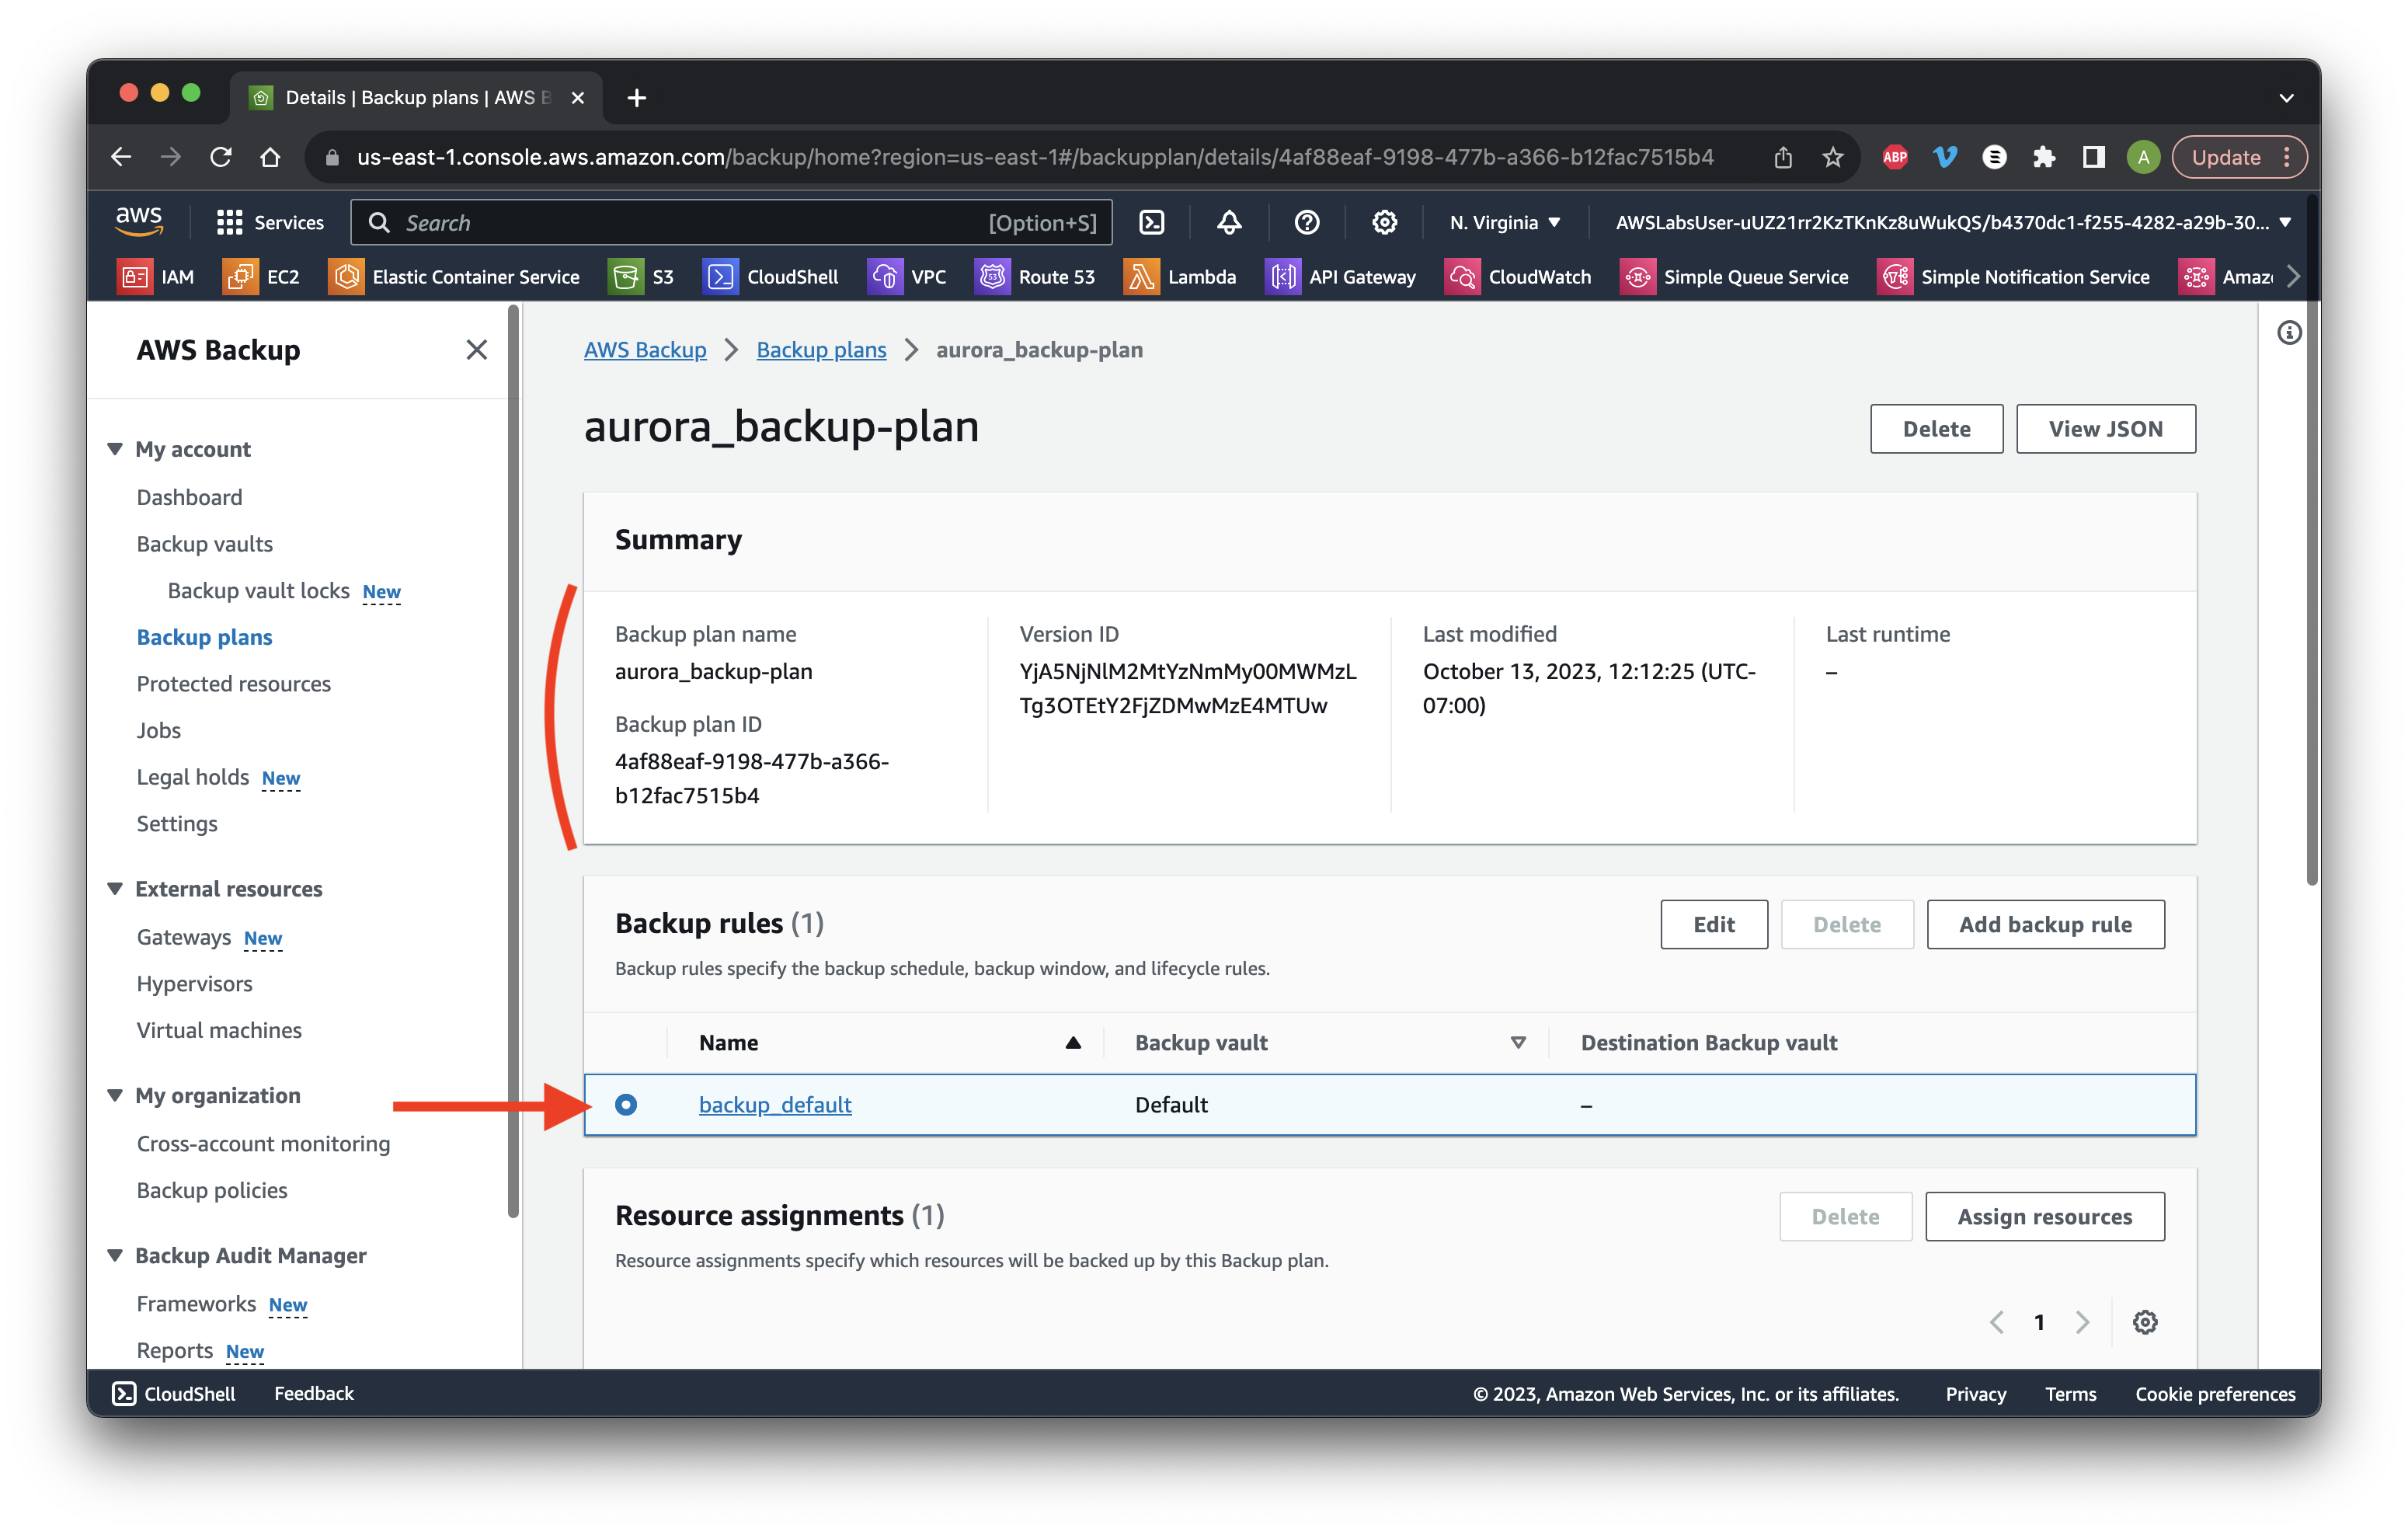
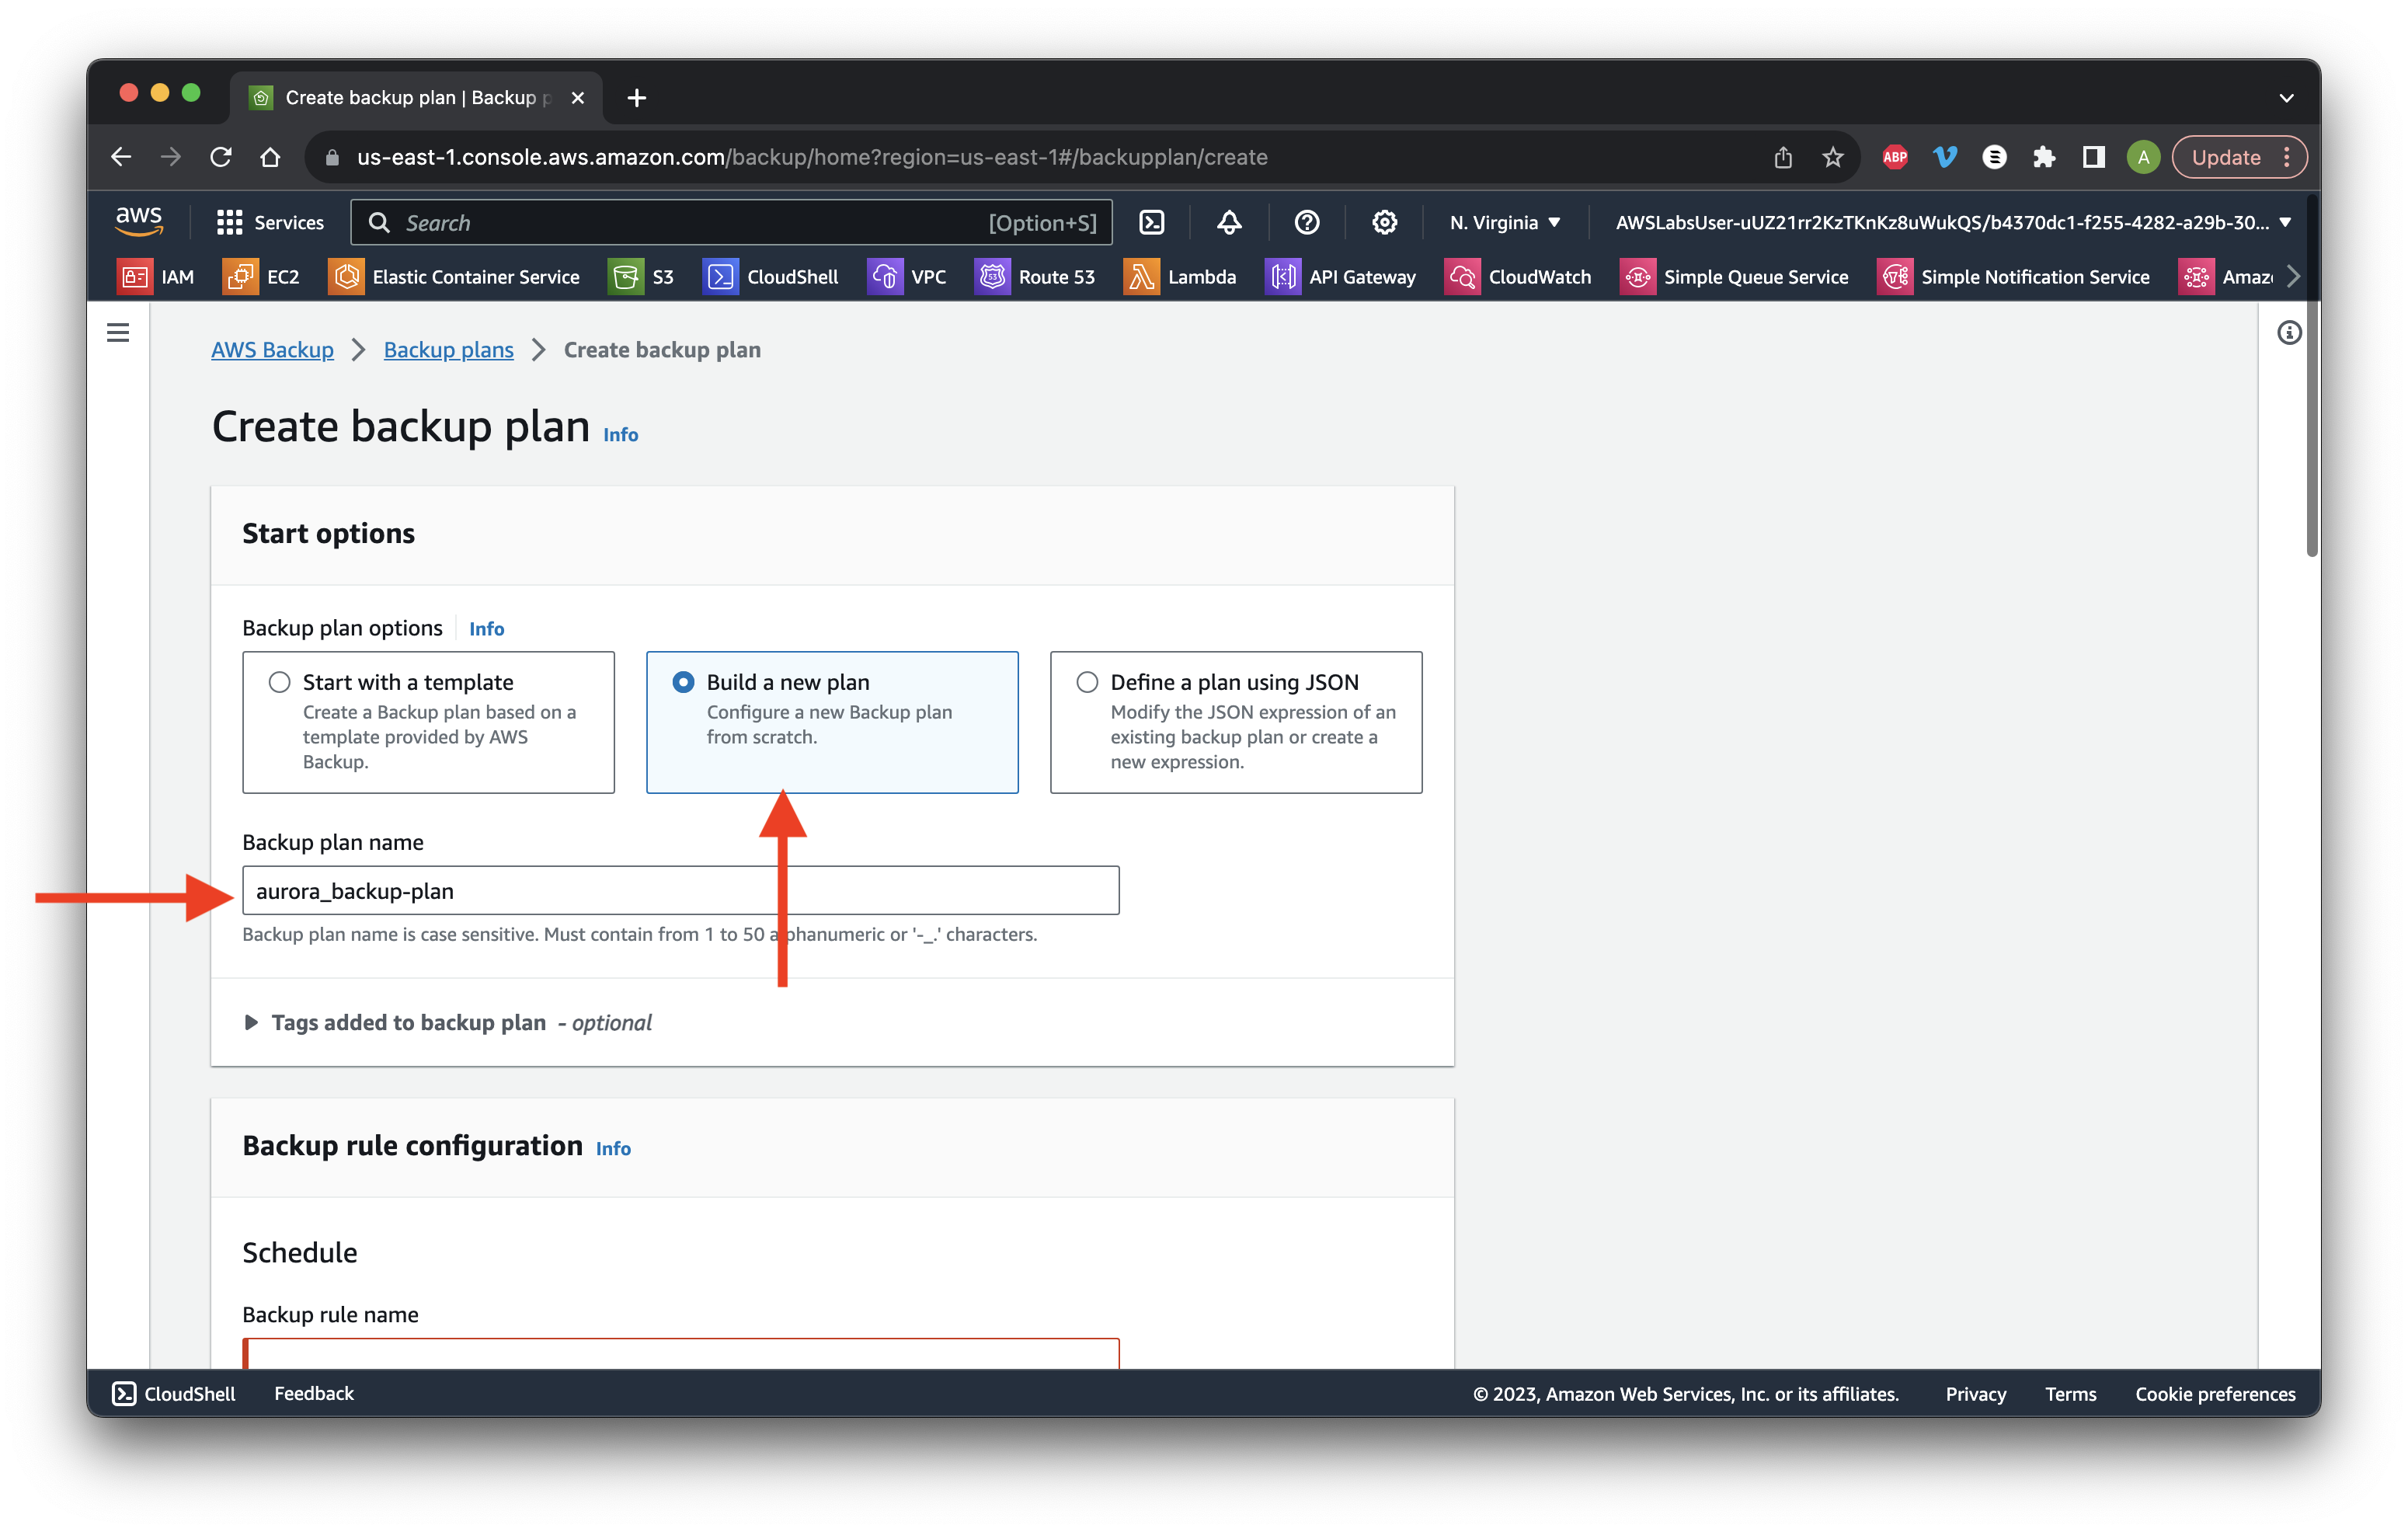
Return to Backup plans and click Create backup plan.

Build a new plan and name it aurora_backup-plan. Scroll down.
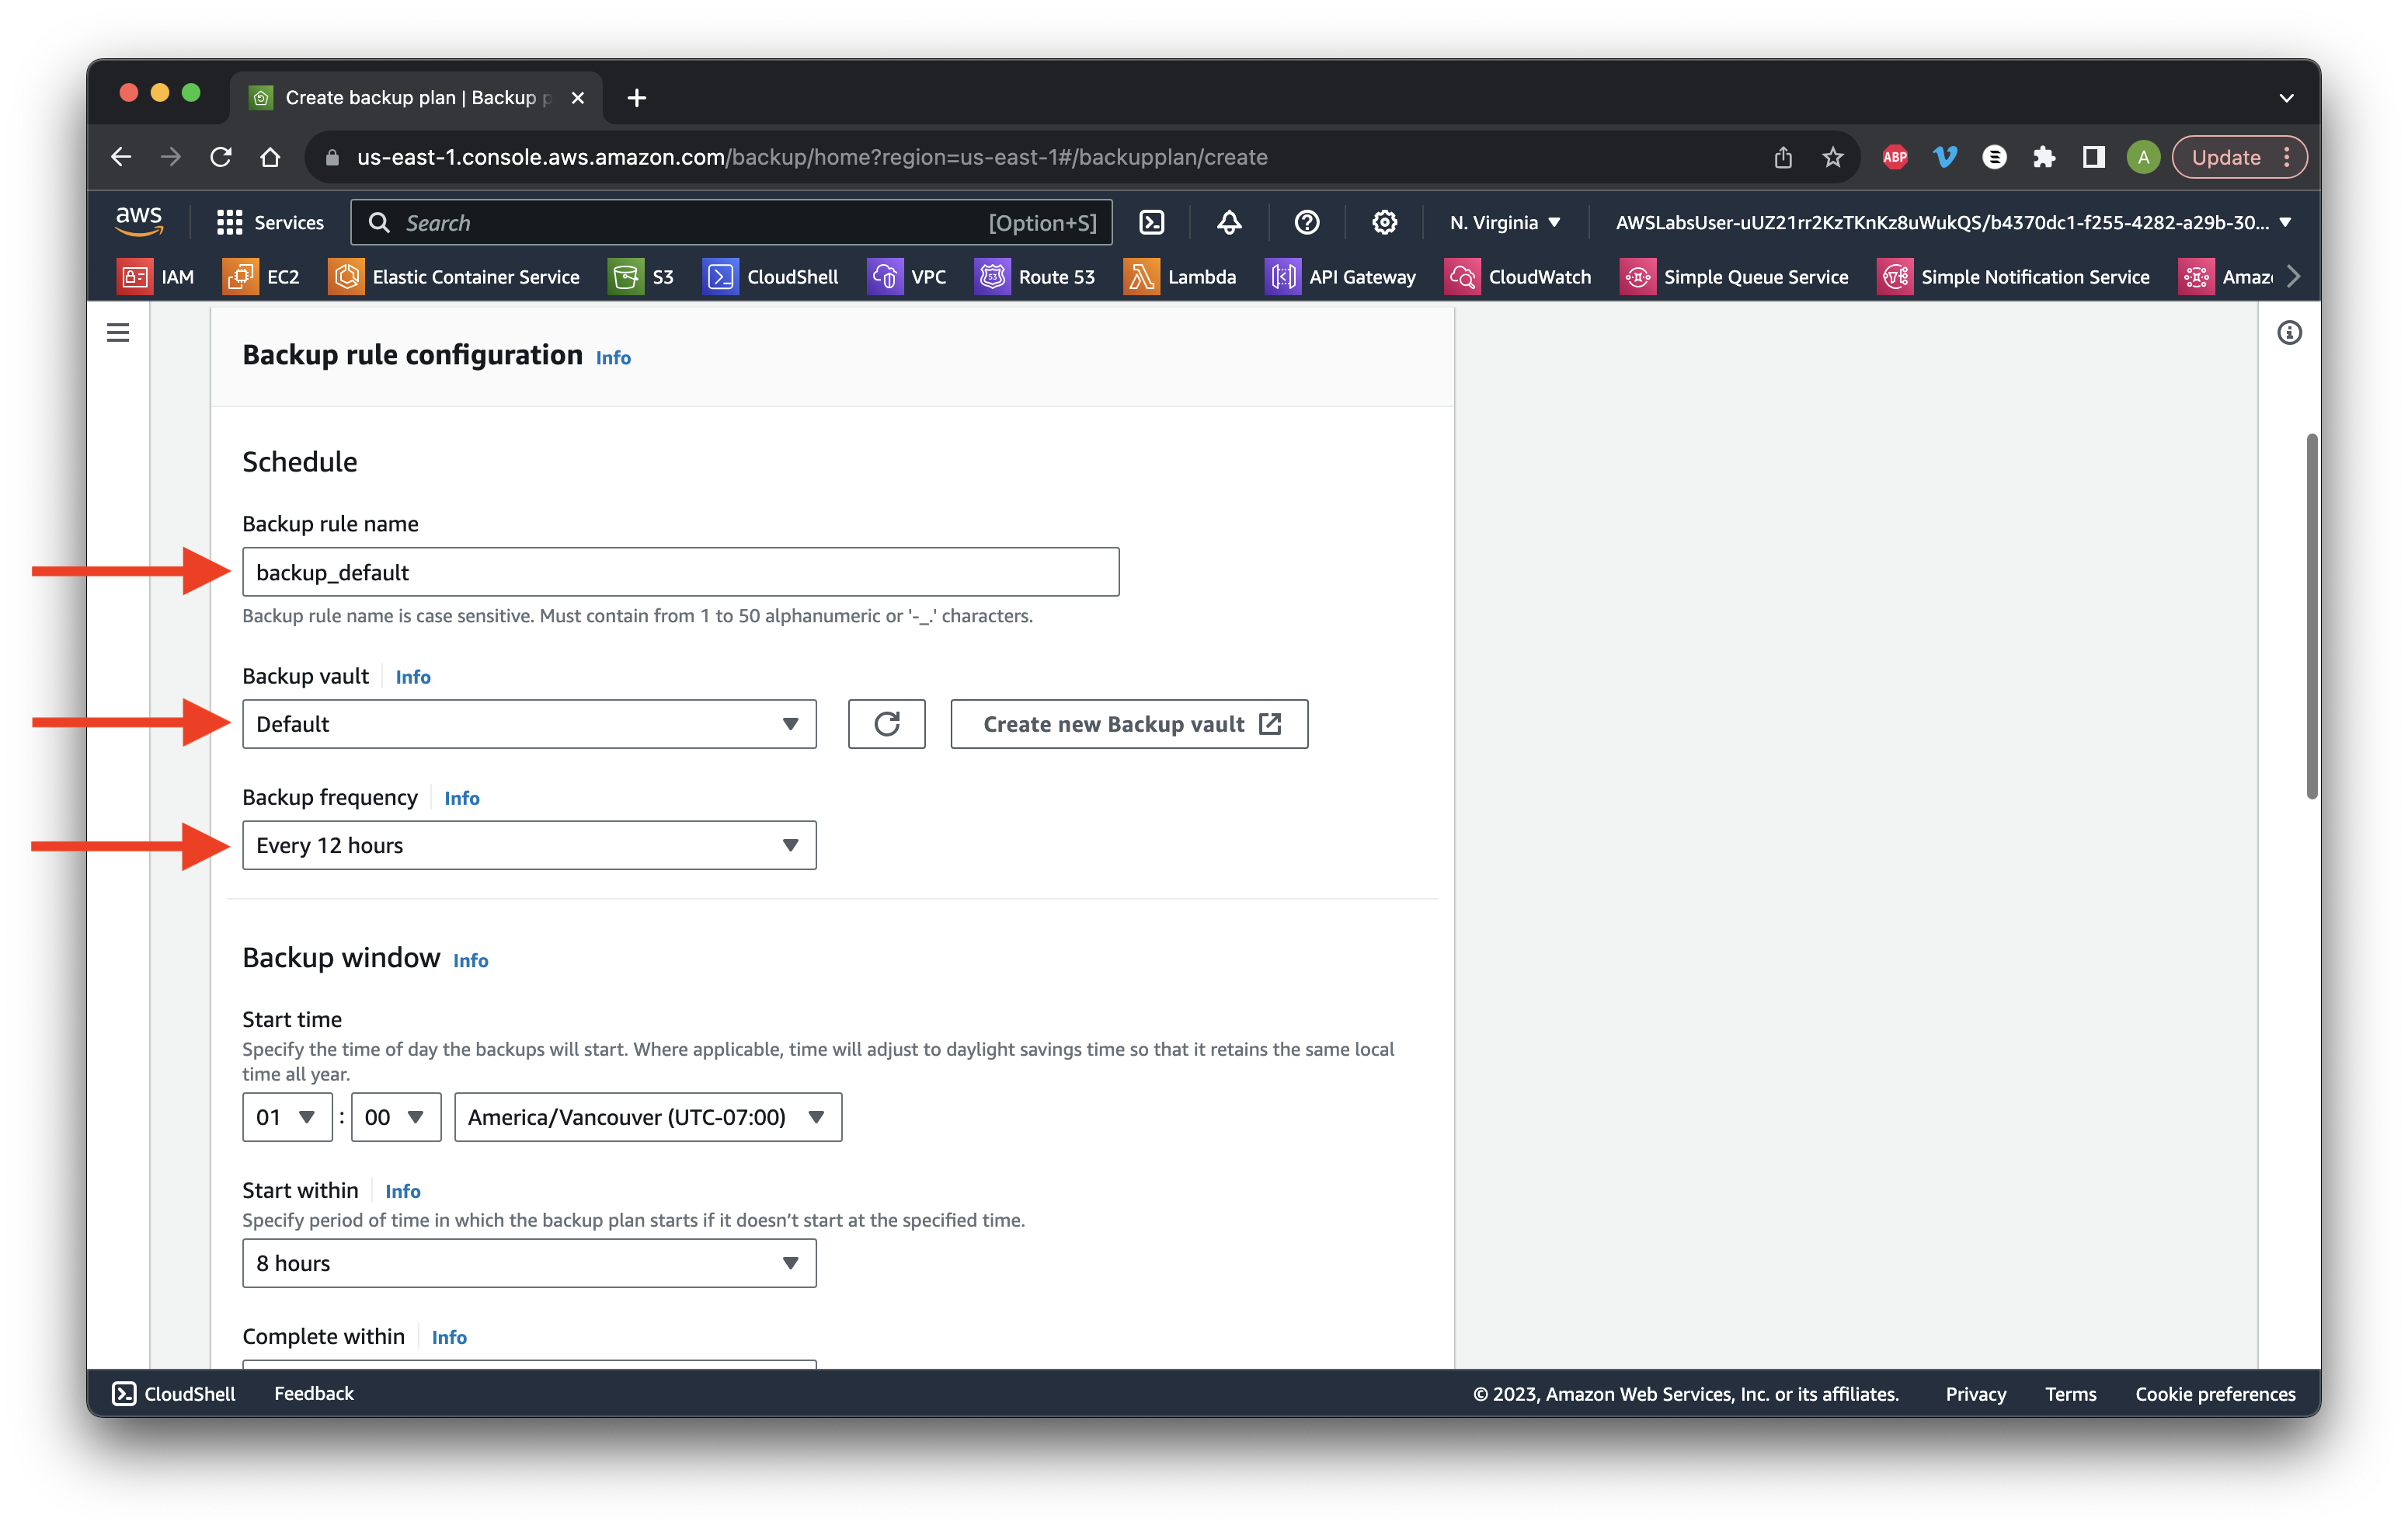
Name the Backup rule backup_default and select the Default vault. Select a Backup frequency of 12 hours. Scroll down and click Create plan.
For Resource name, type DIY_tagged_resources and select the IAM role backup_role. Scroll down.
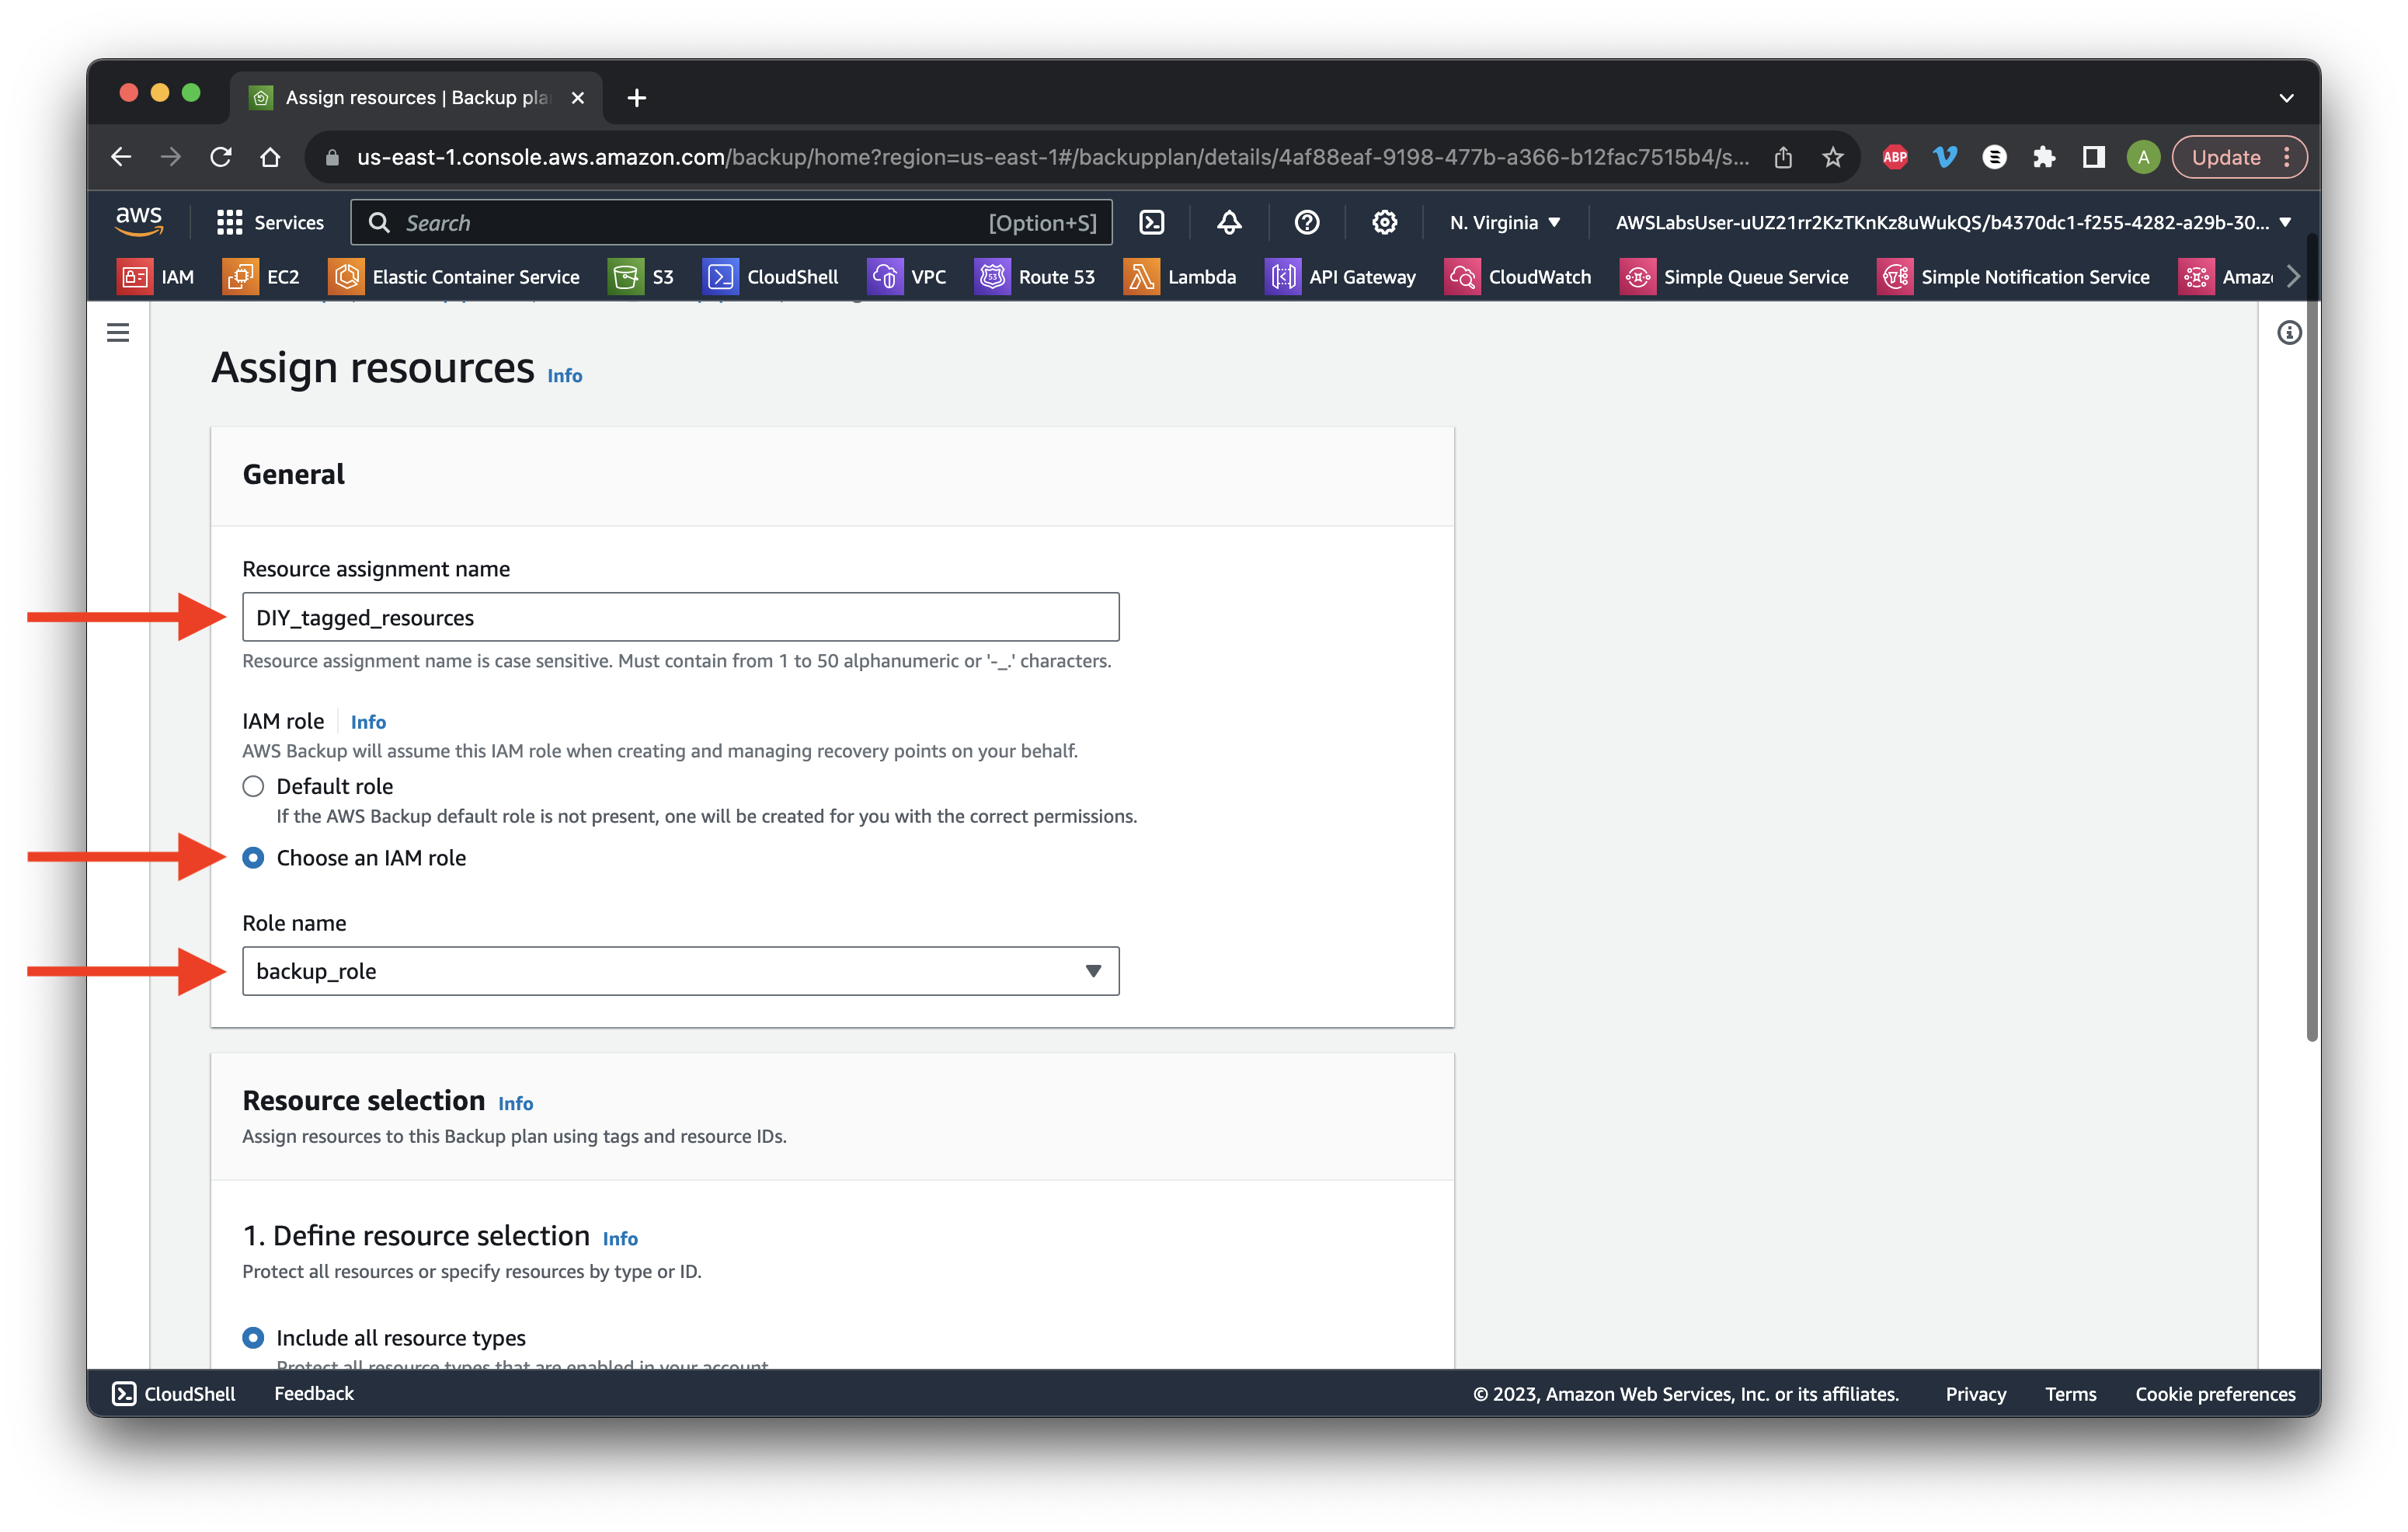
Click Add tags and give the key-value pair of Backup-DIY and True, while giving it the Equal condition. Click Assign resources then Continue.

Review the new backup plan we created. Success!